Ultimate Tall Rainbow Layer Cake With Ombre Frosting Recipe
Tall Rainbow Layer Cake With Ombre Frosting Recipe
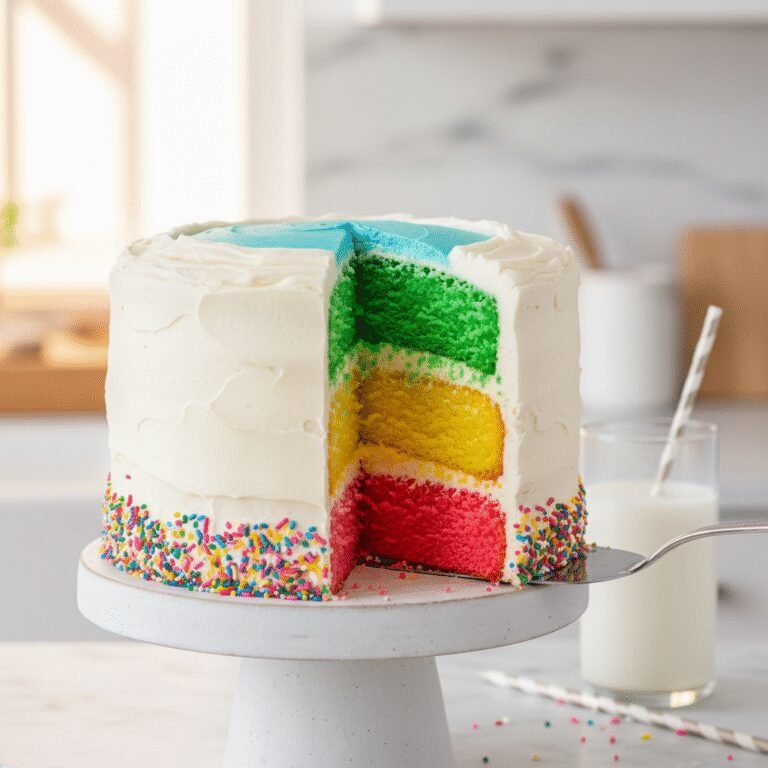
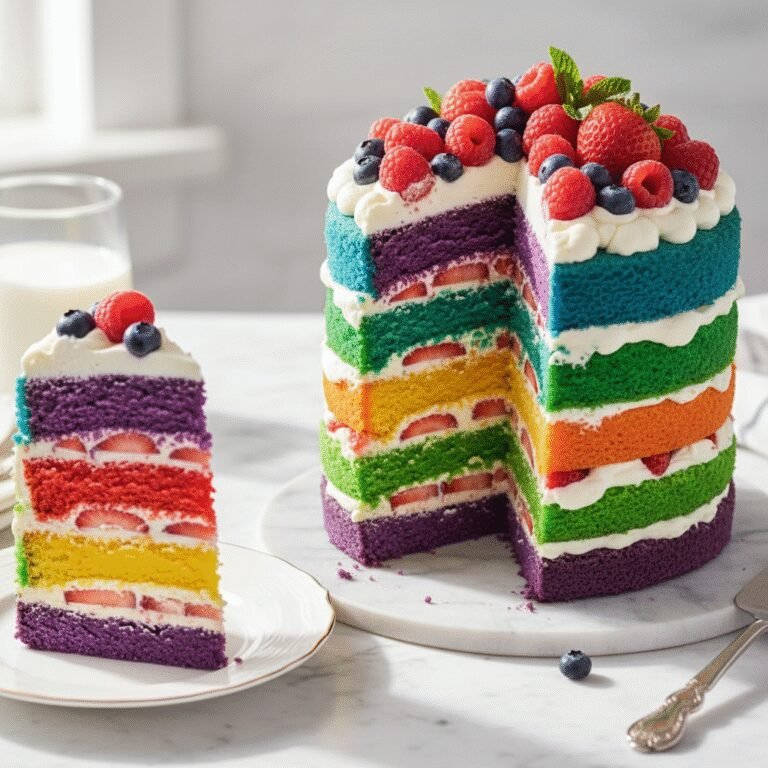
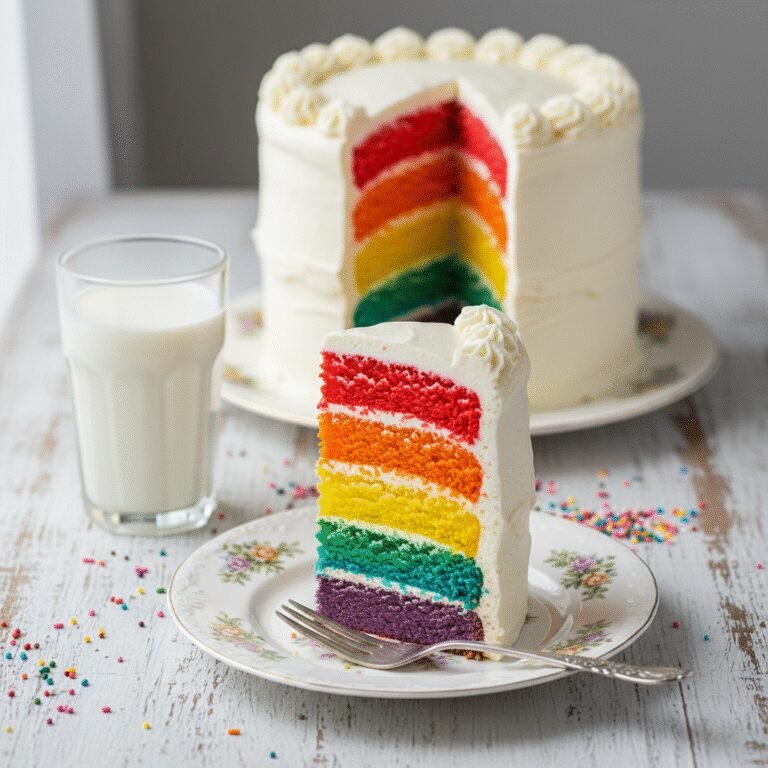
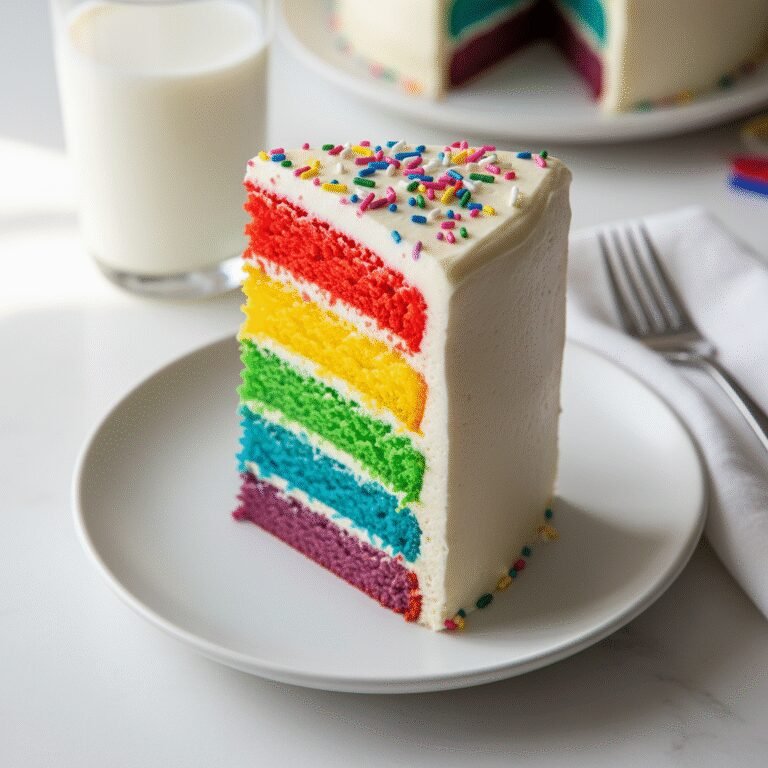
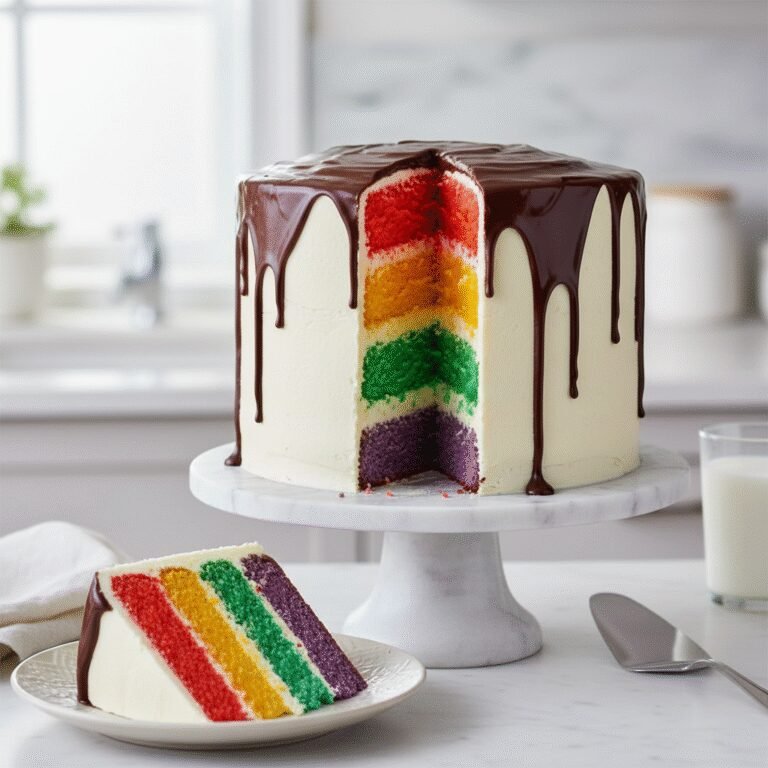
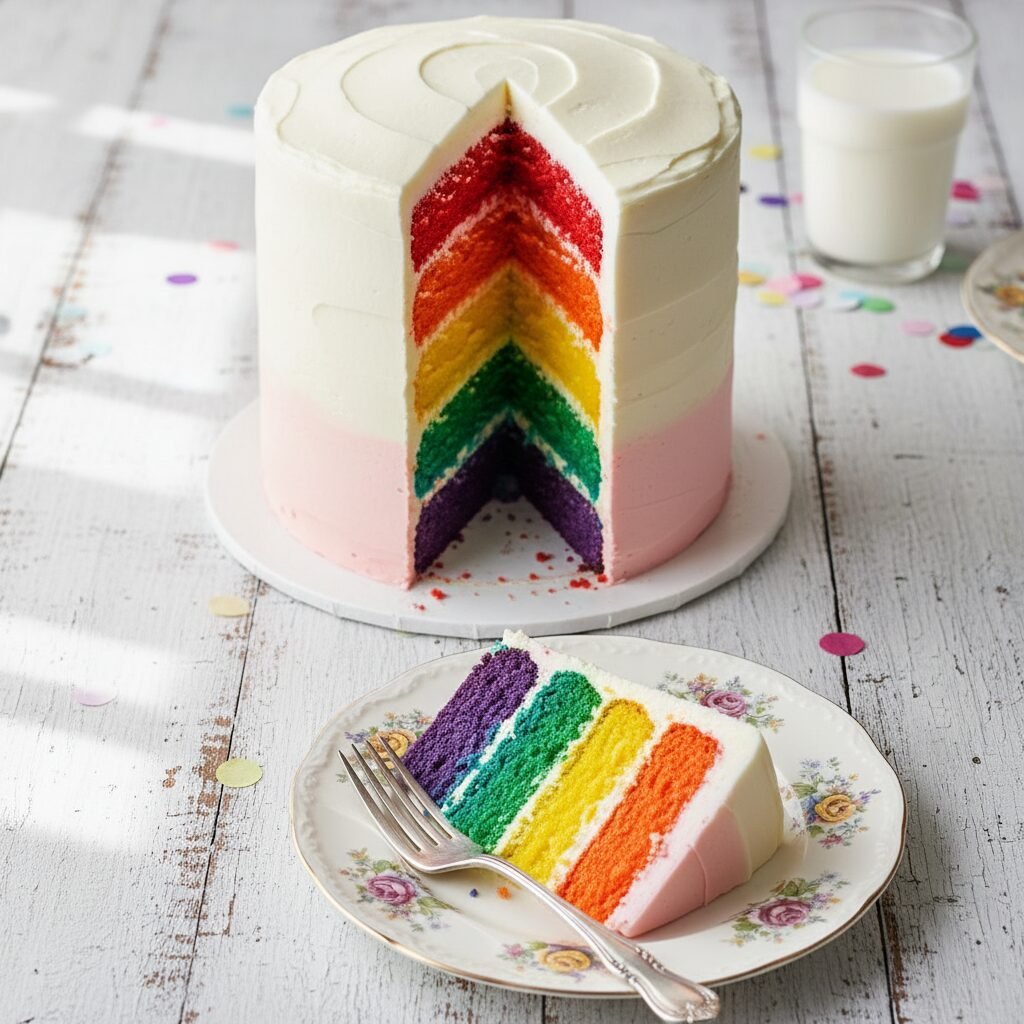
This show-stopping tall rainbow layer cake features six vibrant, tender layers of vanilla cake enveloped in a silky, stunning ombre buttercream. It is the perfect centerpiece for birthdays and celebrations, offering a magical slice of happiness that tastes as incredible as it looks.
1 hour 30 minutes
40 minutes
3 hours 30 minutes
12-16 servings
Dessert
Baking
American
Vegetarian
There is something undeniably magical about slicing into a cake and revealing a hidden spectrum of colors. This Tall Rainbow Layer Cake with Ombre Frosting is not just a dessert; it is an experience, a centerpiece, and a celebration on a plate. Whether you are planning a whimsical birthday party for a child, a pride celebration, or simply want to inject some serious joy into a gray weekend, this recipe delivers on all fronts. The visual impact of the six distinct, vibrant layers stacked high is unmatched, but what truly sets this recipe apart is the flavor and texture. Often, novelty cakes sacrifice taste for appearance, resulting in dry sponges or chemical aftertastes from excessive food coloring. This recipe changes the narrative entirely.
We start with a high-ratio vanilla cake base that uses egg whites to ensure the crumb remains pristine and white, allowing the colors to pop with neon intensity. The texture is plush, velvety, and moist, sturdy enough to support the height of six layers but tender enough to melt in your mouth. The exterior is adorned with a smooth vanilla buttercream applied in an ombre gradient, fading from a deep, saturated hue at the base to a whisper-light pastel at the crown. This technique might look intimidatingly professional, but with our step-by-step guide, you will find it surprisingly therapeutic and achievable. As you read on, you will discover the secrets to keeping your layers flat, your colors bright, and your frosting silky smooth. Prepare to be the star baker of your social circle, because this cake is guaranteed to garner ‘oohs’ and ‘aahs’ before the first forkful is even taken.
History & Origins
The concept of the layer cake has roots deep in Western culinary history, evolving from the heavy, yeast-leavened cakes of the past to the chemically leavened, light sponges we know today. However, the specific phenomenon of the ‘Rainbow Cake’ is a relatively modern marvel, inextricably linked to the rise of visual social media and the evolution of food photography. While colored cakes existed in the mid-20th century—often pastel-tinted for Easter or baby showers—the neon-bright, six-layer rainbow cake exploded into popularity in the early 2010s. It became a symbol of the Pinterest era, where food needed to be as photogenic as it was edible.
The cultural significance of the rainbow cake also ties deeply to the LGBTQ+ community. The rainbow flag, designed by Gilbert Baker in 1978, became a global symbol of pride and diversity. As this symbolism permeated mainstream culture, the rainbow cake became a delicious act of solidarity and celebration during Pride Month and beyond. It represents inclusivity, joy, and the beauty of a spectrum coming together to form a whole. From a culinary perspective, the rainbow cake challenges the baker to master consistency. Unlike a standard chocolate or vanilla cake, a rainbow cake requires precise batter division and coloring. It represents a shift in home baking where the visual artistry became just as paramount as the flavor profile. Today, it stands as a modern classic, a testament to how food trends, social movements, and baking technology (specifically high-quality gel food colorings) intersect to create edible art.
Why This Recipe Works
This recipe succeeds where many other rainbow cakes fail due to three critical technical factors: the batter composition, the choice of coloring agents, and the structural integrity of the frosting. First, the batter is a ‘white velvet’ style cake. By using only egg whites and omitting the yolks, we eliminate the yellow tint that naturally occurs in standard butter cakes. This provides a neutral, white canvas that ensures your blue layers don’t turn teal and your purple layers don’t turn muddy gray. The inclusion of sour cream and buttermilk in the batter introduces acidity, which tenderizes the gluten strands, resulting in a soft crumb that remains moist even after the longer assembly process required for six layers.
Secondly, we strictly recommend high-quality gel food coloring over liquid drops. Liquid coloring contains a significant amount of water, which can alter the hydration ratio of your batter, potentially leading to a dense or rubbery texture if you try to achieve vibrant colors. Gel colors are concentrated; a tiny amount yields vivid saturation without affecting the chemistry of the bake. Finally, the stability of the cake relies on the frosting consistency. This recipe uses a modified American buttercream with a high ratio of heavy cream to butter. This allows for a ‘crusting’ effect that makes smoothing the ombre sides easier, yet it remains fluffy and light to eat. The structural integrity is vital for a tall cake; this frosting acts as a firm mortar between the layers, preventing the dreaded ‘cake slide’ when the room temperature rises.
Why You’ll Love This Recipe
- ✓Six distinct, vibrant layers of color.
- ✓Moist, tender white velvet crumb texture.
- ✓Stunning ombre frosting technique made easy.
- ✓Perfect for birthdays and celebrations.
- ✓Uses egg whites for pure color payoff.
- ✓Stable structure that slices beautifully.
Equipment You’ll Need
- ✓3 x 8-inch round cake pans (baking in batches)
- ✓Stand mixer with paddle attachment
- ✓Kitchen scale
- ✓6 small mixing bowls
- ✓Gel food coloring (Red, Orange, Yellow, Green, Blue, Purple)
- ✓Offset spatula
- ✓Bench scraper
- ✓Rotating cake turntable
- ✓Piping bags
- ✓Cooling racks
Ingredients
- ✓3 1/2 cups cake flour, sifted
- ✓1 tablespoon baking powder
- ✓1/2 teaspoon baking soda
- ✓1 teaspoon salt
- ✓1 cup unsalted butter, room temperature
- ✓2 1/4 cups granulated sugar
- ✓6 large egg whites, room temperature
- ✓1 tablespoon pure vanilla extract
- ✓1 1/2 cups buttermilk, room temperature
- ✓1/2 cup sour cream, room temperature
- ✓Gel food coloring (Red, Orange, Yellow, Green, Blue, Purple)
- ✓2 cups unsalted butter (for frosting), softened
- ✓7-8 cups powdered sugar, sifted
- ✓1/4 cup heavy cream
- ✓2 teaspoons vanilla extract (clear vanilla recommended for white frosting)
- ✓Pinch of salt
Instructions
- Preheat your oven to 350°F (175°C). Grease three 8-inch round cake pans, line the bottoms with parchment paper, and grease the parchment. Flour the sides and tap out excess.
- In a medium bowl, whisk together the cake flour, baking powder, baking soda, and salt. Set aside.
- In the bowl of a stand mixer fitted with the paddle attachment, beat the 1 cup of butter and granulated sugar on medium-high speed until light and fluffy, about 3-4 minutes.
- Reduce speed to medium and add the egg whites one at a time, beating well after each addition. Mix in the vanilla extract and sour cream.
- Reduce speed to low. Add the dry ingredients in three batches, alternating with the buttermilk in two batches, starting and ending with the flour mixture. Mix just until combined; do not overmix.
- Weigh your total batter and divide it evenly into 6 small bowls (approx. 1 1/4 cups per bowl).
- Tint each bowl of batter with gel food coloring to create your rainbow colors: Red, Orange, Yellow, Green, Blue, and Purple. Be bold, as colors fade slightly during baking.
- Pour the Red, Orange, and Yellow batters into the prepared pans. Bake for 18-20 minutes, or until a toothpick inserted into the center comes out clean. Do not overbake.
- Let cakes cool in pans for 10 minutes, then turn out onto wire racks to cool completely. Wash, re-grease, and line the pans, then bake the Green, Blue, and Purple layers.
- While cakes cool, make the frosting. Beat the 2 cups of butter until creamy. Gradually add powdered sugar, alternating with heavy cream and vanilla. Beat on high for 3-4 minutes until fluffy. Add salt to taste.
- To assemble, level the tops of the cakes if they are domed. Place a dab of frosting on a cake board. Place the Purple layer down first. Spread a thin layer of white frosting on top. Repeat with Blue, Green, Yellow, Orange, and finally Red on top.
- Apply a thin ‘crumb coat’ of white frosting all over the cake to seal in crumbs. Chill for 20 minutes.
- Divide the remaining frosting. Leave half white. Tint the rest into 2 or 3 shades of your chosen color (e.g., dark pink, medium pink, light pink) for the ombre effect.
- Pipe the darkest color frosting around the bottom third of the cake. Pipe the medium color around the middle. Pipe the lightest color (or white) around the top third and the top surface.
- Use a bench scraper to smooth the sides while rotating the turntable, blending the colors to create a seamless gradient. Clean the scraper often.
- Garnish with sprinkles or piped swirls if desired. Slice and serve!
Expert Cooking Tips
- ✓Use a kitchen scale to divide the batter evenly; this ensures all layers are the exact same height.
- ✓Room temperature ingredients are non-negotiable for a smooth, emulsified batter.
- ✓Use ‘No-Taste’ Red gel coloring to avoid a bitter aftertaste in the red layer.
- ✓If you only have 2 pans, keep the remaining batter in the fridge while the first batch bakes.
- ✓Chill the cake layers before stacking; cold cake is firmer and easier to handle.
- ✓Wipe your bench scraper clean after every pass when smoothing the ombre frosting to keep the colors distinct.
- ✓Use clear vanilla extract in the frosting if you want a stark white base.
Substitutions and Variations
If you cannot find cake flour, you can make a substitute by removing 2 tablespoons of all-purpose flour per cup and replacing it with cornstarch, sifting several times. For a dairy-free version, substitute the butter with high-quality plant-based butter sticks, the buttermilk with almond milk mixed with a teaspoon of vinegar, and the sour cream with a dairy-free yogurt alternative. Note that the texture may be slightly less rich. If you prefer a less sweet frosting, a Swiss Meringue Buttercream is an excellent alternative that is silkier and less sugary, though it takes more skill to prepare. For natural coloring, you can use freeze-dried fruit powders (raspberry for red, blueberry for purple) or matcha for green, but be aware that these will add flavor to the cake and the colors will be more muted and earthy compared to gel coloring.
Common Mistakes to Avoid
The most common mistake is overmixing the batter after adding the flour. This activates the gluten and leads to a tough, dense cake rather than a fluffy one. Stop mixing as soon as the white flour streaks disappear. Another frequent error is not leveling the cakes. Because you are stacking six layers, even a slight dome on each cake will result in a leaning tower that might collapse. Always trim the tops flat. Using liquid food coloring instead of gel is also a pitfall; liquid coloring adds too much water, which can cause the batter to separate or the cake to sink in the middle. Finally, rushing the cooling process is disastrous. If you try to frost warm cakes, the butter in the frosting will melt, and your layers will slide off.
Serving Suggestions
This cake is a showstopper on its own, but it pairs beautifully with a scoop of vanilla bean ice cream or a dollop of lightly sweetened whipped cream to cut through the richness. For a birthday party, serve with cold milk or a fruity punch. Because the cake is quite tall, slice it thin. You can even cut a horizontal line through the slice halfway down to create two servings from one tall slice, which is great for kids. Serve on neutral-colored plates (white or clear glass) to let the rainbow colors be the main attraction.
Storage and Reheating Tips
Store the frosted cake in the refrigerator, preferably in a cake keeper or loosely covered with plastic wrap once the frosting has crusted. It will stay fresh for up to 4 days. Because butter-based cakes firm up in the fridge, allow slices to sit at room temperature for 20-30 minutes before eating for the best texture. You can also freeze the individual cake layers (wrapped tightly in plastic wrap) for up to 2 months before assembling. Leftover slices can be frozen in airtight containers; just thaw on the counter for an hour before enjoying.
Nutrition Facts (Estimated)
| Serving Size | 1 slice |
| Calories | 650 |
| Fat | 30g |
| Saturated Fat | 18g |
| Unsaturated Fat | 10g |
| Trans Fat | 0g |
| Cholesterol | 85mg |
| Sodium | 320mg |
| Carbohydrates | 88g |
| Fiber | 1g |
| Sugar | 55g |
| Protein | 6g |
Frequently Asked Questions
Can I make the cake layers ahead of time?
Absolutely. You can bake the layers up to 2 days in advance. Wrap them tightly in plastic wrap once completely cooled and store them at room temperature or in the fridge. You can also freeze them for up to 2 months.
Why did my colors turn brown?
Browning usually happens if the oven temperature is too high or the cakes were baked too long. Use an oven thermometer to ensure accuracy. You can also reduce the temp to 325°F and bake slightly longer to prevent browning.
Do I have to use egg whites only?
Using whole eggs will add a yellow tint to the batter. This will turn your blue layer green and your purple layer brown. For true rainbow colors, stick to egg whites.
How do I get the frosting smooth?
The secret is a hot metal bench scraper. Run your metal scraper under hot water, dry it off, and then smooth the cake. The heat slightly melts the outer layer of butter, creating a glass-like finish.
Can I use a 9-inch pan instead?
Yes, but the layers will be thinner and will bake faster (check around 12-15 minutes). You will also end up with a shorter, wider cake.
What if I don’t have buttermilk?
You can make a quick substitute by adding 1 tablespoon of white vinegar or lemon juice to a cup of whole milk and letting it sit for 5-10 minutes until it curdles.
How do I transport such a tall cake?
Chill the cake thoroughly before moving it. A cold cake is stable. Use a tall cake box, and place a non-slip mat under the cake board inside the box to prevent sliding.
Can I use cream cheese frosting?
Cream cheese frosting is delicious but much softer than buttercream. It may not support the weight of six layers well unless you chill it constantly or add more powdered sugar for stiffness.
Conclusion
Creating this Tall Rainbow Layer Cake with Ombre Frosting is a labor of love that pays off tenfold in smiles and satisfaction. It is a project that invites you to play with color and embrace your inner artist. While it requires a bit of time and patience, the steps are straightforward, and the result is a bakery-quality masterpiece right from your own kitchen. Whether it is for a child’s wonder-filled birthday or a vibrant celebration of pride, this cake brings people together. So, preheat that oven, grab your most colorful gels, and get ready to bake a little bit of magic. Happy baking!