The Ultimate Tall Rainbow Layer Cake: A Vibrant 3-Layer Celebration
Tall Rainbow Layer Cake Three Layer Cake Recipe
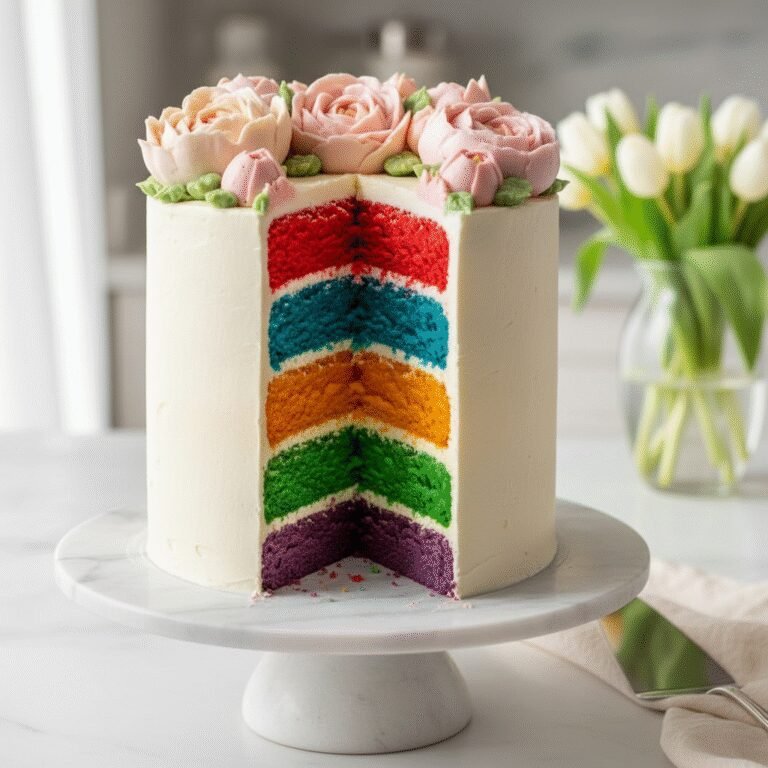
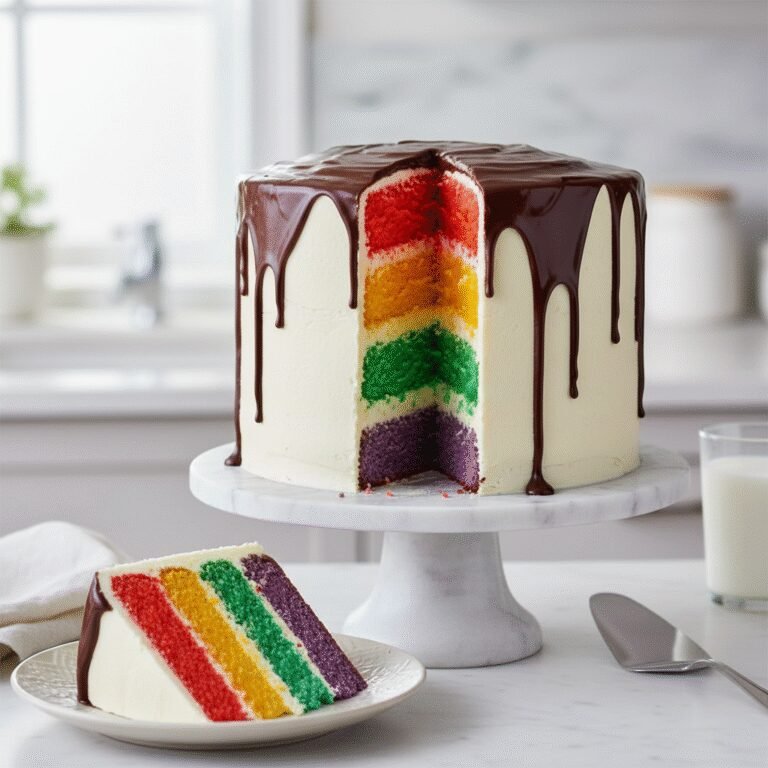
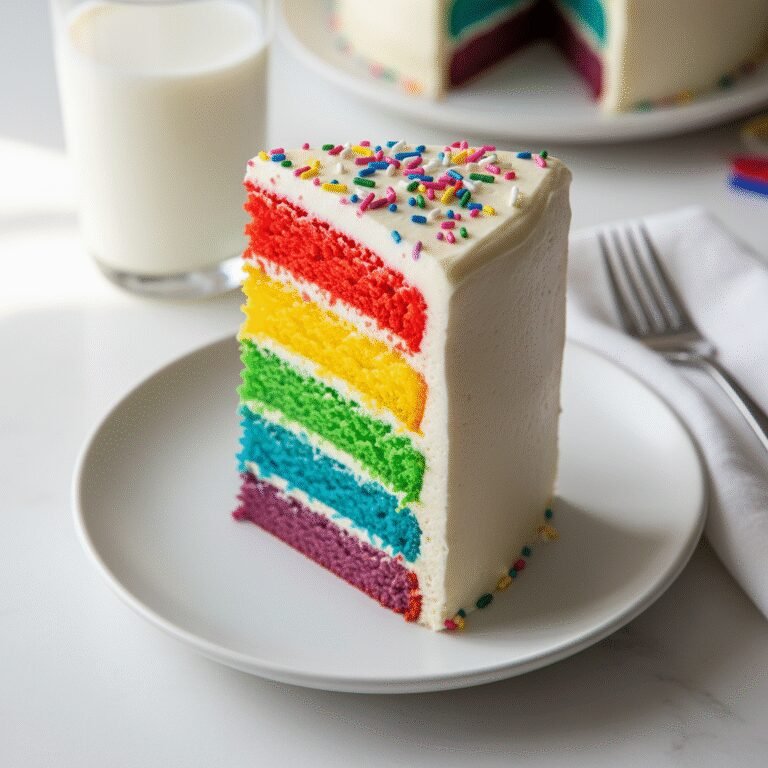
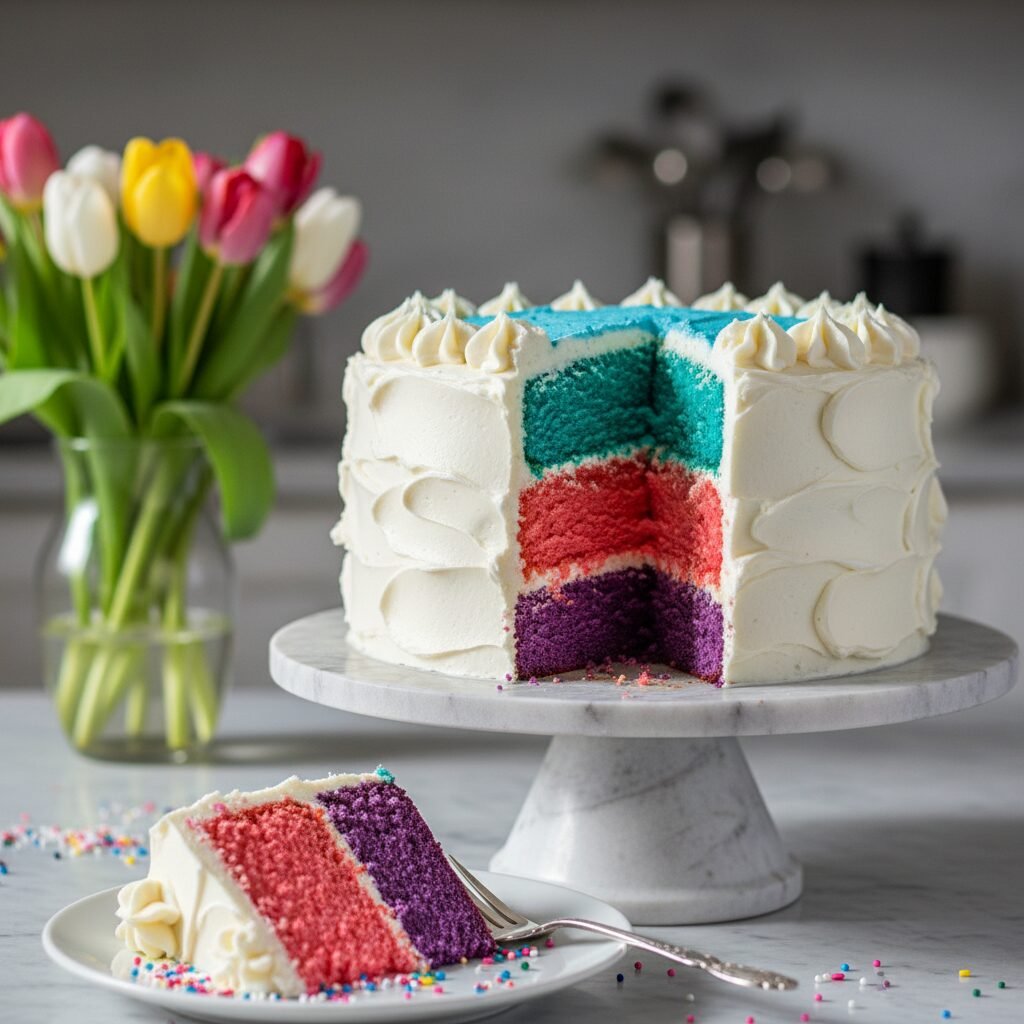
This show-stopping Tall Rainbow Layer Cake features three thick, ultra-moist vanilla sponges swirled with vibrant colors and coated in a silky smooth vanilla buttercream. Perfect for birthdays and celebrations, this recipe simplifies the classic rainbow trend into a manageable three-layer masterpiece without sacrificing the wow factor.
45 minutes
35 minutes
3 hours (includes cooling)
12-16 servings
Dessert
Baking
American
Vegetarian
There is something undeniably magical about slicing into a cake that looks modest on the outside but reveals a kaleidoscope of colors on the inside. This Tall Rainbow Layer Cake is the epitome of celebratory baking, designed to bring instant joy to any table. While traditional rainbow cakes often require baking six individual thin layers, this recipe streamlines the process into three tall, robust layers, each featuring a mesmerizing tie-dye or solid block of color, depending on your artistic preference. The base is a tender, white velvet butter cake that is sturdy enough to stack high but remains incredibly soft and moist thanks to the reverse creaming method.
We coat this vibrant tower in a classic American buttercream that is whipped to airy perfection, providing a creamy, neutral counterpoint to the sweet vanilla sponge. The beauty of this recipe lies not just in its visual appeal, but in its texture. Many novelty cakes sacrifice flavor for looks, often becoming dry or tough from over-handling. However, this formula uses egg whites and cake flour to ensure a delicate crumb that melts in your mouth. Whether you are celebrating Pride month, a child’s birthday, or simply need a dose of color to brighten a gloomy week, this cake delivers on all fronts. It is a baking project that invites creativity—you can customize the colors to match any theme—and results in a centerpiece that looks like it came straight from a high-end bakery window.
History & Origins
The concept of the rainbow cake has a surprisingly rich history that parallels the evolution of food dye and baking technology. While colored cakes have existed since the mid-20th century, often using beet juice or boiled spinach for subtle tints, the vibrant, neon-bright layers we recognize today are a product of the modern gel food coloring revolution. The specific trend of the multi-layered rainbow cake exploded in popularity around 2009-2010. It is widely attributed to a viral blog post by Kaitlin Flannery of ‘Whisk Kid,’ whose perfectly precise six-layer rainbow cake caught the eye of Martha Stewart. When Flannery appeared on ‘The Martha Stewart Show’ to bake the cake, it cemented the dessert’s status as an icon of American home baking.
Culturally, the rainbow cake has transcended its role as merely a dessert to become a symbol of inclusivity and joy. It is inextricably linked to Pride celebrations, often served in June to honor the LGBTQ+ community, mirroring the diversity and vibrancy of the Rainbow Flag. Over the last decade, the cake has seen many iterations—from crepe cakes to cheesecakes—but the tall layer cake remains the gold standard. This specific three-layer adaptation pays homage to that viral sensation but acknowledges the practical constraints of the home baker, offering a way to achieve that towering height and spectrum of color without needing an industrial-sized oven or an entire afternoon dedicated solely to baking separate layers.
Why This Recipe Works
This recipe succeeds where many other colorful cakes fail because it prioritizes the structural integrity and texture of the sponge above all else. First, we utilize the ‘reverse creaming’ method (mixing fats into dry ingredients before adding liquids) rather than the traditional creaming method. This coats the flour proteins in fat, inhibiting gluten development. The result is a velvety, flat-topped cake that is perfect for stacking; you won’t have to trim off mounds of domed cake, which reduces waste and keeps your layers uniform.
Secondly, the recipe calls specifically for gel food coloring rather than liquid drops. Liquid food coloring adds excess water to the batter, which can throw off the baking chemistry, leading to a dense or rubbery texture. Gel colors are concentrated, meaning you get vibrant, electric hues without altering the liquid ratio of the batter. Furthermore, we use egg whites instead of whole eggs. The absence of yellow egg yolks ensures the batter starts as a stark white canvas, allowing the colors to pop truly and purely—blue stays blue instead of turning green, and purple remains a true violet. Finally, the buttercream ratio is calculated to provide a stable dam for these tall layers, ensuring the cake stands straight and doesn’t slide, even at room temperature.
Why You’ll Love This Recipe
- ✓Uses the reverse creaming method for a perfectly flat, tender crumb.
- ✓Optimized for three tall 8-inch pans, saving time compared to 6-layer recipes.
- ✓Egg-white base ensures colors stay true and vibrant without yellow tinting.
- ✓Sturdy enough to stack high but stays moist for days.
- ✓Highly customizable color palette for any holiday or theme.
- ✓Includes a stable crusting buttercream that is easy to smooth.
Equipment You’ll Need
- ✓Three 8-inch round cake pans
- ✓Stand mixer with paddle attachment
- ✓Digital kitchen scale
- ✓Gel food coloring (Red, Orange, Yellow, Green, Blue, Purple)
- ✓Offset spatula
- ✓Cake turntable
- ✓Bench scraper
- ✓Parchment paper
- ✓Wire cooling racks
Ingredients
- ✓3 3/4 cups (450g) cake flour, sifted
- ✓2 cups (400g) granulated sugar
- ✓1 tbsp baking powder
- ✓1 tsp salt
- ✓1 cup (226g) unsalted butter, room temperature, cut into cubes
- ✓1 cup (240ml) whole milk, room temperature
- ✓1/2 cup (120ml) heavy cream, room temperature
- ✓1 tbsp pure vanilla extract
- ✓6 large egg whites, room temperature
- ✓For the Frosting: 2 cups (452g) unsalted butter, softened
- ✓7-8 cups (900g) powdered sugar, sifted
- ✓1 tbsp vanilla extract
- ✓2-4 tbsp heavy cream
- ✓Pinch of salt
Instructions
- Preheat your oven to 335°F (168°C). Grease three 8-inch round cake pans and line the bottoms with parchment paper.
- In the bowl of a stand mixer fitted with the paddle attachment, combine the sifted cake flour, sugar, baking powder, and salt. Mix on low speed for 30 seconds to combine.
- Add the cubed, softened butter to the dry ingredients one piece at a time while the mixer is running on low. Continue mixing until the mixture resembles coarse sand and no large chunks of butter remain.
- In a separate measuring cup, whisk together the milk, heavy cream, vanilla extract, and egg whites.
- Pour 1/2 of the liquid mixture into the dry ingredients. Mix on medium speed for 2 full minutes to build the cake’s structure. Scrape down the sides and bottom of the bowl.
- Add the remaining liquid mixture in two batches, mixing on low speed for about 20 seconds after each addition until just combined. Do not overmix.
- Divide the batter evenly into 3 or 6 bowls, depending on your desired effect. For a 3-layer tie-dye effect, divide into 6 small bowls and color them Red, Orange, Yellow, Green, Blue, and Purple using gel colors.
- To create the layers: Drop spoonfuls of Red and Orange batter into the first pan and swirl gently with a knife. Drop Yellow and Green into the second pan and swirl. Drop Blue and Purple into the third pan and swirl.
- Bake for 30-35 minutes, or until a toothpick inserted into the center comes out clean or with a few moist crumbs. The tops should be pale, not browned.
- Let the cakes cool in the pans for 10 minutes, then turn them out onto a wire rack to cool completely before frosting.
- To make the buttercream: Beat the softened butter on medium-high speed for 5-7 minutes until pale and creamy. Add the powdered sugar in two batches, mixing on low until incorporated. Add vanilla, salt, and heavy cream. Whip on high for 3-5 minutes until fluffy.
- Assembly: Place the Red/Orange layer on your cake board. Spread a generous layer of buttercream. Top with the Yellow/Green layer, add buttercream, and finish with the Blue/Purple layer upside down (for a flat top).
- Apply a thin crumb coat of frosting over the entire cake and chill for 20 minutes. Apply the final thick layer of frosting and smooth with a bench scraper. Decorate with sprinkles if desired.
Expert Cooking Tips
- ✓Use a kitchen scale to weigh your flour and sugar; cup measurements can vary wildly and lead to a dry cake.
- ✓Ensure all ingredients, especially the butter, milk, and egg whites, are at true room temperature to prevent the batter from curdling.
- ✓Do not skimp on the beating time for the buttercream; the long whipping process dissolves the sugar and removes the yellow butter tint.
- ✓If using a dark non-stick pan, reduce the oven temperature by 25°F to prevent the edges from browning too quickly.
- ✓Gel food coloring is potent; start with a toothpick tip’s worth and add more only if necessary to avoid bitter aftertastes.
- ✓Wrap the warm cake layers in plastic wrap and freeze them for 30 minutes before stacking; this makes them easier to handle and locks in moisture.
Substitutions and Variations
If you cannot find cake flour, you can make a DIY substitute by removing 2 tablespoons of all-purpose flour from every cup and replacing it with cornstarch; sift together three times to aerate. For a dairy-free version, use a high-quality plant-based butter stick (not tub margarine) and unsweetened almond or soy milk, though the texture may be slightly less tender. If you prefer to use whole eggs instead of egg whites, use 4 whole large eggs, but be aware the batter will have a yellow tint which will affect the purity of blue and purple food colorings (blue may turn slightly teal). Vanilla bean paste can be swapped for vanilla extract for a more intense flavor and visual speckling in the white frosting.
Common Mistakes to Avoid
The most common mistake is overmixing the batter after adding the final liquids; this develops gluten and results in a tough, bread-like texture rather than a soft crumb. Another frequent error is using liquid food coloring from the grocery store aisle; these are too watery and weak, requiring you to add so much liquid that the cake collapses. Avoid opening the oven door repeatedly to check on the cakes, as the fluctuation in temperature can cause the centers to sink. Finally, attempting to frost the cakes before they are 100% cool will result in a sliding disaster as the butter in the frosting melts.
Serving Suggestions
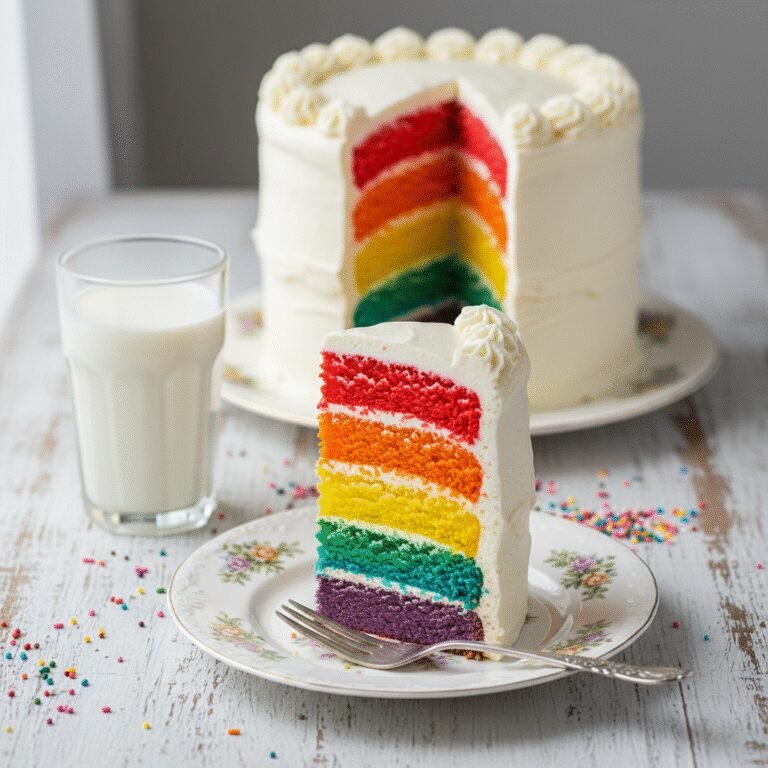
This tall cake is a centerpiece on its own, but it pairs beautifully with a scoop of tart raspberry sorbet or vanilla bean ice cream to cut through the sweetness. Serve with a glass of cold milk or a dry sparkling wine like Prosecco for an adult celebration. To get clean slices that show off the layers, dip a sharp chef’s knife in hot water and wipe it dry between every single cut. For a festive touch, garnish the base of the cake with a ring of rainbow sprinkles or edible confetti.
Storage and Reheating Tips
Store the frosted cake at room temperature in a cake keeper for up to 3 days; the sugar and fat act as preservatives. If the weather is very hot or humid, store it in the refrigerator, but bring it back to room temperature for at least 2 hours before serving, as cold buttercream is hard and waxy. Cut slices can be wrapped individually in plastic wrap and stored in an airtight container in the fridge for 5 days. For long-term storage, wrap unfrosted cake layers in plastic wrap and foil, then freeze for up to 3 months.
Nutrition Facts (Estimated)
| Serving Size | 1 slice |
| Calories | 650 |
| Fat | 30g |
| Saturated Fat | 18g |
| Unsaturated Fat | 10g |
| Trans Fat | 0g |
| Cholesterol | 85mg |
| Sodium | 320mg |
| Carbohydrates | 88g |
| Fiber | 1g |
| Sugar | 45g |
| Protein | 6g |
Frequently Asked Questions
Can I make this cake ahead of time?
Yes! You can bake the layers up to 2 days in advance. Wrap them tightly in plastic wrap and store them at room temperature or in the fridge. The buttercream can be made a week in advance and stored in the fridge; just re-whip it before using.
Why did my cake layers sink in the middle?
Sinking usually happens because the cake was underbaked, the oven door was opened too early, or there was too much leavening (baking powder) measured. Ensure your oven temperature is accurate using an external thermometer.
Can I bake this in 9-inch pans instead?
Yes, you can use three 9-inch pans. The layers will be thinner, so you will need to reduce the baking time by about 5-8 minutes. Keep a close eye on them.
How do I get the frosting so smooth?
The secret is a ‘crumb coat’ (a thin initial layer of frosting to trap crumbs), followed by chilling the cake. Then apply the final coat and use a metal bench scraper dipped in hot water and dried to smooth the sides.
Can I use this recipe for cupcakes?
Absolutely. This batter makes approximately 24-30 standard cupcakes. Bake them at 350°F for 18-22 minutes.
Is the cake overly sweet?
American buttercream is sweet by nature. To balance this, the cake sponge itself is moderately sweet, and we add a pinch of salt to the frosting. You can also use a Swiss Meringue Buttercream for a less sweet option.
My batter looks curdled after adding the milk. Is it ruined?
Not necessarily. If your ingredients weren’t perfectly room temperature, the fats might separate. It usually comes back together when you add the flour. Just keep going!
What brand of food coloring do you recommend?
Americolor Soft Gel Paste and Wilton Icing Colors are the industry standards for home bakers. They provide intense color without thinning the batter.
Conclusion
Baking this Tall Rainbow Layer Cake is more than just following a recipe; it is an exercise in edible art that promises to light up the faces of everyone in the room. The combination of the sturdy yet soft white velvet crumb and the creamy, cloud-like frosting makes for a dessert that tastes as impressive as it looks. While it requires a bit of patience to mix and color the batter, the result is a towering triumph of home baking. So, grab your gel colors, preheat your oven, and get ready to slice into a spectrum of joy. Don’t forget to snap a picture of that first slice—it is a moment worth capturing!