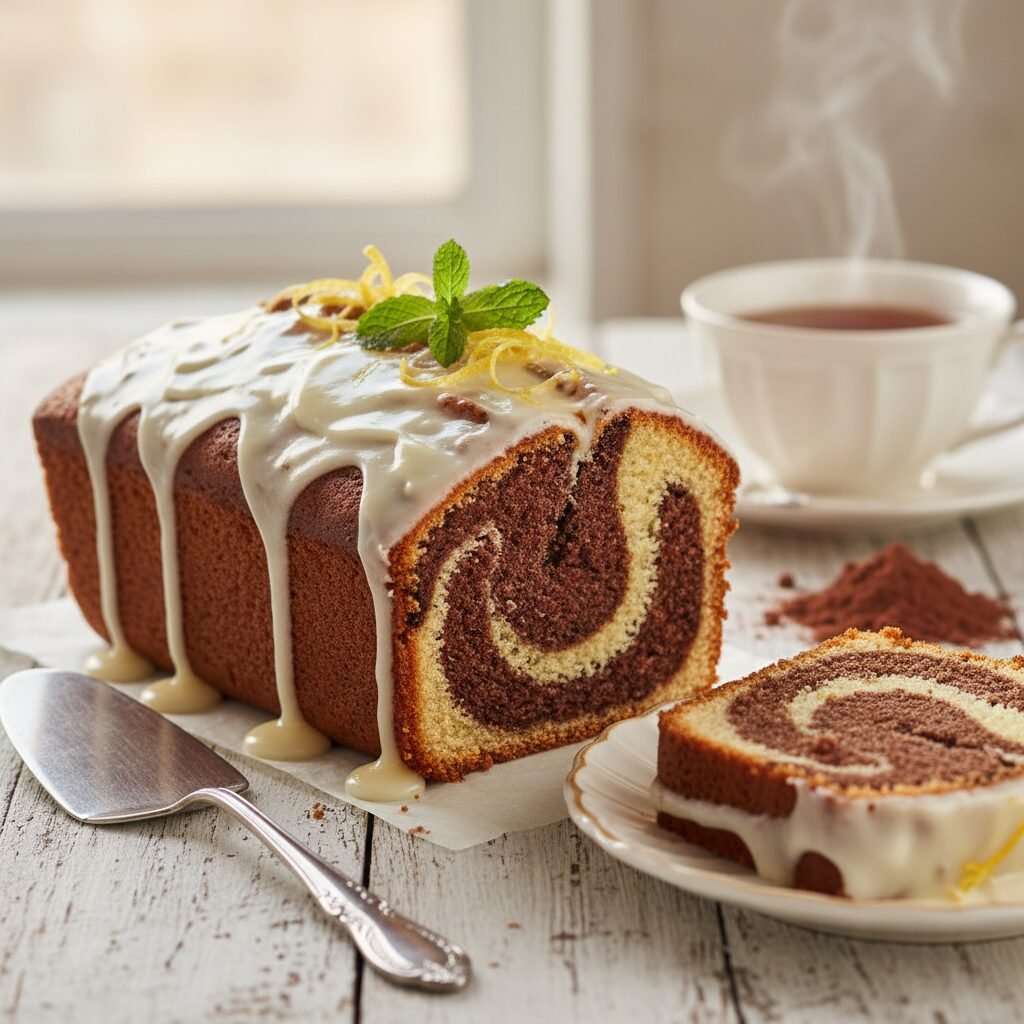
The Ultimate Moist Marble Pound Cake With Zesty Lemon Glaze
Moist Marble Pound Cake With Lemon Glaze Recipe
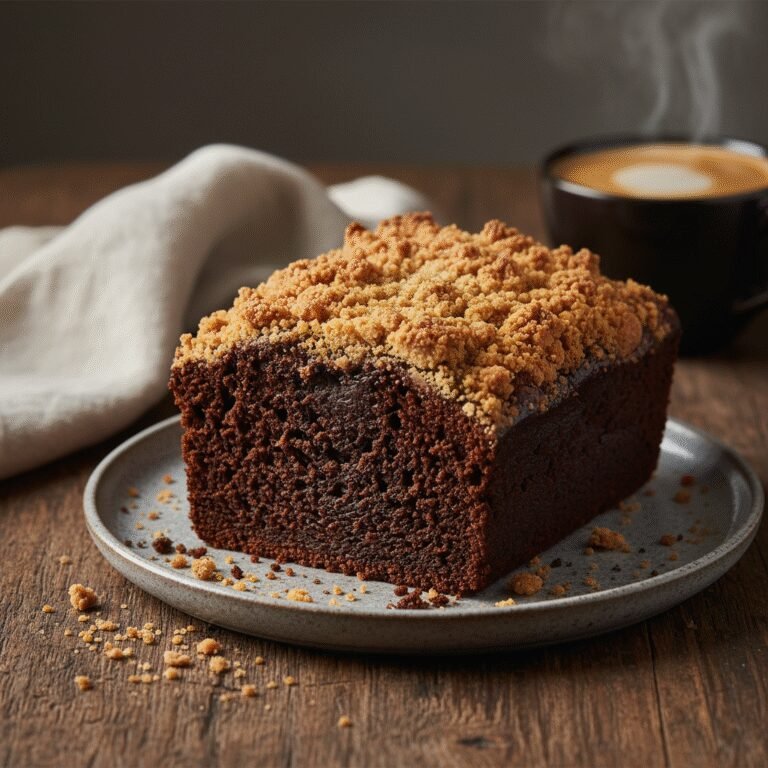
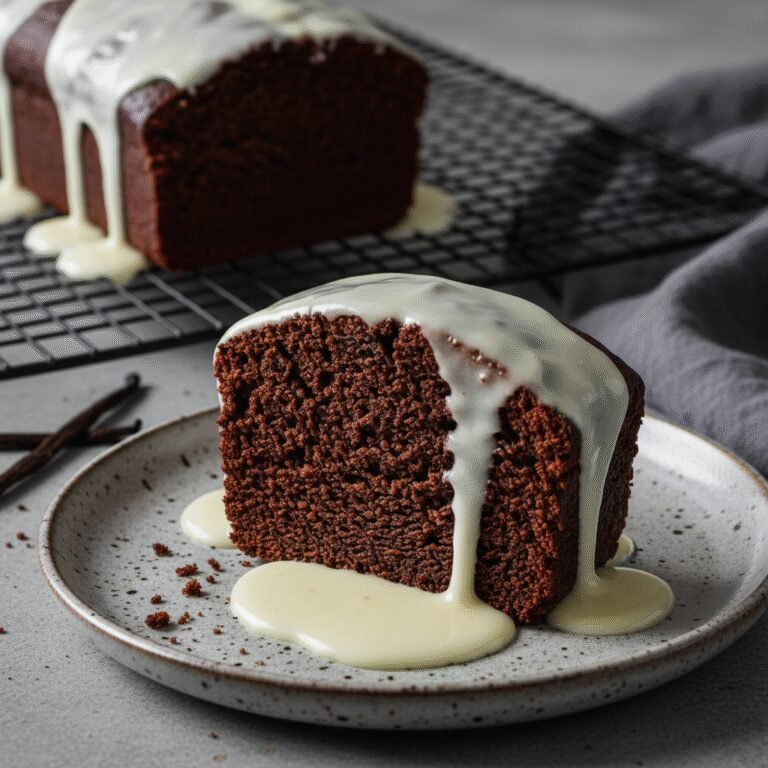
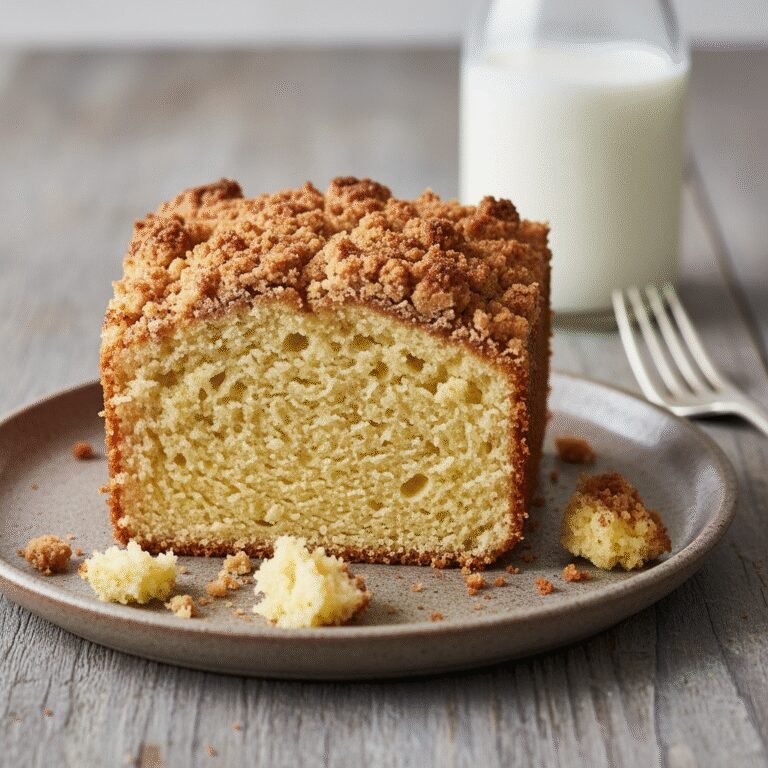
Experience the best of both worlds with this visually stunning Marble Pound Cake, featuring swirls of rich chocolate and vanilla bean batter. Topped with a bright, citrusy lemon glaze that cuts through the buttery richness, this moist loaf is the perfect companion for your morning coffee or afternoon tea.
25 minutes
60 minutes
1 hour 40 minutes
1 Loaf (10-12 Slices)
Dessert
Baking
American
Vegetarian
There is something undeniably magical about slicing into a loaf of marble cake. The anticipation of revealing the unique, artistic swirls hidden beneath the golden-brown crust evokes a sense of childhood nostalgia and culinary wonder. This Moist Marble Pound Cake with Lemon Glaze is not just a dessert; it is a celebration of contrasting flavors and textures that harmonize beautifully on the palate. While many pound cakes suffer from being overly dense or dry, this recipe has been meticulously crafted to ensure a velvety, melt-in-your-mouth crumb that stays moist for days.
The secret lies in the foundation of the batter—a rich, butter-based mixture enhanced with sour cream, which provides the necessary fat and acidity to tenderize the gluten strands. The chocolate swirl isn’t just plain batter with cocoa powder thrown in; it’s enriched with a bloomed cocoa paste to ensure the chocolate sections are just as moist and flavorful as the vanilla ones. But the true showstopper is the finish. A traditional marble cake is delicious on its own, but the addition of a tart, zesty lemon glaze elevates it to a sophisticated bakery-style treat. The brightness of the fresh lemon juice cuts through the decadence of the butter and chocolate, cleansing the palate and inviting you to take another bite. Whether you are baking for a holiday gathering, a Sunday brunch, or simply to treat yourself, this recipe promises a visual masterpiece that tastes even better than it looks.
History & Origins
The history of the pound cake is as rich and dense as the cake itself. Dating back to the early 1700s in Northern Europe, the original recipe was famously simple to remember: one pound each of flour, butter, eggs, and sugar. This 1:1:1:1 ratio produced a heavy, caloric, and incredibly sturdy cake that could feed a large family and keep well without refrigeration. As the recipe migrated to America and evolved through the 19th century, bakers began to incorporate leavening agents like pearl ash and later, baking powder, creating a lighter, more palatable texture.
The concept of ‘marbling’ cake batters traces its roots to 19th-century Germany, where it was known as ‘Marmorkuchen’ (marble cake). Interestingly, the original marble cakes were not chocolate and vanilla. Early versions used molasses and spices to darken part of the batter, creating a swirl that mimicked the veins of marble stone. It wasn’t until the late Victorian era, as chocolate became more accessible and affordable to the middle class, that the chocolate-vanilla combination we know and love today became the standard. Jewish immigrants played a significant role in bringing these German baking traditions to the United States, cementing the marble cake as a staple in American bakeries and delicatessens. Today, the marble pound cake represents a beautiful intersection of English pound cake density and German artistic baking techniques.
Why This Recipe Works
This recipe succeeds where many others fail by addressing the two most common complaints about marble cake: dryness and a lack of distinct flavor between the swirls. First, we ditch the traditional 1:1:1:1 pound cake ratio in favor of a ‘high-ratio’ cake method. By incorporating sour cream and a specific balance of sugar to flour, we increase the moisture content significantly. The acidity in the sour cream also reacts with the baking soda to create a finer, softer crumb structure.
Secondly, a common pitfall in marble cakes is that the chocolate portion is often dry because cocoa powder acts like flour, absorbing liquid. To combat this, this recipe utilizes a ‘blooming’ technique where the cocoa powder is mixed with boiling water and a touch of sugar before being added to the batter. This not only intensifies the chocolate flavor by releasing flavor compounds but also ensures the chocolate batter has the same hydration level as the vanilla batter. Finally, the lemon glaze is not an afterthought; it provides a crucial acid component. The human palate craves balance, and the sharp acidity of the lemon glaze provides a necessary counterpoint to the deep, earthy notes of the chocolate and the sweet, creamy vanilla, making every bite complex and satisfying.
Why You’ll Love This Recipe
- ✓Visually stunning swirls make for a show-stopping presentation.
- ✓Sour cream ensures the crumb remains incredibly moist for days.
- ✓Bloomed cocoa powder provides a deep, fudgy chocolate flavor.
- ✓The lemon glaze adds a bright, citrusy contrast to the rich butter cake.
- ✓Sturdy texture makes it perfect for slicing, toasting, or gifting.
- ✓Freezes beautifully for make-ahead meal prep.
Equipment You’ll Need
- ✓9×5-inch Loaf Pan
- ✓Stand Mixer or Electric Hand Mixer
- ✓Large Mixing Bowls
- ✓Small Heat-proof Bowl
- ✓Rubber Spatula
- ✓Whisk
- ✓Wire Cooling Rack
- ✓Butter Knife or Skewer (for swirling)
- ✓Citrus Zester
Ingredients
- ✓2 cups All-Purpose Flour, spooned and leveled
- ✓1 teaspoon Baking Powder
- ✓1/2 teaspoon Salt
- ✓1 cup Unsalted Butter, softened to room temperature
- ✓1 3/4 cups Granulated Sugar, divided
- ✓4 Large Eggs, room temperature
- ✓2 teaspoons Pure Vanilla Extract
- ✓1/2 cup Full-Fat Sour Cream, room temperature
- ✓1/4 cup Unsweetened Cocoa Powder
- ✓3 tablespoons Boiling Water
- ✓1 cup Confectioners’ Sugar (for glaze)
- ✓2 tablespoons Fresh Lemon Juice (for glaze)
- ✓1 teaspoon Lemon Zest (for glaze)
- ✓1 tablespoon Milk or Heavy Cream (optional, for consistency)
Instructions
- 1. Preheat your oven to 325°F (163°C). Grease a 9×5-inch loaf pan generously with butter and dust with flour, or line it with parchment paper leaving an overhang for easy removal.
- 2. In a medium bowl, whisk together the flour, baking powder, and salt until well combined. Set aside.
- 3. In a small heat-proof bowl, mix the cocoa powder, 3 tablespoons of the granulated sugar, and the boiling water. Whisk until smooth and glossy. This blooms the cocoa. Set aside to cool slightly.
- 4. In the bowl of a stand mixer fitted with the paddle attachment (or using a hand mixer), beat the softened butter and the remaining granulated sugar on medium-high speed for 4-5 minutes. The mixture should look pale, fluffy, and aerated.
- 5. Add the eggs one at a time, beating well after each addition and scraping down the sides of the bowl. Mix in the vanilla extract.
- 6. Reduce the mixer speed to low. Add the flour mixture in three parts, alternating with the sour cream, beginning and ending with the flour. Mix only until just combined—do not overmix.
- 7. Remove 1 cup of the vanilla batter and add it to the bowl with the cooled chocolate mixture. Stir gently until the chocolate is evenly incorporated.
- 8. Using a spoon or ice cream scoop, alternate dollops of vanilla and chocolate batter into the prepared loaf pan. Tap the pan on the counter to settle the batter.
- 9. Take a butter knife or a wooden skewer and run it through the batter in a figure-eight or zigzag motion 2-3 times. Do not over-swirl, or the colors will muddy.
- 10. Bake for 55-65 minutes, or until a toothpick inserted into the center comes out clean or with just a few moist crumbs. If the top browns too quickly, tent loosely with foil after 40 minutes.
- 11. Remove from the oven and let the cake cool in the pan for 15 minutes. Then, lift it out using the parchment paper or invert onto a wire rack to cool completely.
- 12. While the cake cools, whisk together the confectioners’ sugar, lemon juice, and lemon zest. Add milk a teaspoon at a time if you prefer a thinner glaze.
- 13. Once the cake is completely cool, drizzle the glaze generously over the top, allowing it to drip down the sides. Let the glaze set for 15 minutes before slicing.
Expert Cooking Tips
- ✓Room temperature ingredients are non-negotiable. Cold eggs or sour cream can cause the butter batter to curdle, affecting the final texture.
- ✓Do not over-swirl the batter. Less is more; a simple zigzag motion is enough to create beautiful patterns. Too much mixing creates a light brown cake rather than a marble effect.
- ✓Weigh your flour if possible. If using cups, use the ‘spoon and level’ method to avoid packing the flour, which leads to a dry cake.
- ✓Bloom the cocoa. Mixing cocoa with hot water releases the oils and flavor, preventing the chocolate part of the cake from tasting dusty.
- ✓Tent the cake with aluminum foil if the top is browning too fast but the center is still jiggly. This usually happens around the 40-minute mark.
- ✓Let the cake cool completely before glazing. If the cake is warm, the glaze will simply melt and soak into the crumb rather than sitting on top.
Substitutions and Variations
Baking is a science, but there is some room for flexibility in this recipe. If you don’t have sour cream, full-fat plain Greek yogurt is an excellent 1:1 substitute that provides similar acidity and moisture. You can also use buttermilk, though the batter will be slightly thinner. For the flour, cake flour can be used for an even lighter crumb, but all-purpose flour provides the classic sturdy pound cake texture. If you are out of unsalted butter, you can use salted butter, but omit the added salt in the dry ingredients. For the glaze, if lemon isn’t your preference, orange juice and zest make a lovely ‘chocolate orange’ variation, or you can stick to a classic vanilla glaze by using milk and vanilla extract instead of citrus juice. For a gluten-free version, use a high-quality 1:1 gluten-free baking flour blend that contains xanthan gum.
Common Mistakes to Avoid
The most common mistake with pound cake is overmixing the batter after adding the flour. Once the flour hits the wet ingredients, gluten begins to form. Excessive mixing results in a tough, rubbery cake rather than a tender one. Another frequent error is baking at too high a temperature. Pound cakes are dense and need time for the heat to penetrate the center; baking too hot will burn the outside while the inside remains raw. Always check your oven accuracy with an oven thermometer. Lastly, rushing the cooling process causes the cake to break apart. Pound cakes are fragile when hot; give it the full 15 minutes in the pan to set structurally before attempting to move it.
Serving Suggestions
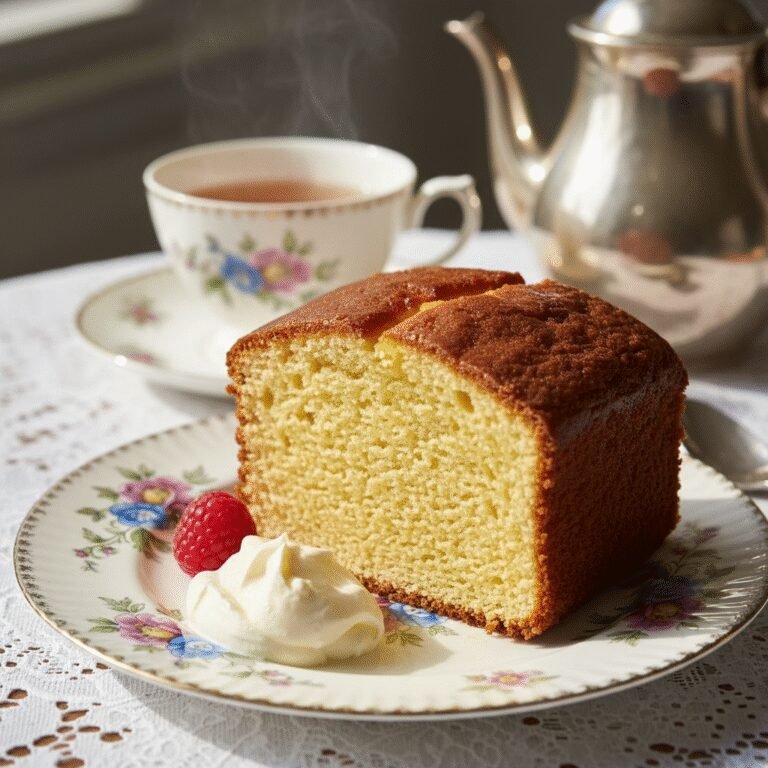
This Moist Marble Pound Cake is incredibly versatile. It shines simply sliced on a white plate with a cup of black coffee or Earl Grey tea, which complements the lemon glaze. For a more dessert-forward presentation, serve a slice slightly warmed with a dollop of freshly whipped cream and a side of fresh raspberries or strawberries. The tartness of the berries pairs wonderfully with the chocolate and lemon. It also makes a fantastic base for a trifle or can be toasted in a skillet with butter for a decadent breakfast treat.
Storage and Reheating Tips
This cake stores beautifully, thanks to its high fat content. Keep the cake wrapped tightly in plastic wrap or stored in an airtight container at room temperature for up to 3-4 days. In fact, the flavor often improves on the second day as the moisture distributes. For longer storage, wrap the loaf (or individual slices) in plastic wrap and then in aluminum foil, and freeze for up to 3 months. Thaw wrapped at room temperature. Avoid storing it in the refrigerator, as the cold air will dry out the crumb and make the butter harden, resulting in a stale texture.
Nutrition Facts (Estimated)
| Serving Size | 1 Slice |
| Calories | 380 |
| Fat | 18g |
| Saturated Fat | 11g |
| Unsaturated Fat | 6g |
| Trans Fat | 0g |
| Cholesterol | 85mg |
| Sodium | 190mg |
| Carbohydrates | 48g |
| Fiber | 2g |
| Sugar | 28g |
| Protein | 5g |
Frequently Asked Questions
Why did my chocolate batter sink to the bottom?
This usually happens if the chocolate batter is significantly heavier or denser than the vanilla batter. By adding the boiling water to bloom the cocoa, we lighten the density to match the vanilla batter, preventing this issue.
Can I bake this in a Bundt pan?
Yes, absolutely! However, a standard Bundt pan is larger than a loaf pan. You may need to double the recipe to fill a 10-12 cup Bundt pan properly. The baking time will also increase to approximately 65-75 minutes.
How do I know exactly when the cake is done?
The toothpick test is best. Insert a wooden skewer into the thickest part of the crack on top. It should come out with a few moist crumbs attached, but no wet batter. If it’s clean, take it out immediately to prevent dryness.
My cake cracked on top. Is that normal?
Yes, a crack down the center is characteristic of a classic pound cake! The dense batter expands as it bakes, and the crust sets before the center finishes rising, creating that beautiful rustic split.
Can I use melted butter instead of softened?
No. The creaming process (beating solid softened butter with sugar) creates air pockets that act as mechanical leavening. Melted butter will result in a dense, greasy, and flat cake.
Why does my cake taste like baking powder?
This indicates you may have used too much leavener or your baking powder is clumped. Always level your measuring spoons and sift your dry ingredients to ensure even distribution.
Can I reduce the sugar in this recipe?
Sugar does more than sweeten; it provides moisture and tenderness. Reducing it by more than 1/4 cup will likely compromise the texture, making the cake tougher and drier.
How do I get the glaze to look white and opaque?
Use less liquid. Start with the lemon juice and add milk only drop by drop. A thick, paste-like glaze will settle into a nice opaque white layer, whereas a thin glaze will turn translucent.
Conclusion
Baking this Moist Marble Pound Cake with Lemon Glaze is a rewarding experience that yields a dessert as beautiful as it is delicious. The interplay of dark chocolate and fragrant vanilla, crowned with that zesty lemon finish, creates a symphony of flavors that is sure to impress anyone lucky enough to get a slice. It’s a recipe that bridges the gap between comforting home baking and elegant pastry shop quality. We hope this becomes a staple in your recipe box for years to come. If you try this recipe, please leave a comment and let us know how your swirls turned out!