The Ultimate Moist Marble Pound Cake For Afternoon Tea
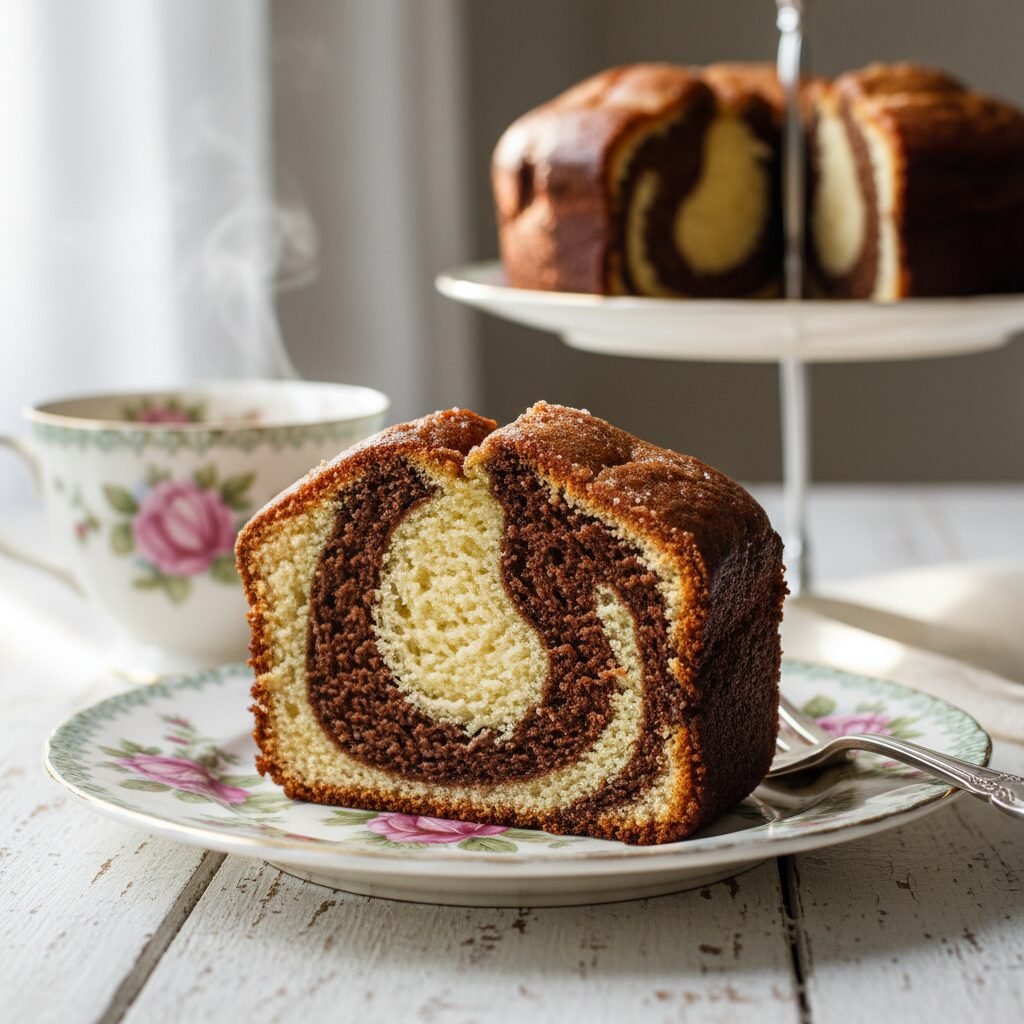
Moist Marble Pound Cake For Afternoon Tea Recipe
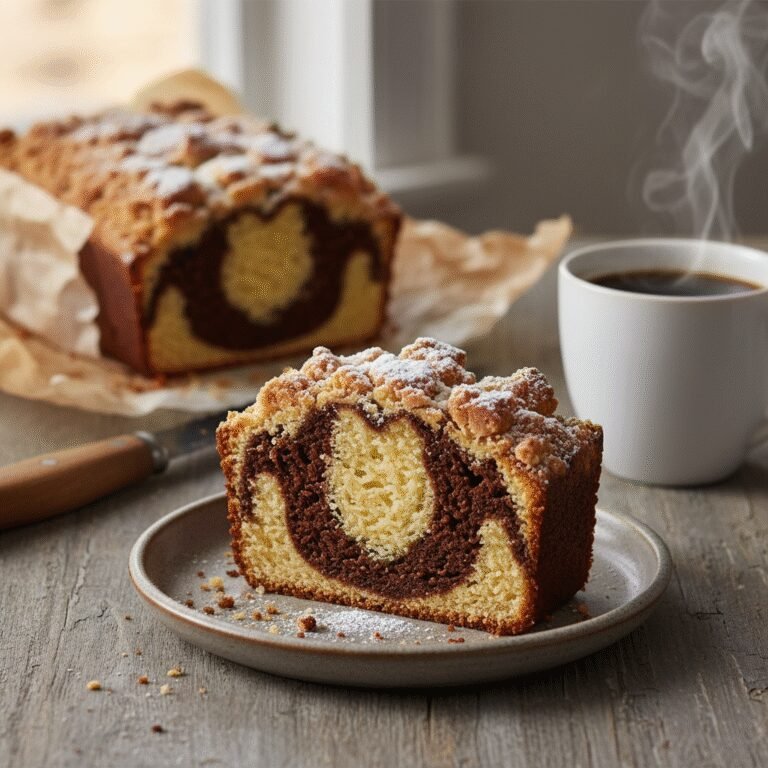
This stunning Marble Pound Cake combines rich, fudgy chocolate swirls with a buttery vanilla crumb for the ultimate afternoon tea treat. Enhanced with sour cream for an incredibly moist texture, this showstopper is easier to make than it looks and tastes even better the next day.
25 minutes
65 minutes
1 hour 30 minutes
1 Loaf (10-12 Slices)
Dessert
Baking
American / European
Vegetarian
There is something undeniably elegant about a well-made Marble Pound Cake. It sits at the perfect intersection of comfort food and high tea sophistication, offering the best of both worlds to those who cannot decide between chocolate and vanilla. Unlike the dry, crumbly loaf cakes often found in coffee shop display cases, this recipe is specifically engineered to produce a crumb that is dense, velvety, and remarkably moist. The magic lies in the balance of ingredients; we use real butter for that unmistakable melt-in-the-mouth flavor, but we also incorporate sour cream, which tenderizes the gluten strands and ensures the cake stays fresh for days. Whether you are hosting a formal afternoon tea with fine china or simply looking for a slice of comfort to accompany your morning coffee, this cake delivers. The visual appeal of the chaotic, beautiful swirls means every slice is a unique piece of edible art, guaranteed to impress your guests before they even take their first bite. It is a nostalgic classic, elevated for the modern palate, and destined to become a staple in your baking repertoire.
History & Origins
The history of the pound cake dates back to the early 1700s in Northern Europe. The name itself was a practical recipe mnemonic for a largely illiterate population: the original formula called for one pound each of flour, butter, eggs, and sugar. While this ratio created a delicious cake, it was incredibly dense and heavy by modern standards. As leavening agents like pearl ash and eventually baking powder were discovered, the recipe evolved to become lighter and more aerated. The ‘marble’ variation, however, has its own fascinating lineage. It traces its roots to 19th-century Germany, where it was known as ‘Marmorkuchen.’ interestingly, the original dark swirls were not made with chocolate, which was an expensive luxury at the time, but rather with molasses and spices. German immigrants brought this tradition to America before the Civil War. As chocolate became more affordable and accessible in the late Victorian era, it replaced molasses, creating the black-and-white contrast we know and love today. This recipe honors that transatlantic journey, combining the sturdy structure of the traditional English pound cake with the artistic flair of the German marble technique.
Why This Recipe Works
This recipe succeeds where many others fail because it addresses the two biggest complaints about pound cake: dryness and lack of flavor distinction. First, we tackle moisture. By substituting a portion of the butter with full-fat sour cream, we introduce acidity and fat in a form that keeps the crumb tender. The acidity in the sour cream breaks down long gluten strands, preventing the cake from becoming tough, while the extra moisture ensures it doesn’t dry out during the long bake time required for loaf cakes. Second, we focus on the chocolate swirl. Many recipes simply add cocoa powder to half the batter, which dries out the chocolate section and makes it bitter. In this recipe, we ‘bloom’ the cocoa powder in boiling water and mix it with a little sugar and baking soda before adding it to the batter. This blooming process releases the full depth of the chocolate flavor and ensures the chocolate batter has the same consistency as the vanilla batter, preventing them from baking at different rates or sinking. Finally, the reverse creaming method—or a very thorough traditional creaming—ensures enough air is incorporated to lift the heavy batter, resulting in a tight but light crumb perfect for slicing.
Why You’ll Love This Recipe
- ✓Incredibly moist texture thanks to the addition of sour cream.
- ✓Deep, authentic chocolate flavor achieved by blooming cocoa powder.
- ✓Beautiful, artistic swirls make every slice unique.
- ✓Sturdy enough to slice thinly without crumbling.
- ✓Keeps fresh for up to 5 days at room temperature.
- ✓Freezes beautifully for make-ahead meal prep.
Equipment You’ll Need
- ✓9×5 inch Loaf Pan
- ✓Stand Mixer or Electric Hand Mixer
- ✓Large Mixing Bowl
- ✓Medium Mixing Bowl
- ✓Small Heat-proof Bowl
- ✓Rubber Spatula
- ✓Skewer or Butter Knife (for swirling)
- ✓Wire Cooling Rack
- ✓Parchment Paper
Ingredients
- ✓2 cups (240g) All-Purpose Flour
- ✓1 teaspoon Baking Powder
- ✓1/2 teaspoon Salt
- ✓1 cup (227g) Unsalted Butter, softened to room temperature
- ✓1 3/4 cups (350g) Granulated Sugar, divided
- ✓4 Large Eggs, room temperature
- ✓2 teaspoons Pure Vanilla Extract
- ✓1/2 cup (120g) Full-Fat Sour Cream, room temperature
- ✓1/3 cup (30g) Unsweetened Dutch-Process Cocoa Powder
- ✓3 tablespoons Boiling Water
- ✓1/4 teaspoon Baking Soda
Instructions
- Preheat your oven to 325°F (163°C). Grease a 9×5 inch loaf pan generously with butter and dust with flour, or line it with parchment paper leaving an overhang for easy removal.
- In a medium bowl, whisk together the flour, baking powder, and salt until well combined. Set aside.
- In a small heat-proof bowl, mix the cocoa powder, 3 tablespoons of the granulated sugar, baking soda, and boiling water. Whisk until smooth and glossy. This blooms the cocoa. Set aside to cool slightly.
- In the bowl of a stand mixer fitted with the paddle attachment (or using a hand mixer), cream the softened butter and the remaining granulated sugar on medium-high speed for about 5 minutes. The mixture should look pale, fluffy, and aerated.
- Add the eggs one at a time, beating well after each addition. Scrape down the sides of the bowl ensuring everything is incorporated. Stir in the vanilla extract.
- Reduce the mixer speed to low. Add half of the flour mixture, mixing just until the flour streaks disappear. Add the sour cream and mix briefly. Add the remaining flour mixture and mix until just combined. Do not overmix.
- Remove about 1/3 of the vanilla batter (approx 1.5 cups) and place it into a separate bowl. Pour the cooled chocolate mixture into this separated batter and fold gently with a spatula until the color is uniform.
- To assemble, alternate adding dollops of vanilla and chocolate batter into the prepared loaf pan. You can do a checkerboard pattern or simply layer them.
- Using a skewer or a butter knife, swirl the batters together. Run the knife through the batter in a figure-8 motion or zig-zag pattern. Do not over-swirl, or the colors will muddy together.
- Tap the pan on the counter firmly 2-3 times to release any large air bubbles.
- Bake for 60 to 70 minutes. The cake is done when a toothpick inserted into the center comes out clean or with just a few moist crumbs attached. Check at the 50-minute mark; if the top is browning too quickly, tent loosely with aluminum foil.
- Remove from the oven and let the cake cool in the pan for 15 minutes. Then, lift it out using the parchment paper or invert onto a wire rack to cool completely before slicing.
Expert Cooking Tips
- ✓Room temperature ingredients are non-negotiable. Cold eggs or sour cream will cause the butter to seize and the batter to curdle, leading to a dense cake.
- ✓Bloom your cocoa. Mixing cocoa with hot water intensifies the chocolate flavor and ensures the chocolate batter isn’t drier than the vanilla batter.
- ✓Don’t over-swirl. Less is more. 3 or 4 passes with the knife is usually enough to create a beautiful pattern without turning the whole cake gray.
- ✓Weigh your flour. If you scoop with a cup, you might pack too much flour in, resulting in a dry cake. A kitchen scale is your best friend.
- ✓Tent with foil. Loaf cakes bake for a long time. If the top looks perfect but the middle is raw, cover it with foil to stop the browning while the center finishes cooking.
- ✓Wait to slice. Pound cake structure sets as it cools. Slicing it while hot will cause it to crumble and fall apart.
Substitutions and Variations
If you do not have sour cream, full-fat Greek yogurt is the best substitute as it has a similar consistency and acidity. In a pinch, you can use buttermilk, though the batter will be slightly thinner. For the flour, Cake Flour can be used for an even lighter crumb, but All-Purpose Flour provides the classic sturdy pound cake texture. If you only have salted butter, omit the 1/2 teaspoon of added salt in the recipe. For the chocolate, Dutch-process cocoa gives a darker color and fudgier flavor, but natural cocoa powder will work if that is all you have on hand; just note the color will be lighter. Vanilla bean paste can be swapped for the extract for lovely visible vanilla specks in the light batter.
Common Mistakes to Avoid
The most common mistake is rushing the creaming process. You really need to beat the butter and sugar for a full 5 minutes to incorporate air; this is the primary leavening for the cake. Another error is opening the oven door too frequently. Every time you open the door, heat escapes and the temperature fluctuates, which can cause the cake to sink in the middle. Lastly, over-baking is the enemy of moisture. Start checking your cake 10 minutes before the suggested time, as oven temperatures vary significantly. A dry cake is often just an over-baked cake.
Serving Suggestions
This cake shines on its own, but for an afternoon tea setting, serve thin slices on fine china. It pairs beautifully with a dollop of lightly sweetened whipped cream (Chantilly cream) and fresh berries like raspberries or strawberries to cut through the richness. For a warm dessert, toast a thick slice and top it with vanilla bean ice cream and hot fudge sauce. Beverage-wise, this cake is robust enough to stand up to black teas like Earl Grey or English Breakfast, but also complements a dark roast coffee perfectly.
Storage and Reheating Tips
Marble pound cake actually tastes better the day after baking as the flavors have time to meld and the moisture redistributes. Store the cake in an airtight container at room temperature for up to 4-5 days. Do not refrigerate it, as the cold environment will dry out the butter-based crumb and make it taste stale. For long-term storage, slice the cake, wrap each slice individually in plastic wrap, then place them in a freezer-safe bag. Freeze for up to 3 months. Thaw individual slices on the counter for 30 minutes before eating.
Nutrition Facts (Estimated)
| Serving Size | 1 Slice |
| Calories | 380 |
| Fat | 21g |
| Saturated Fat | 12g |
| Unsaturated Fat | 8g |
| Trans Fat | 0.5g |
| Cholesterol | 95mg |
| Sodium | 180mg |
| Carbohydrates | 44g |
| Fiber | 1g |
| Sugar | 24g |
| Protein | 5g |
Frequently Asked Questions
Why did my chocolate batter sink to the bottom?
This usually happens if the chocolate batter is significantly heavier or denser than the vanilla batter. This recipe avoids that by adding water to the cocoa, keeping the consistencies similar. Also, ensure you layer the batters rather than dumping all the chocolate on top.
Can I bake this in a bundt pan?
Yes, but you will need to double the recipe for a standard 10-12 cup bundt pan. The baking time will also increase to approximately 75-90 minutes. Always check for doneness with a skewer.
Why is my pound cake dry?
Dryness is usually caused by over-measuring flour (use a scale!) or over-baking. It can also happen if you didn’t use enough fat—stick to full-fat sour cream and real butter for this recipe.
How do I get the perfect swirl?
The trick is to alternate scoops of batter (vanilla, chocolate, vanilla) into the pan, creating a checkerboard effect, and then swirl minimally. If you mix too much, the colors blend into a light brown instead of distinct ribbons.
Can I use oil instead of butter?
Technically yes, but it won’t be a ‘pound cake’ in flavor. Butter provides the essential flavor profile. If you must use oil, the texture will be moister but will lack that rich, savory-sweet depth.
My cake cracked on top, is that bad?
Not at all! A crack down the center is the signature look of a classic pound cake. It indicates the batter expanded correctly in the oven. It adds to the rustic charm.
Can I add nuts or chips?
Absolutely. You can fold in 1/2 cup of chocolate chips or chopped walnuts into the batter before swirling. Toss them in a teaspoon of flour first to prevent them from sinking.
Why did my cake overflow?
The pan might have been too small or overfilled. This recipe is designed for a standard 9×5 loaf pan. If you use an 8×4 pan, reserve some batter for a muffin or two, or the cake will spill over.
Conclusion
Mastering the Moist Marble Pound Cake is a satisfying achievement for any home baker. It is a recipe that rewards patience and precision with a dessert that is visually striking and deeply comforting. Whether you are preparing for a festive gathering, a quiet Sunday afternoon tea, or simply stocking the freezer for emergency sweet cravings, this loaf is sure to become a favorite. The interplay of vanilla and chocolate ensures everyone is happy, and the lush texture will have friends and family asking for the recipe. Happy baking!