The Ultimate Moist Chocolate Sheet Cake For Office Party Recipe
Moist Chocolate Sheet Cake For Office Party Recipe
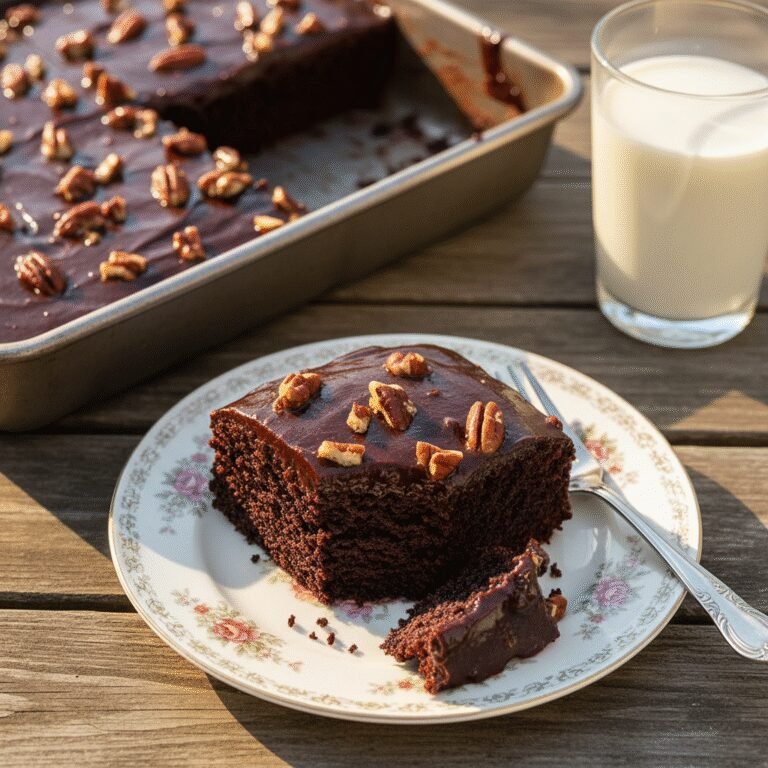
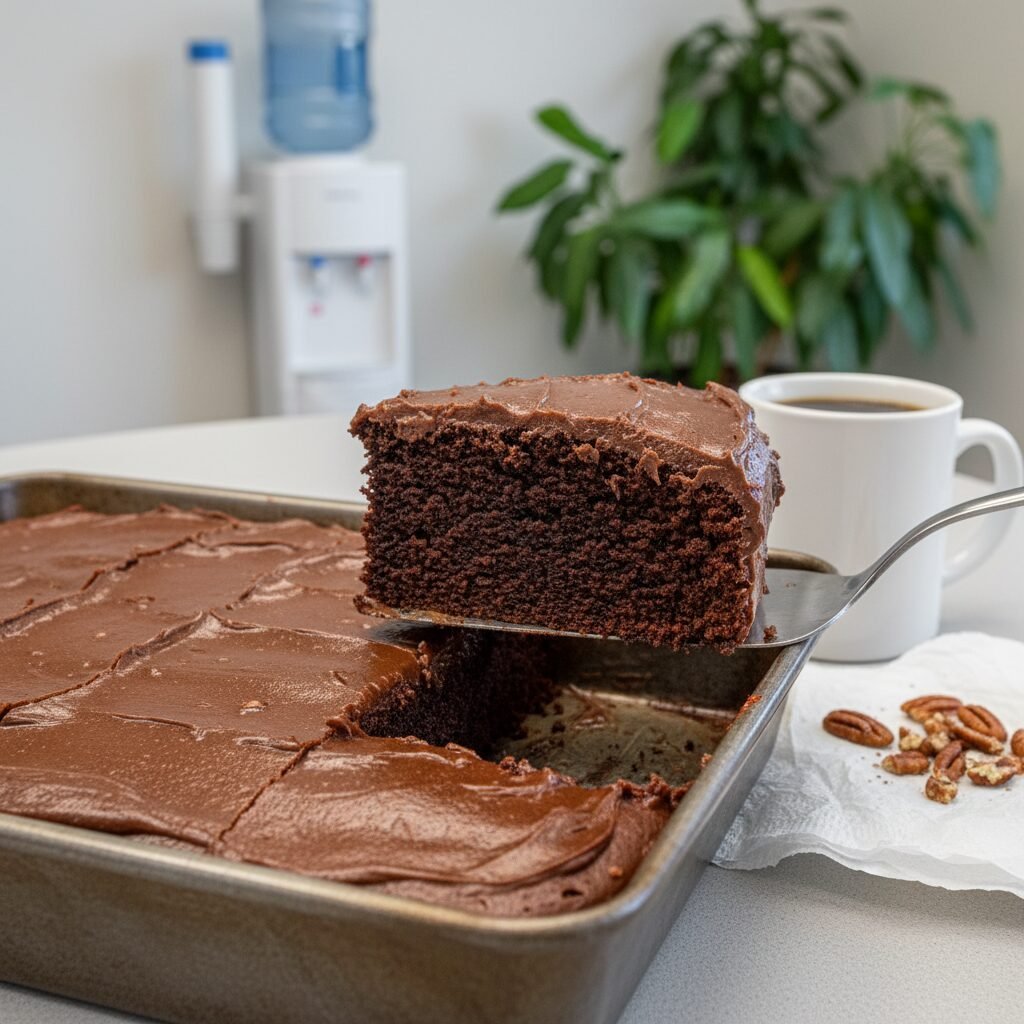
This crowd-pleasing chocolate sheet cake is the undisputed hero of office parties and potlucks. Featuring an incredibly tender crumb and a rich, fudgy icing poured over the warm cake, it is easy to transport, feeds a crowd, and guarantees an empty pan every time.
20 minutes
20 minutes
55 minutes
24 servings
Dessert
Baking
American
Vegetarian
When it comes to office parties, potlucks, or large gatherings, the pressure to bring a dessert that travels well and appeals to everyone can be daunting. You want something that doesn’t require delicate assembly, won’t melt in the car, and yields enough servings to satisfy the entire accounting department. Enter the Moist Chocolate Sheet Cake—often affectionately known as Texas Sheet Cake. This isn’t just another chocolate cake; it is an institution in American home baking.
What sets this recipe apart is its unique texture. Unlike fluffy, airy birthday cakes that rely heavily on creaming butter and sugar, this cake is denser, darker, and significantly moister. The batter is prepared in a saucepan rather than a stand mixer, creating a streamlined process that feels almost too easy for the incredible results it yields. The magic happens at the very end: a warm, cocoa-infused fudge icing is poured directly over the hot cake the moment it leaves the oven. This technique allows the icing to seep slightly into the top layer of the sponge, creating a transitional zone of gooey, chocolatey perfection that fuses the frosting and cake together.
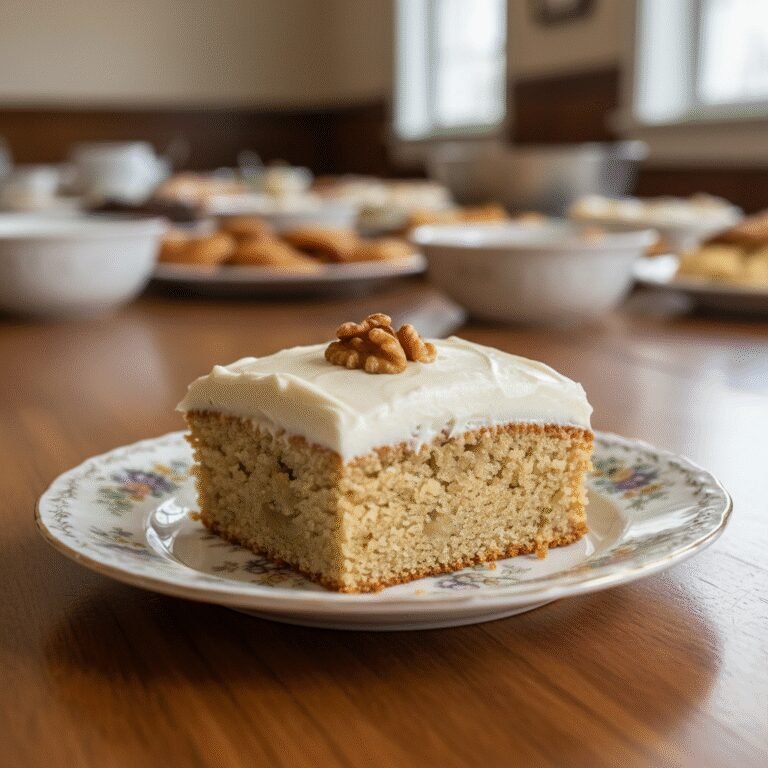
Ideally suited for a standard jelly roll pan, this cake cuts easily into twenty-four generous squares or forty-eight bite-sized morsels, making it the most logistical and delicious choice for feeding a crowd. Whether you are celebrating a coworker’s promotion, a birthday, or just need a morale booster for the team, this sheet cake delivers a nostalgic, comfort-food experience that will have your colleagues asking for the recipe before the last crumb is gone.
History & Origins
The history of the chocolate sheet cake is a fascinating slice of Americana, deeply rooted in the mid-20th-century evolution of community cookbooks and newspaper food columns. While sheet cakes—cakes baked in shallow, rectangular pans—have existed for over a century, the specific iteration known as ‘Texas Sheet Cake’ rose to prominence in the 1950s and 1960s.
There is considerable debate regarding the name. Some food historians argue it was named ‘Texas’ cake because of its sheer size—big like the state itself. Others suggest it might be linked to a recipe published in the Dallas Morning News in 1957, which helped popularize the dish across the Southern United States. Interestingly, the ingredients bear a striking resemblance to German Chocolate Cake, specifically the use of buttermilk and sweet chocolate, though the sheet cake simplifies the process by omitting the coconut-pecan filling in favor of a poured fudge icing.
Before it was regionally branded, similar recipes appeared in community church cookbooks under names like ‘Buttermilk Brownie Cake’ or ‘Mexican Chocolate Cake’ (likely due to the occasional addition of cinnamon). The defining characteristic—boiling butter and water with cocoa—was a technique that gained traction because it bloomed the cocoa powder, intensifying the chocolate flavor without requiring expensive chocolate bars. Over the decades, this cake became a staple of funeral repasts, church picnics, and office parties because of its reliability. It represents a time in culinary history when convenience and quantity met high-quality homemade flavor, bridging the gap between the elaborate layer cakes of the Victorian era and the boxed mixes that would later dominate the market.
Why This Recipe Works
This recipe succeeds where others fail due to the specific chemistry of the ‘boiling method’ and the temperature at which the frosting is applied. First, by boiling the water (or coffee) and butter with the cocoa powder, you are effectively ‘blooming’ the cocoa. Heat releases the volatile flavor compounds in the cocoa solids, resulting in a deeper, more robust chocolate profile than you would get by simply whisking dry cocoa into batter.
Secondly, the liquid fat ratio is high. The combination of melted butter and buttermilk ensures the gluten strands in the flour remain short, which translates to a tender, melt-in-your-mouth texture rather than a chewy, bread-like crumb. The acidity in the buttermilk also reacts with the baking soda to provide a quick, energetic lift, essential for a cake that bakes in just 20 minutes.
Finally, and most importantly, is the icing technique. Most cakes require complete cooling before frosting to prevent the icing from sliding off. Here, we break that rule. Pouring the hot, sugar-saturated icing over the hot cake creates a seal. As the cake cools, the icing sets into a fudge-like consistency that cracks slightly when cut, while the bottom layer of the icing permeates the top of the cake. This traps moisture inside the sponge, keeping the cake fresh and soft for days longer than a traditional buttercream-frosted cake. It is a scientifically perfect marriage of texture and temperature.
Why You’ll Love This Recipe
- ✓Feeds a Large Crowd: Yields 24-30 servings comfortably.
- ✓Travel-Friendly: Baked and frosted in the pan, making it easy to transport.
- ✓No Mixer Required: Can be made entirely with a saucepan and a whisk.
- ✓Stays Moist for Days: The warm-on-warm frosting technique locks in moisture.
- ✓Rich Chocolate Flavor: Blooming the cocoa powder intensifies the taste.
- ✓Versatile Toppings: Can be made with or without pecans/walnuts.
Equipment You’ll Need
- ✓13×18 inch Jelly Roll Pan (or 12×17 inch baking sheet with rim)
- ✓Large Saucepan
- ✓Whisk
- ✓Large Mixing Bowl
- ✓Measuring Cups and Spoons
- ✓Spatula
Ingredients
- ✓2 cups all-purpose flour
- ✓2 cups granulated sugar
- ✓1 teaspoon baking soda
- ✓1/2 teaspoon salt
- ✓1 cup unsalted butter (2 sticks)
- ✓1 cup water (or hot brewed coffee for extra depth)
- ✓1/4 cup unsweetened cocoa powder
- ✓1/2 cup buttermilk, room temperature
- ✓2 large eggs, lightly beaten
- ✓1 teaspoon pure vanilla extract
- ✓FOR THE FROSTING:
- ✓1/2 cup unsalted butter (1 stick)
- ✓1/4 cup unsweetened cocoa powder
- ✓6 tablespoons whole milk
- ✓3 cups powdered sugar, sifted
- ✓1 teaspoon pure vanilla extract
- ✓1 cup chopped pecans or walnuts (optional)
Instructions
- Preheat your oven to 350°F (175°C). Grease a 13×18 inch jelly roll pan (or a similarly sized rimmed baking sheet) generously with butter or non-stick cooking spray.
- In a large mixing bowl, whisk together the flour, granulated sugar, baking soda, and salt. Set this dry mixture aside.
- In a large saucepan over medium heat, combine 1 cup of butter, 1 cup of water (or coffee), and 1/4 cup of cocoa powder. Whisk constantly until the butter is melted and the mixture comes to a rolling boil.
- Remove the saucepan from the heat and immediately pour the hot chocolate mixture over the dry ingredients in the mixing bowl. Whisk gently until just combined and smooth. The batter will be thin.
- In a small bowl, whisk together the buttermilk, beaten eggs, and vanilla extract. Pour this into the chocolate batter and whisk until fully incorporated and uniform in color.
- Pour the batter into the prepared baking pan, using a spatula to spread it into an even layer, ensuring it reaches all four corners.
- Bake for 18-22 minutes, or until a toothpick inserted into the center comes out clean or with just a few moist crumbs. Do not overbake.
- About 5 minutes before the cake is done baking, start the frosting. In the same saucepan used earlier (rinsed out), combine 1/2 cup butter, 1/4 cup cocoa powder, and the milk. Bring to a boil over medium heat while whisking.
- Once boiling, remove from heat immediately. Gradually whisk in the sifted powdered sugar and vanilla extract until the frosting is glossy and smooth. If using nuts, fold them in now.
- Remove the cake from the oven. Immediately pour the hot frosting over the hot cake. Use an offset spatula to gently spread the frosting to the edges—work quickly as it sets fast.
- Allow the cake to cool in the pan on a wire rack for at least 30-45 minutes before slicing. This allows the frosting to set into a fudge-like consistency.
Expert Cooking Tips
- ✓Sift the Powdered Sugar: This is non-negotiable for the frosting. If you don’t sift, you will have tiny white lumps of sugar in your smooth chocolate glaze.
- ✓Room Temperature Buttermilk: Ensure your buttermilk and eggs are not ice cold; this prevents the hot cocoa mixture from seizing or curdling when combined.
- ✓Use Coffee: Swap the water in the cake batter for hot brewed coffee. It doesn’t make the cake taste like coffee; it simply amplifies the chocolate flavor.
- ✓Don’t Overbake: Since the cake is thin, it bakes quickly. Check it at the 18-minute mark to ensure it stays moist.
- ✓Timing is Key: Make the frosting while the cake finishes baking. You must pour hot frosting over hot cake to get the signature texture.
- ✓Grease the Pan Well: Even though it’s a moist cake, the high sugar content can make it stick. Grease the corners well.
- ✓Toasting Nuts: If you are adding pecans or walnuts, toast them in a dry skillet for 2 minutes beforehand to bring out their flavor.
Substitutions and Variations
This recipe is quite forgiving with substitutions. If you don’t have buttermilk, you can make a ‘sour milk’ substitute by adding 1 tablespoon of white vinegar or lemon juice to a measuring cup and filling it to the 1/2 cup line with regular milk; let it sit for 5 minutes before using. Sour cream or plain Greek yogurt can also be substituted for buttermilk in a 1:1 ratio, though the batter may be slightly thicker. For the fat, while butter provides the best flavor, you can use margarine or even coconut oil, though the latter will impart a coconut taste. If you are out of unsweetened cocoa powder, Dutch-processed cocoa can be used for a darker color and mellower flavor, but the original recipe relies on the acidity of natural cocoa to react with the baking soda, so stick to natural cocoa if possible. For a nut-free version, simply omit the pecans; you can sprinkle sprinkles or chocolate chips on top instead if desired.
Common Mistakes to Avoid
The most common mistake with sheet cake is overbaking. Because the batter is spread thin, the window between ‘perfectly moist’ and ‘dry sponge’ is very small. Start checking early. Another frequent error is letting the cake cool down before frosting. If the cake is cold, the frosting sits on top like a thick, separate layer rather than fusing with the cake. Conversely, if the frosting cools too much before pouring, it becomes unspreadable and grainy. Finally, failing to sift the powdered sugar results in a bumpy, unattractive finish that is impossible to whisk smooth once the liquid is added. Always sift!
Serving Suggestions
This cake is incredibly rich, so it serves well with something to cut the sweetness. A scoop of vanilla bean ice cream or a dollop of unsweetened whipped cream is classic. For an office setting where ice cream might melt, serve it alongside cold milk or hot black coffee. The bitterness of the coffee pairs beautifully with the sweet fudge icing. If you are feeling festive, fresh berries (raspberries or strawberries) add a nice pop of color and acidity to the plate.
Storage and Reheating Tips
One of the best features of this cake is its shelf life. It can be stored at room temperature, covered tightly with plastic wrap or foil, for up to 3 days. In fact, many find it tastes even better the second day as the flavors meld. If you need to keep it longer, it can be refrigerated for up to 5 days, though the cold will solidify the butter and make the texture denser; bring it to room temperature before serving for best results. For freezing, let the icing set completely, then cut into squares. Wrap individual squares in plastic wrap and then foil. They can be frozen for up to 3 months. Thaw on the counter for an hour before eating.
Nutrition Facts (Estimated)
| Serving Size | 1 square |
| Calories | 380 |
| Fat | 18g |
| Saturated Fat | 9g |
| Unsaturated Fat | 8g |
| Trans Fat | 0g |
| Cholesterol | 45mg |
| Sodium | 180mg |
| Carbohydrates | 52g |
| Fiber | 2g |
| Sugar | 34g |
| Protein | 4g |
Frequently Asked Questions
Can I make this in a 9×13 pan instead?
Yes, but it will be a much thicker cake, more like a traditional birthday cake. You will need to increase the baking time significantly, likely to 35-40 minutes. The ratio of frosting to cake will also be different.
Why is my frosting grainy?
Grainy frosting usually happens if the sugar wasn’t dissolved properly or, more commonly, if the powdered sugar wasn’t sifted. It can also happen if the butter/milk mixture wasn’t hot enough when the sugar was added.
Can I leave the nuts out?
Absolutely. The nuts are traditional but entirely optional. If you omit them, you don’t need to change any other ingredient quantities.
How do I transport this without ruining the frosting?
The frosting sets to a semi-hard fudge consistency after about an hour. Once set, you can lightly cover it with foil. Using a pan with a plastic lid that snaps on (a carrier) is the safest bet for office transport.
Can I use gluten-free flour?
Yes, a high-quality 1-to-1 gluten-free flour blend (like King Arthur or Bob’s Red Mill) works very well in this recipe because the cake relies on cocoa and moisture for structure more than heavy gluten development.
Why do I need to use boiling water?
Boiling water blooms the cocoa powder, releasing its full flavor potential and ensuring the cocoa dissolves completely without leaving dry clumps in the batter.
Can I use salted butter?
Yes, if you only have salted butter, just reduce the added salt in the recipe to 1/4 teaspoon.
Is this the same as a Texas Sheet Cake?
Yes! This recipe is classically known as Texas Sheet Cake. We labeled it for office parties because its size and transportability make it the perfect work event dessert.
Can I halve the recipe?
Yes, you can halve the ingredients and bake it in a smaller pan, such as a 9×13 inch pan (for a thin cake) or a quarter sheet pan. Watch the baking time closely.
My cake sank in the middle, why?
This usually happens if the oven door was opened too early during baking, or if there was too much leavening (baking soda). Ensure your measurements are precise.
Conclusion
The Moist Chocolate Sheet Cake is more than just a dessert; it is a reliable culinary tool in your social arsenal. Whether you are trying to impress a new boss, comfort a friend, or simply bring joy to a mundane Tuesday afternoon break, this recipe delivers. Its ease of preparation means you don’t have to be a professional baker to achieve professional results, and the yield ensures no one is left out. Bake this for your next office gathering, and prepare to become the most popular person in the breakroom.