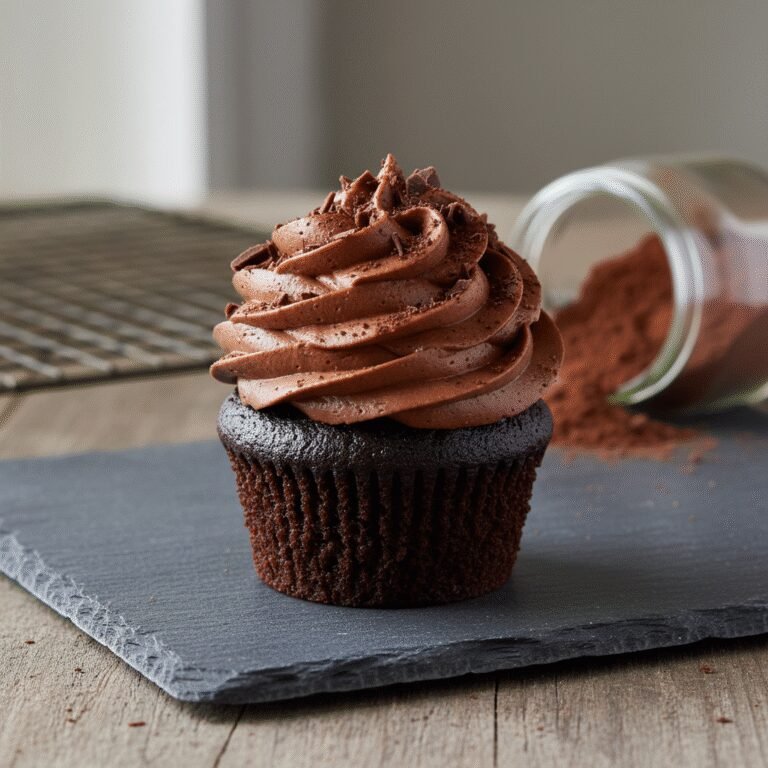
The Ultimate Moist Chocolate Cupcake with Creamy Vanilla Buttercream
Moist Chocolate Cupcake With Vanilla Buttercream Recipe
Discover the secret to the most tender, rich, and deeply chocolatey cupcakes you will ever bake. Paired with a silky-smooth, classic vanilla buttercream, these treats are the perfect balance of decadent cocoa and sweet, creamy nostalgia.
20 minutes
20 minutes
40 minutes
12 cupcakes
Dessert
Baking
American
Vegetarian
Every home baker is on a perpetual quest for the perfect chocolate cupcake—one that doesn’t dry out the moment it cools and delivers a profound chocolate punch rather than a whisper of cocoa. This recipe is the culmination of years of testing, tweaking, and tasting. Unlike many recipes that rely solely on butter for the batter, which can lead to a denser, drier crumb once cooled, this method utilizes a high-quality vegetable oil base. This ensures the cupcakes stay incredibly moist for days, not just hours. But the real magic lies in the ‘blooming’ of the cocoa powder, a technique often reserved for high-end pastry kitchens but easily replicable at home. By mixing hot coffee with the cocoa, we release the essential oils in the chocolate, intensifying the flavor profile to luxurious new heights.
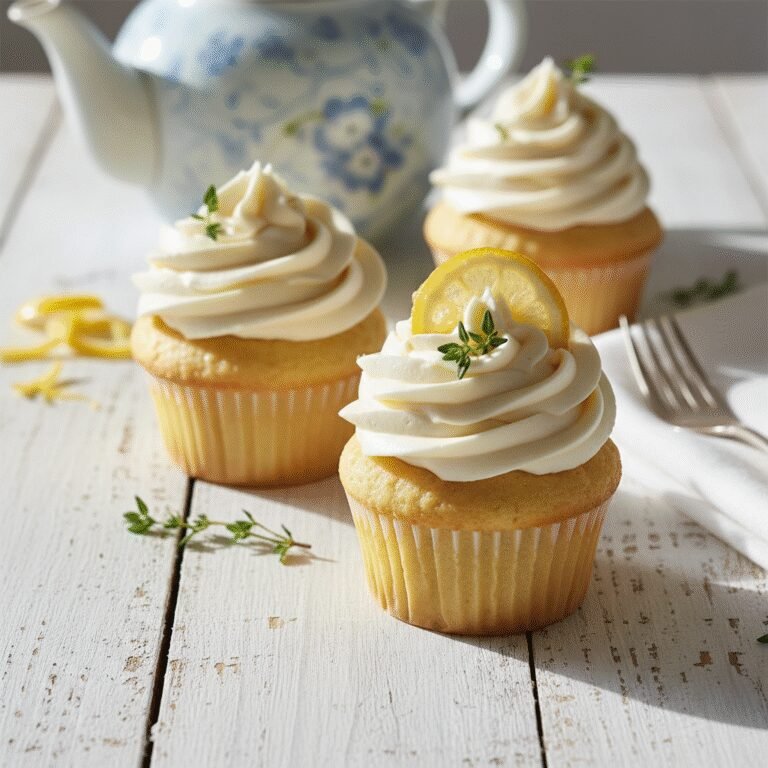
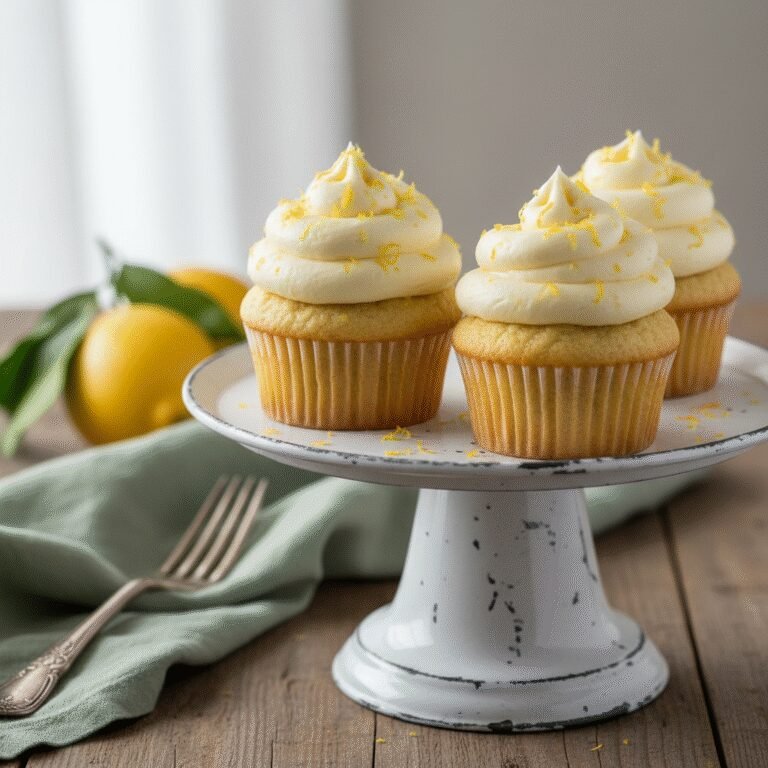
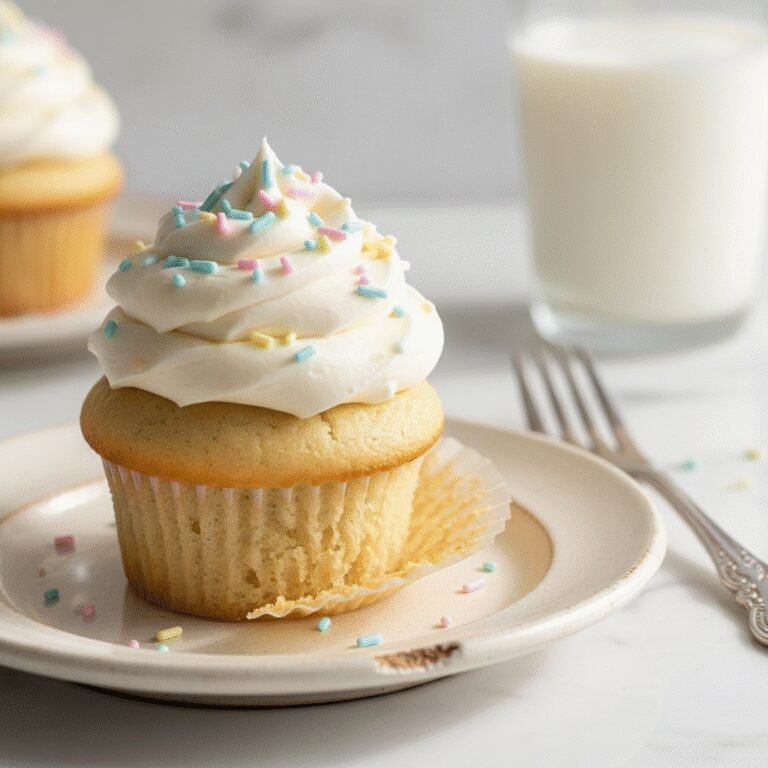
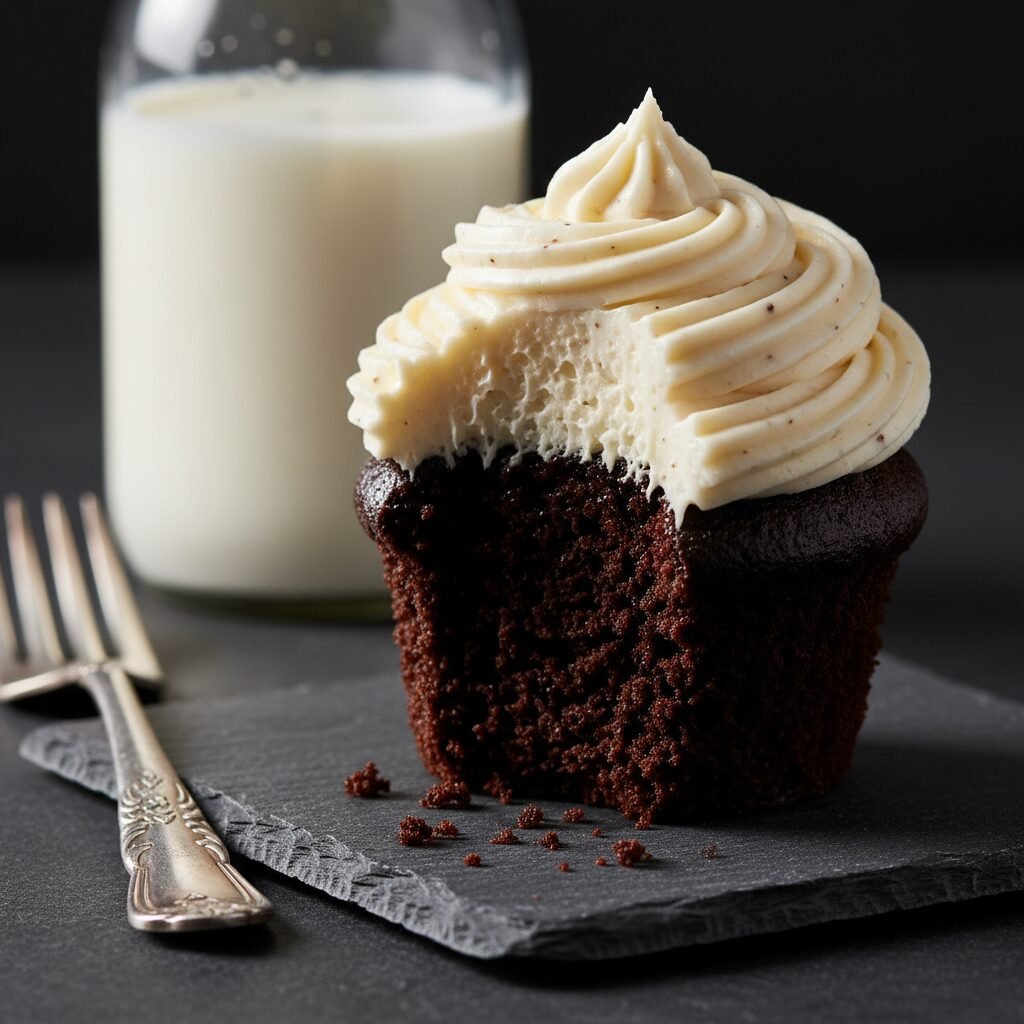
Complementing the deep, dark sponge is a quintessential American vanilla buttercream. It is whipped to an airy cloud-like consistency, providing a sweet, creamy counterpoint to the bitter undertones of the chocolate. Whether you are baking for a birthday party, a school bake sale, or simply a Tuesday night craving, these cupcakes evoke a sense of comfort and celebration. They are sturdy enough to hold a mountain of frosting yet delicate enough to melt in your mouth. Prepare to become the most popular baker in your circle, because once you make these, no boxed mix will ever satisfy you again.
History & Origins
The humble cupcake has a surprisingly long and storied history that dates back much further than the modern bakery craze of the early 2000s. The first known reference to a cake to be baked in small cups appeared in Amelia Simmons’ ‘American Cookery’ in 1796, a cookbook that is often cited as the first American cookbook. Simmons described ‘a light cake to bake in small cups,’ marking a departure from the large, dense hearth cakes of the era. However, the actual term ‘cupcake’ didn’t surface in print until 1828 in Eliza Leslie’s ‘Receipts’. In these early days, the name derived not just from the baking vessel—often small pottery cups or ramekins before the invention of the muffin tin—but also from the method of measuring ingredients by the cupful, a revolutionary shift from the weight-based measurements that were standard in European baking.
Throughout the 19th and 20th centuries, the cupcake remained a staple of home baking due to its convenience and shorter baking time compared to full-sized cakes. The commercialization of the cupcake began in 1919 when Hostess introduced the ‘CupCake,’ though it wasn’t until the 1950s that the iconic white squiggles appeared on top. The modern ‘cupcake boom,’ however, is largely attributed to the early 2000s, fueled by pop culture phenomena like ‘Sex and the City,’ which featured New York’s Magnolia Bakery. This sparked a global trend of gourmet cupcake shops, elevating the simple treat into a canvas for artisanal flavors and elaborate decorations. Today, the chocolate cupcake with vanilla buttercream stands as a timeless classic, bridging the gap between 18th-century innovation and modern indulgence.
Why This Recipe Works
The science behind this recipe is what separates a good cupcake from a great one. First and foremost, the decision to use oil instead of butter in the batter is deliberate. Butter contains water and milk solids which can lead to a tougher gluten structure and a drier texture when the fat re-solidifies at room temperature. Oil, remaining liquid at room temperature, coats the flour proteins more effectively, inhibiting excessive gluten formation and resulting in a sensationally tender crumb that stays moist for days.
Secondly, we employ the ‘blooming’ technique. Cocoa powder is essentially dried solids from the cacao bean, and like ground coffee, it needs heat to release its full flavor potential. By whisking the cocoa powder with hot brewed coffee (or hot water), we dissolve the particles completely and release the flavorful oils trapped within. The acidity of the coffee also enhances the chocolate flavor without making the cake taste like mocha. Finally, the use of buttermilk is crucial. Its acidity reacts with the baking soda to create carbon dioxide, providing a powerful lift that makes the cupcakes light and airy despite their richness. It also tenderizes the gluten, ensuring a soft, velvety mouthfeel.
Why You’ll Love This Recipe
- ✓Stays moist for up to 4 days due to oil-based batter.
- ✓Deep chocolate flavor achieved by blooming cocoa in hot coffee.
- ✓Perfectly balanced sweetness with the vanilla buttercream.
- ✓Simple one-bowl method for the batter.
- ✓Versatile base that pairs well with any frosting flavor.
Equipment You’ll Need
- ✓12-cup muffin tin
- ✓Cupcake liners
- ✓Large mixing bowl
- ✓Whisk
- ✓Stand mixer or electric hand mixer
- ✓Measuring cups and spoons
- ✓Wire cooling rack
- ✓Piping bag and tips (optional)
Ingredients
- ✓1 cup Granulated Sugar
- ✓3/4 cup plus 2 tbsp All-Purpose Flour
- ✓1/4 cup plus 2 tbsp Unsweetened Cocoa Powder (Dutch-process preferred)
- ✓3/4 tsp Baking Powder
- ✓3/4 tsp Baking Soda
- ✓1/2 tsp Salt
- ✓1 large Egg, room temperature
- ✓1/2 cup Buttermilk, room temperature
- ✓1/4 cup Vegetable Oil (or Canola Oil)
- ✓1 tsp Pure Vanilla Extract
- ✓1/2 cup Hot Brewed Coffee (or hot water)
- ✓1 cup Unsalted Butter, softened (for frosting)
- ✓3-4 cups Powdered Sugar, sifted (for frosting)
- ✓2-3 tbsp Heavy Cream or Milk (for frosting)
- ✓1 tbsp Pure Vanilla Extract (for frosting)
- ✓Pinch of Salt (for frosting)
Instructions
- Preheat your oven to 350°F (175°C) and line a standard 12-cup muffin tin with paper liners.
- In a large mixing bowl, sift together the flour, sugar, cocoa powder, baking powder, baking soda, and salt. Whisk well to ensure the dry ingredients are evenly combined.
- Add the egg, buttermilk, vegetable oil, and vanilla extract to the dry ingredients.
- Mix on medium speed with an electric mixer (or whisk vigorously by hand) for about 2 minutes. The batter should be smooth and well-incorporated.
- Reduce the mixer speed to low and carefully pour in the hot coffee (or hot water). The batter will be very thin and liquidy—this is normal and essential for a moist cupcake.
- Pour the batter into the prepared cupcake liners, filling them about 2/3 full. Do not overfill, or they will spill over while baking.
- Bake in the preheated oven for 18-22 minutes, or until a toothpick inserted into the center comes out clean or with just a few moist crumbs attached.
- Remove the cupcakes from the oven and let them cool in the pan for 5 minutes before transferring them to a wire rack to cool completely.
- While the cupcakes cool, prepare the buttercream. In a stand mixer fitted with the paddle attachment, beat the softened butter on medium-high speed for about 5 minutes until it is pale and creamy.
- Gradually add the powdered sugar, one cup at a time, mixing on low speed until incorporated. Scrape down the sides of the bowl as needed.
- Add the vanilla extract, a pinch of salt, and 2 tablespoons of heavy cream. Beat on medium-high speed for another 3-5 minutes until the frosting is light, fluffy, and airy. Add more cream if the frosting is too stiff, or more sugar if it’s too loose.
- Once the cupcakes are completely cool, pipe or spread the buttercream generously on top. Decorate with sprinkles if desired.
Expert Cooking Tips
- ✓Do not over-bake. Check the cupcakes at the 18-minute mark to ensure they stay moist.
- ✓Use room temperature ingredients (egg, buttermilk) to ensure the batter emulsifies properly.
- ✓Sifting the cocoa powder and powdered sugar is crucial to avoid lumps in your batter and frosting.
- ✓If you don’t have buttermilk, make a substitute by adding 1/2 tablespoon of lemon juice or vinegar to 1/2 cup of milk and letting it sit for 5 minutes.
- ✓Using hot coffee enhances the chocolate flavor without adding a coffee taste; don’t skip the heat!
- ✓Fill liners only 2/3 full to create a nice dome without overflowing.
- ✓Whip the buttercream longer than you think necessary—this introduces air and makes it less greasy.
Substitutions and Variations
Baking is a science, but there is some room for flexibility. If you do not have buttermilk, you can create a ‘sour milk’ substitute using regular milk and vinegar or lemon juice, or use watered-down sour cream or plain yogurt. For the oil, any neutral-flavored oil like canola, vegetable, or grapeseed oil works perfectly; melted coconut oil can also be used but may impart a slight coconut flavor. Gluten-free all-purpose flour blends (specifically those containing xanthan gum) can be swapped 1:1 for regular flour with good results. Regarding the coffee, if you are sensitive to caffeine or baking for children, hot water works perfectly fine, though the chocolate flavor might be slightly less intense. For the frosting, you can use salted butter if you prefer a sweet-salty profile, just omit the extra pinch of salt.
Common Mistakes to Avoid
The most common mistake is over-baking the cupcakes, which dries them out immediately. Trust the toothpick test; a few moist crumbs are better than a clean dry stick. Another frequent error is measuring flour incorrectly. Scooping directly from the bag packs the flour down, leading to too much dry ingredient and a dense cake. Always use the ‘spoon and level’ method or a kitchen scale. In the frosting stage, using butter that is too soft or melted will result in a greasy, runny mess that won’t hold its shape. The butter should be cool room temperature—soft enough to dent with a finger, but not shiny or oily. Finally, frosting the cupcakes before they are 100% cool will cause the buttercream to slide right off.
Serving Suggestions
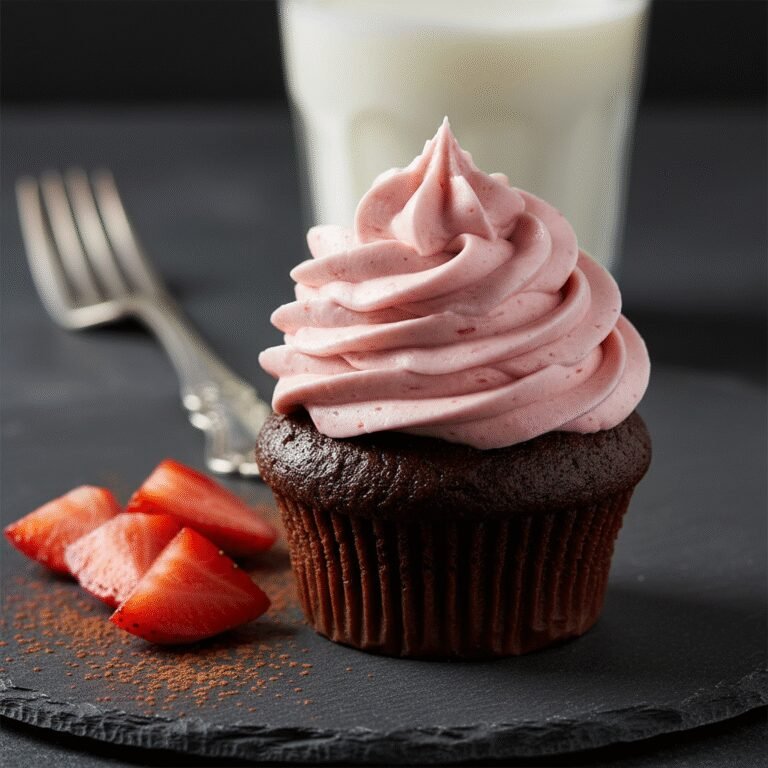
These cupcakes are best served at room temperature. If they have been refrigerated, allow them to sit on the counter for 20-30 minutes before eating to let the buttercream soften and the sponge relax. They pair beautifully with a cold glass of milk, a hot cup of coffee, or even a scoop of strawberry ice cream for a classic Neapolitan flavor profile. For a party, arrange them on a tiered stand and garnish with fresh berries, chocolate shavings, or colorful sprinkles to match the theme.
Storage and Reheating Tips
Store unfrosted cupcakes in an airtight container at room temperature for up to 3 days. Once frosted, they can stay at room temperature for 2 days in a cool kitchen. For longer storage, place them in the refrigerator for up to 5 days, but ensure the container is airtight to prevent the fridge smells from seeping into the fat of the buttercream. You can also freeze the cupcakes (frosted or unfrosted) for up to 3 months. Flash freeze them on a baking sheet first so the frosting hardens, then wrap them individually in plastic wrap and place in a freezer bag. Thaw on the counter for a few hours before serving.
Nutrition Facts (Estimated)
| Serving Size | 1 cupcake |
| Calories | 380 |
| Fat | 18g |
| Saturated Fat | 6g |
| Unsaturated Fat | 11g |
| Trans Fat | 0g |
| Cholesterol | 45mg |
| Sodium | 190mg |
| Carbohydrates | 52g |
| Fiber | 2g |
| Sugar | 28g |
| Protein | 4g |
Frequently Asked Questions
Can I use natural cocoa powder instead of Dutch-process?
Yes, you can. This recipe relies on baking soda, which reacts with the acid in natural cocoa. However, Dutch-process cocoa will give a darker color and a fudgier flavor.
Why is the batter so runny?
The batter is intentionally thin because of the liquid content (coffee, oil, buttermilk). This high hydration is what guarantees a moist crumb after baking. Do not add more flour!
Can I make this recipe as a cake instead?
Absolutely. This batter fits perfectly into an 8-inch round cake pan. You will need to increase the baking time to approximately 30-35 minutes.
Why did my cupcakes sink in the middle?
Sinking usually happens if the oven door was opened too early, causing a temperature drop, or if there was too much leavening (baking powder/soda). Ensure your oven temp is accurate.
My buttercream is grainy, how do I fix it?
Grainy buttercream usually means the sugar hasn’t dissolved or the butter was too cold. Keep beating it on high speed; adding a teaspoon more of liquid helps dissolve the sugar.
Can I reduce the sugar in the recipe?
Reducing sugar in baking affects texture and moisture, not just sweetness. It is not recommended to reduce the sugar in the batter significantly, or the cupcakes may be dry.
How do I get the perfect swirl on top?
Use a large piping tip, like a Wilton 1M or 2D. Start in the center, move to the outer edge, and spiral inward and upward, releasing pressure as you pull away at the top.
Are these cupcakes dairy-free?
The batter contains buttermilk, and the frosting uses butter. To make them dairy-free, use soy or almond milk with vinegar for the buttermilk and a vegan butter stick for the frosting.
Conclusion
There is something undeniably magical about a homemade chocolate cupcake. It’s a small, personal portion of happiness that brings out the inner child in everyone. This recipe for Moist Chocolate Cupcakes with Vanilla Buttercream is designed to be your forever favorite—reliable, delicious, and impressive every single time. Whether you are a novice baker or a seasoned pro, the combination of the tender, dark chocolate crumb and the sweet, creamy vanilla frosting is a winner. So, preheat that oven, brew some coffee, and get ready to bake the best cupcakes of your life. Enjoy every bite!