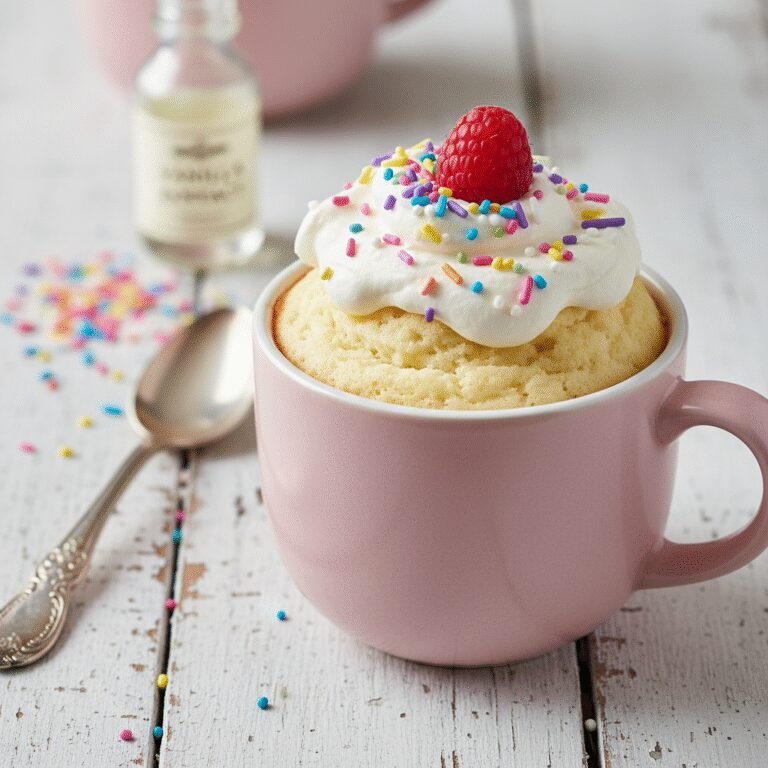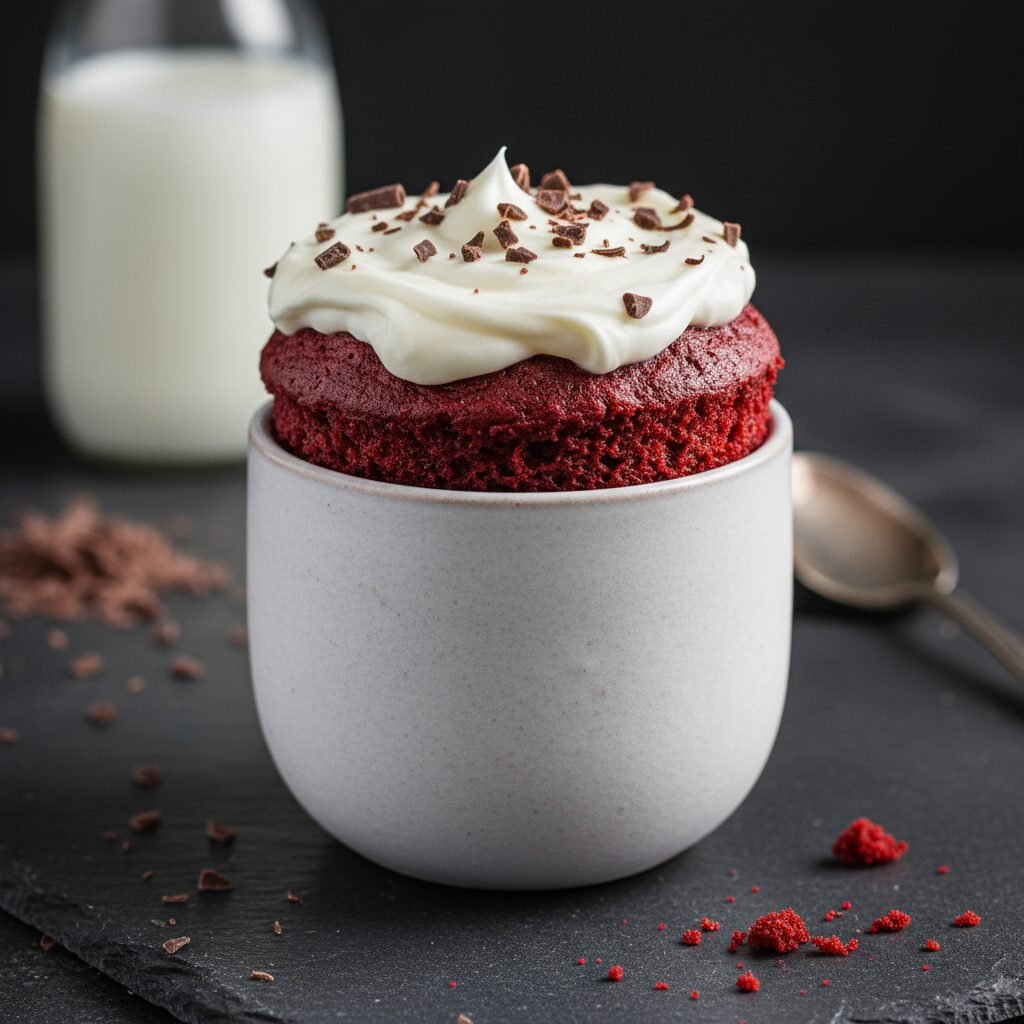
The Ultimate 5-Minute Red Velvet Mug Cake With Cream Cheese Frosting
Easy Red Velvet Mug Cake With Cream Cheese Frosting Recipe
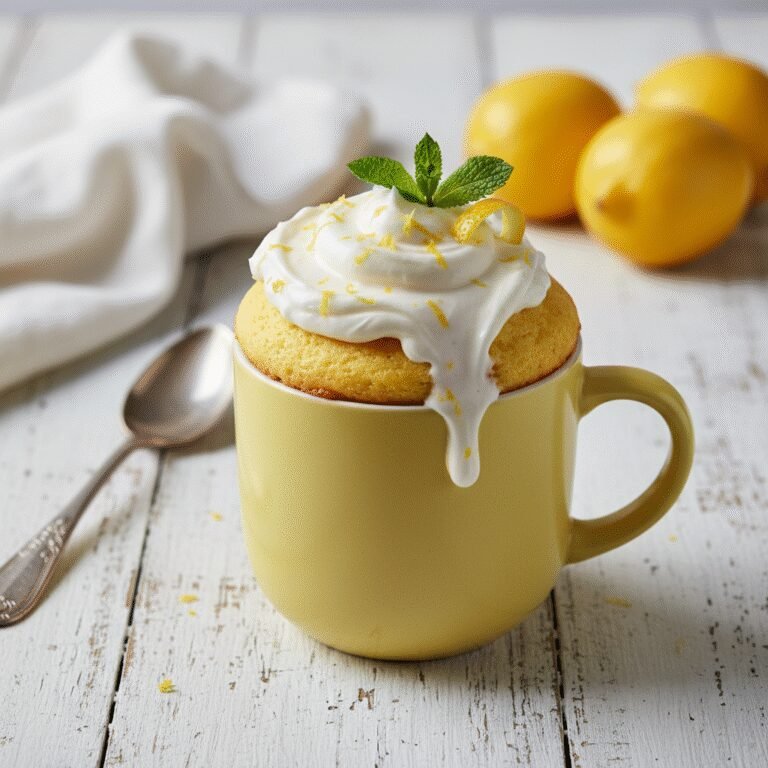
Satisfy your late-night dessert cravings instantly with this decadent, single-serving Red Velvet Mug Cake. Perfectly moist, vibrant red, and topped with a tangy, lush cream cheese frosting, it delivers bakery-quality flavor in under 5 minutes using just your microwave.
5 minutes
2 minutes
7 minutes
1 serving
Dessert
Microwave
American
Vegetarian
There is a specific kind of hunger that strikes at 9 PM—a longing for something sweet, comforting, and indulgent, yet the thought of dragging out a stand mixer, preheating an oven, and waiting an hour for a cake to bake is simply out of the question. Enter the Red Velvet Mug Cake: the ultimate solution for the impatient gourmand. This isn’t just a sponge in a cup; it is a carefully calibrated recipe designed to mimic the tender, velvety crumb of a traditional layer cake, scaled down to a single, perfectly portioned serving.
Red velvet is a unique flavor profile that often gets misunderstood as simply ‘chocolate cake dyed red.’ True aficionados know that it is a subtle dance between mild cocoa, tangy buttermilk, and vanilla, all wrapped in a texture that is distinctively soft—hence the name ‘velvet.’ Recreating this in a microwave is a culinary challenge. Microwaves cook by vibrating water molecules, which can often lead to rubbery, dry, or unevenly cooked textures. However, through the right balance of fat (vegetable oil instead of butter) and moisture (buttermilk is non-negotiable here), we achieve a crumb that is surprisingly fluffy and moist.
But what is a red velvet cake without its soulmate, cream cheese frosting? This recipe includes a quick, small-batch frosting that you can whip up while the cake ‘bakes’ for 90 seconds. The contrast between the warm, steaming cake and the cool, tangy, sweet frosting is a sensory experience that rivals any high-end bakery slice. Whether you are celebrating a solo victory, comforting a broken heart, or simply treating yourself because you deserve it, this mug cake is your new go-to recipe for instant gratification.
History & Origins
The history of Red Velvet cake is as rich and layered as the dessert itself, filled with culinary chemistry, marketing genius, and a bit of mystery. The term ‘velvet’ cake originated in the Victorian era, distinguishing cakes with a soft, fine crumb from the coarser sponge cakes of the day. This texture was often achieved using almond flour, cornstarch, or cocoa. By the early 20th century, ‘Devil’s Food’ cakes were popular, and it was here that the ‘red’ aspect began to emerge naturally.
Before the advent of Dutch-processed cocoa, cocoa powder was more acidic. When this raw cocoa mixed with the acidic buttermilk and vinegar in the batter, the anthocyanins in the cocoa turned a distinct reddish-brown hue. It wasn’t the vibrant fire-engine red we know today, but a mahogany color that was visually striking. During the Great Depression and World War II, when food rationing limited access to sugar and butter, bakers used beet juice to keep cakes moist and enhance the color, further cementing the association between the cake and the color red.
The modern, vibrant iteration of the cake owes its fame largely to the Adams Extract company in Texas. In an effort to sell more food coloring and vanilla extract during the Depression, John A. Adams created a recipe card for ‘Red Velvet Cake’ that used a significant amount of red dye. This marketing ploy worked, and the cake became a Southern staple. A persistent urban legend also attributes the recipe to the Waldorf-Astoria Hotel in New York, claiming a patron was charged a fortune for the recipe and released it to the public in revenge—though this is likely folklore.
In the 2000s, the cake saw a massive resurgence in pop culture, partly due to the bakery ‘Magnolia’ in New York City and its appearance in ‘Sex and the City.’ As the mug cake trend took off in the 2010s, driven by internet culture and the desire for single-serving treats, adapting this complex cake for the microwave became a holy grail for food bloggers. This recipe represents the culmination of that history: Victorian texture, Southern flavor, and modern convenience.
Why This Recipe Works
This recipe succeeds where many other mug cakes fail because it addresses the fundamental differences between oven baking and microwave cooking. In an oven, ambient heat slowly penetrates the batter, allowing leavening agents to react steadily and gluten to develop structure without toughening. A microwave, however, steams the food from the inside out rapidly. This intense burst of energy often results in a texture that is rubbery or omelet-like, especially if eggs are used in a small quantity of batter.
First, this recipe omits the egg entirely. In a full-sized cake, eggs provide structure and richness, but in a 10-ounce mug, even one egg is too much protein, turning the cake into a sponge. By removing the egg and relying on baking powder for lift, we ensure the texture remains fudge-like and tender.
Second, we use oil instead of butter. Butter contains water and milk solids; when microwaved, the water evaporates quickly, leaving the cake dry once it cools. Oil is 100% fat and remains liquid at room temperature, coating the flour proteins and preventing gluten formation, which guarantees a moist mouthfeel even after the rapid cooking process.
Finally, the inclusion of real buttermilk and a tiny splash of vinegar is scientifically crucial. The acidity reacts with the baking powder for immediate lift (essential for the short cook time) and breaks down the gluten strands for tenderness. It also provides that signature tangy flavor that cuts through the sugar, distinguishing this as a true Red Velvet rather than just a red-colored vanilla cake.
Why You’ll Love This Recipe
- ✓Ready in under 7 minutes from pantry to spoon.
- ✓No eggs required, preventing a rubbery texture.
- ✓Authentic buttermilk tang for true Red Velvet flavor.
- ✓Includes a luscious, 3-ingredient cream cheese frosting.
- ✓Single-serving portion control (no leftover temptation).
- ✓Minimal cleanup—mix and bake in the same mug.
Equipment You’ll Need
- ✓Microwave-safe mug (10-12 oz capacity)
- ✓Measuring spoons
- ✓Small mixing bowl (for frosting)
- ✓Whisk or fork
- ✓Microwave
Ingredients
- ✓4 tablespoons All-Purpose Flour
- ✓2 tablespoons Granulated Sugar
- ✓1/2 teaspoon Unsweetened Cocoa Powder
- ✓1/4 teaspoon Baking Powder
- ✓1 pinch Salt
- ✓3 tablespoons Buttermilk (room temperature is best)
- ✓1 1/2 tablespoons Vegetable Oil (or neutral oil like canola)
- ✓1/2 teaspoon Red Food Coloring (liquid or gel)
- ✓1/4 teaspoon Vanilla Extract
- ✓FROSTING: 1 tablespoon Cream Cheese (softened)
- ✓FROSTING: 1 tablespoon Unsalted Butter (softened)
- ✓FROSTING: 2-3 tablespoons Powdered Sugar
Instructions
- In a microwave-safe mug (at least 10-12 oz size to prevent overflow), whisk together the flour, sugar, cocoa powder, baking powder, and salt until well combined and free of lumps.
- Add the buttermilk, vegetable oil, red food coloring, and vanilla extract to the dry ingredients.
- Mix gently but thoroughly with a spoon or small whisk. Ensure you scrape the bottom corners of the mug so no pockets of dry flour remain. The batter should be smooth and vibrant red.
- Place the mug in the center of the microwave. Cook on high power for 60 to 90 seconds. The timing depends on your microwave’s wattage (usually 1000W). Start with 60 seconds; the cake should rise and look set but slightly shiny on top. If it looks wet, add 10-15 second intervals. Do not overcook, or it will become dry.
- While the cake cools slightly, prepare the frosting. In a small bowl, mix the softened cream cheese, softened butter, and powdered sugar until smooth and creamy.
- Allow the cake to cool for at least 2-3 minutes before frosting (otherwise, the frosting will melt entirely).
- Dollop the cream cheese frosting onto the warm cake. Garnish with chocolate shavings or sprinkles if desired, and enjoy immediately.
Expert Cooking Tips
- ✓Do not overmix the batter once the wet ingredients are added; stop as soon as the flour streaks disappear to keep it tender.
- ✓Use a wide mug rather than a tall, thin one. This allows the cake to cook more evenly and prevents the center from being raw while the edges dry out.
- ✓Microwave wattages vary wildly. Watch your mug cake like a hawk the first time you make it. It is better to slightly undercook it than overcook it.
- ✓If you don’t have buttermilk, make a ‘sour milk’ substitute by adding a few drops of lemon juice or vinegar to regular milk and letting it sit for 5 minutes.
- ✓Gel food coloring is more concentrated than liquid. If using gel, just use a small drop; if using liquid, you need the full measure for that bright red color.
- ✓Soften your cream cheese and butter for the frosting while you gather ingredients to ensure no lumps.
Substitutions and Variations
This recipe is quite flexible, provided you maintain the ratio of wet to dry ingredients. **Flour:** You can use a 1:1 Gluten-Free All-Purpose flour blend (like King Arthur or Bob’s Red Mill) to make this gluten-free. Almond flour alone will not work as it lacks the structure needed for a mug cake. **Dairy:** If you are vegan or dairy-free, substitute the buttermilk with soy or almond milk mixed with 1/2 tsp of apple cider vinegar. For the frosting, use vegan butter and vegan cream cheese. **Sugar:** You can substitute granulated sugar with coconut sugar or a heat-stable sweetener like erythritol, though the texture may be slightly drier. **Oil:** Melted coconut oil or melted butter can be used, but vegetable oil yields the moistest result. Applesauce can be used for a lower-fat version, but the cake will be denser and more ‘gummy.’ **Dye:** If you prefer to avoid artificial dyes, you can use beet powder or simply omit it for a ‘brown velvet’ cake—the flavor will remain delicious.
Common Mistakes to Avoid
The most common mistake with mug cakes is **overcooking**. Because microwaves cook unevenly and continue to cook the food even after the timer stops (carryover cooking), a cake that looks perfectly dry in the microwave will be a brick by the time you eat it. Aim for a top that is tacky to the touch. Another mistake is **using the wrong size mug**. If the mug is too small, the batter will overflow, creating a mess. Always fill the mug no more than halfway. Finally, **forgetting to mix the bottom**. Mug corners are notorious for trapping dry flour. Make sure to dig your spoon all the way down when mixing the batter.
Serving Suggestions
This mug cake is best served warm, about 3 to 5 minutes after it comes out of the microwave. The residual heat makes the frosting slightly melty and luscious. For an extra indulgent treat, top with chopped pecans (a traditional Red Velvet pairing), mini chocolate chips, or a dusting of extra cocoa powder. If you want to turn this into a plated dessert, run a knife around the edge of the mug and invert it onto a plate, then pour the frosting over the top like a glaze. Serve with a side of cold milk or a hot espresso.
Storage and Reheating Tips
Mug cakes are designed to be eaten immediately. The texture degrades fairly quickly, becoming stale or rubbery within a few hours. However, if you absolutely must save it, cover the mug tightly with plastic wrap and store it in the refrigerator for up to 24 hours. To reheat, sprinkle a teaspoon of water over the top (to reintroduce moisture) and microwave in 10-second bursts until warm. Do not freeze this mug cake, as the texture will not survive the thawing process.
Nutrition Facts (Estimated)
| Serving Size | 1 mug cake with frosting |
| Calories | 480 |
| Fat | 24g |
| Saturated Fat | 9g |
| Unsaturated Fat | 14g |
| Trans Fat | 0g |
| Cholesterol | 25mg |
| Sodium | 310mg |
| Carbohydrates | 62g |
| Fiber | 2g |
| Sugar | 38g |
| Protein | 5g |
Frequently Asked Questions
Can I add an egg to this recipe?
It is not recommended for this specific single-serving recipe. A whole egg is too much volume and protein for this amount of flour, resulting in a rubbery, omelet-like texture. If you scale the recipe up, you could incorporate eggs, but for one mug, egg-free is best.
Why did my mug cake overflow?
This usually happens if the mug is too small or the baking powder is too fresh and active. Ensure your mug holds at least 10-12 ounces and is filled only halfway with batter before cooking.
Can I make this in the oven?
Technically yes, but the timing defeats the purpose. If you must, bake in an oven-safe ramekin at 350°F (175°C) for about 15-20 minutes. However, the texture is optimized for steaming in a microwave.
Is the red food coloring necessary?
For the flavor? No. For the ‘Red Velvet’ experience? Yes. Without the dye, the cake will be a light cocoa brown color. It will still taste delicious, but it won’t have the signature look.
Can I multiply this recipe?
You can mix a double batch in a bowl, but you must cook them in separate mugs individually. Microwaving two mugs at once alters the cooking time and heat distribution unpredictably.
Why is my frosting lumpy?
Lumpy frosting occurs when the butter or cream cheese is too cold. They must be softened to room temperature to blend smoothly with the powdered sugar.
Can I use regular milk instead of buttermilk?
Buttermilk is acidic, which helps activate the baking powder and tenderize the flour. If you use regular milk, the cake won’t rise as well. Add a splash of vinegar or lemon juice to regular milk to create a substitute.
My cake turned out hard. What happened?
You likely overcooked it. Microwave power varies significantly. Next time, reduce the cooking time by 15-20 seconds. Also, ensure you measured your flour correctly; too much flour makes it hard.
Conclusion
In a world that often demands patience and delayed gratification, the Red Velvet Mug Cake stands as a delicious rebellion. It proves that you don’t need a special occasion, hours of time, or a sink full of dirty dishes to enjoy a high-quality dessert. With its vibrant color, tender crumb, and tangy-sweet frosting, this recipe is a testament to the magic of chemistry and the convenience of modern cooking. So the next time the craving hits, remember: you are only five minutes away from a warm, comforting bite of red velvet bliss.