The Ultimate Easy No Bake Oreo Cheesecake In 9×13 Pan Recipe
Easy No Bake Oreo Cheesecake In 9×13 Pan Recipe
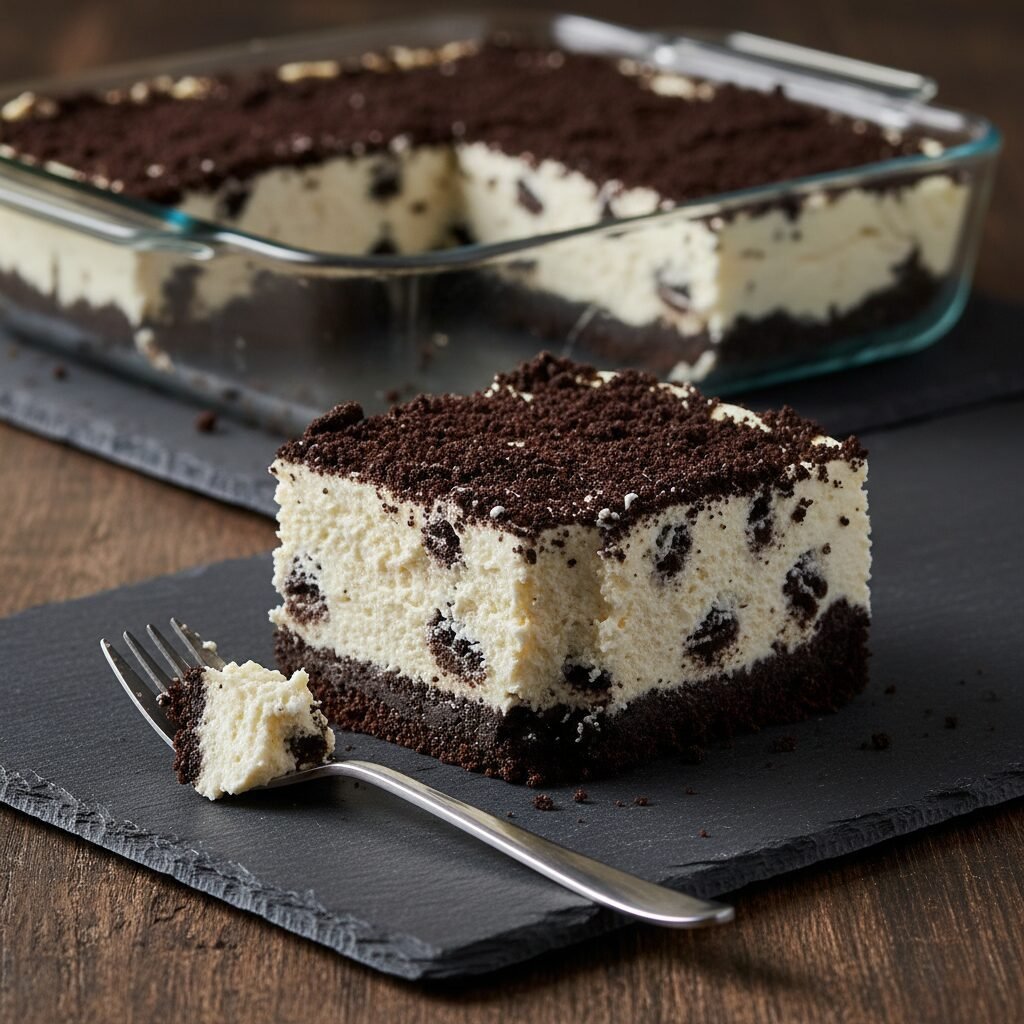
Indulge in the creamy, dreamy layers of this Easy No Bake Oreo Cheesecake, perfectly portioned in a 9×13 pan for crowds. With a buttery Oreo crust and a velvety cookies-and-cream filling, this dessert requires zero oven time and guarantees a slice of heaven in every bite.
25 minutes
0 minutes
4 hours 25 minutes (includes chilling)
15-20 servings
Dessert
Chilling / No-Bake
American
Vegetarian
If there is one dessert that universally bridges the gap between childhood nostalgia and sophisticated indulgence, it is the Cookies and Cream Cheesecake. This Easy No Bake Oreo Cheesecake in a 9×13 pan is not just a recipe; it is a celebration of texture and flavor that requires absolutely no heat. Imagine a dessert where the crust offers a deep, dark chocolate crunch, providing the perfect foundation for a filling that is light as air yet rich with the tang of cream cheese. We are talking about a velvety smooth mixture, speckled generously with crushed Oreo cookies, creating a monochrome masterpiece that looks as good as it tastes.
The beauty of making this in a 9×13 pan cannot be overstated. Traditional springform pans are fantastic for height, but the rectangular slab format allows for easier slicing, better crust-to-filling ratios, and the ability to feed a hungry crowd at a potluck or family gathering without the stress of water baths or cracked tops. This recipe relies on the magic of heavy cream and cream cheese aerated to perfection, stabilizing in the refrigerator to create a sliceable consistency that melts in your mouth. It is the ultimate summer dessert when you can’t bear to turn on the oven, yet it is rich enough to stand proudly on a holiday dessert table. From the first blitz of the cookie crumbs to the final garnish of whipped cream swirls, this dish promises minimal effort with maximum payoff, delivering a professional-bakery-quality treat right from your home kitchen.
History & Origins
The history of cheesecake is a journey that spans millennia, arguably beginning in ancient Greece where it was served to athletes during the first Olympic Games in 776 BC. These early versions were simple mixtures of cheese, honey, and wheat. However, the cheesecake we know and love today owes much of its identity to the accidental invention of modern cream cheese in New York in 1872 by dairyman William Lawrence. This revolutionized the texture, moving away from the grainy ricotta or cottage cheese bases of the past to the smooth, dense style associated with New York cheesecake.
The Oreo cookie, the other star of this show, made its debut in 1912, produced by the National Biscuit Company (Nabisco) in Chelsea, New York City. It quickly became the best-selling cookie in the United States. The marriage of these two icons—the tangy, smooth cream cheese and the dark, cocoa-rich Oreo—likely gained massive popularity in the late 20th century as ‘Cookies and Cream’ became a staple flavor profile for ice creams and confections. The ‘No-Bake’ evolution of the cheesecake gained traction in the mid-20th century with the advent of convenient refrigeration and stabilized whipped toppings, offering home cooks a way to produce elegant desserts without the technical difficulties of baking custards. This specific iteration, the 9×13 pan version, is a modern adaptation born of convenience and the American love for ‘bar’ desserts that are easy to transport and share.
Why This Recipe Works
This recipe succeeds where others fail because of the careful balance of fat, sugar, and aeration. Traditional baked cheesecakes rely on eggs and heat to set the structure, which can be temperamental. This no-bake version relies on the mechanical aeration of heavy whipping cream (or stabilized whipped topping) folded into softened cream cheese. The fat globules in the cream trap air bubbles, creating a stable foam that, when chilled, firms up sufficiently to be sliced.
Furthermore, we use a specific ratio of butter to cookie crumbs for the crust. Too much butter makes the crust greasy and hard; too little makes it crumble apart. By pressing this mixture firmly into a 9×13 pan, we create a solid base that doesn’t require baking to hold its shape. The filling incorporates powdered sugar rather than granulated sugar; the cornstarch in the powdered sugar acts as a slight stabilizer and prevents the gritty texture that granulated sugar can sometimes leave in no-bake desserts. Finally, chilling is the secret ingredient. Allowing the fats to resolidify over at least 4 hours (preferably overnight) ensures that the slice holds its sharp edges, providing that satisfying contrast between the crisp crust and the lush filling.
Why You’ll Love This Recipe
- ✓Requires absolutely no baking, keeping your kitchen cool.
- ✓Feeds a large crowd easily with 15-20 generous servings.
- ✓Perfect balance of tangy cheesecake and sweet Oreo cookies.
- ✓Can be made up to 2 days in advance for stress-free hosting.
- ✓Eliminates the risk of cracking or sinking associated with baked cheesecakes.
- ✓Versatile base that allows for various toppings like ganache or fruit.
Equipment You’ll Need
- ✓9×13 inch baking pan
- ✓Food processor or gallon zip-top bag and rolling pin
- ✓Large mixing bowl
- ✓Electric hand mixer or stand mixer
- ✓Silicone spatula
- ✓Measuring cups and spoons
- ✓Offset spatula
Ingredients
- ✓45 Oreo cookies (divided usage: 30 for crust, 15 for filling/topping)
- ✓1/2 cup unsalted butter, melted
- ✓24 oz (3 blocks) full-fat cream cheese, softened to room temperature
- ✓1 cup powdered sugar, sifted
- ✓1 teaspoon pure vanilla extract
- ✓1 teaspoon lemon juice (optional, for tang)
- ✓16 oz heavy whipping cream (chilled) OR 2 tubs (8oz each) frozen whipped topping, thawed
Instructions
- Prepare the crust: Place 30 Oreo cookies (entire cookies, filling included) into a food processor. Pulse until they are fine crumbs. If you don’t have a processor, place them in a zip-top bag and crush with a rolling pin.
- Mix crumbs with butter: Pour the melted butter over the cookie crumbs and pulse or stir until the mixture resembles wet sand.
- Form the crust: Dump the crumb mixture into your 9×13 inch pan. Using the bottom of a measuring cup or glass, press the crumbs firmly and evenly into the bottom of the pan to create a compact layer. Place the pan in the freezer while you make the filling.
- Whip the cream (skip if using whipped topping): In a chilled bowl, whip the cold heavy cream until stiff peaks form. Be careful not to over-whip into butter. Set aside in the fridge.
- Beat cream cheese: In a large mixing bowl, beat the softened cream cheese until completely smooth and creamy. There should be no lumps. This usually takes about 2-3 minutes on medium-high speed.
- Add sugar and flavorings: Add the sifted powdered sugar, vanilla extract, and lemon juice to the cream cheese. Beat until fully combined and fluffy.
- Combine mixtures: Gently fold the whipped cream (or thawed whipped topping) into the cream cheese mixture using a spatula. Fold slowly to keep the mixture airy. Do not stir vigorously.
- Add crunch: Roughly chop the remaining 15 Oreo cookies. Fold about 2/3 of these chopped cookies into the cheesecake batter.
- Assemble: Remove the crust from the freezer. Pour the cheesecake filling over the crust and spread it into an even layer using an offset spatula.
- Top and Chill: Sprinkle the remaining chopped Oreos over the top. Cover the pan tightly with plastic wrap and refrigerate for at least 4 hours, preferably overnight, to allow the filling to set firmly.
- Serve: Once set, slice into squares and serve cold. Wipe your knife between cuts for clean edges.
Expert Cooking Tips
- ✓Ensure your cream cheese is truly at room temperature before mixing to avoid a lumpy texture.
- ✓If using heavy cream, chill your bowl and beaters beforehand to get the best volume.
- ✓Press the crust down very firmly; a loose crust will crumble when you try to serve a slice.
- ✓Do not use ‘Double Stuf’ Oreos for the crust as the extra filling can make the crust too oily; stick to regular Oreos.
- ✓Sift your powdered sugar to prevent white lumps in your smooth filling.
- ✓Use a hot knife (dipped in hot water and wiped dry) to get perfect, bakery-style slices.
- ✓Allow the cheesecake to set overnight for the absolute best texture and sliceability.
Substitutions and Variations
This recipe is quite flexible regarding ingredients. If you cannot find Oreo brand cookies, any chocolate sandwich cookie works perfectly fine. For a gluten-free version, simply swap in gluten-free chocolate sandwich cookies; the rest of the recipe is naturally gluten-free. If you prefer a lighter dessert, you can use low-fat cream cheese (Neufchâtel), though the set might be slightly softer. For the whipped component, heavy whipping cream yields a richer, more natural taste, but Cool Whip or a generic stabilized whipped topping is a classic, convenient substitute that holds up very well in warm weather. You can also experiment with the crust by using graham crackers or chocolate graham crackers if you find the all-Oreo crust too rich. For a different flavor profile, try using Golden Oreos or Mint Oreos.
Common Mistakes to Avoid
The most common mistake is using cold cream cheese. If the cream cheese isn’t soft, it won’t blend with the sugar, leaving you with tiny white lumps that ruin the texture. Another pitfall is over-beating the heavy cream; if you take it too far, it turns into butter and separates, making the filling grainy. Conversely, under-whipping the cream means the cheesecake won’t set properly and will be runny. Rushing the chilling time is also a frequent error; 4 hours is the absolute minimum, but cutting into it too soon will result in a dessert that collapses on the plate. Finally, be careful not to crush the Oreos for the filling too finely; you want chunks for texture, not gray dust that turns the whole cake a muddy color.
Serving Suggestions
Serve this cheesecake chilled, straight from the refrigerator. For an extra touch of decadence, drizzle each square with chocolate ganache or hot fudge sauce just before serving. A dollop of fresh whipped cream and a whole mini Oreo on each slice makes for a beautiful presentation. Fresh berries, such as strawberries or raspberries, add a tart contrast that cuts through the richness of the chocolate and cream. Pair this dessert with a hot cup of coffee or a cold glass of milk to balance the sweetness. If you are serving this for a party, cut them into smaller, bite-sized squares and serve them in cupcake liners for easy finger food.
Storage and Reheating Tips
This cheesecake must be stored in the refrigerator. Cover the pan tightly with plastic wrap or aluminum foil to prevent it from absorbing fridge odors. It will stay fresh for up to 5 days. Do not leave it out at room temperature for more than an hour, as the dairy can spoil and the structure will soften. For longer storage, this cheesecake freezes beautifully. Cut it into slices, freeze them on a baking sheet until solid, then wrap each slice individually in plastic wrap and foil. They can be frozen for up to 3 months. Thaw overnight in the refrigerator before serving.
Nutrition Facts (Estimated)
| Serving Size | 1 slice |
| Calories | 420 |
| Fat | 28g |
| Saturated Fat | 14g |
| Unsaturated Fat | 12g |
| Trans Fat | 0g |
| Cholesterol | 65mg |
| Sodium | 290mg |
| Carbohydrates | 38g |
| Fiber | 1g |
| Sugar | 28g |
| Protein | 4g |
Frequently Asked Questions
Can I use low-fat cream cheese?
Yes, you can use Neufchâtel or low-fat cream cheese, but the texture will be slightly softer and less rich. Avoid fat-free cream cheese as it often contains stabilizers that affect the setting process.
Why is my cheesecake filling runny?
This usually happens if the heavy cream wasn’t whipped to stiff peaks before folding, or if the mixture was over-mixed, knocking the air out. It can also happen if the cheesecake hasn’t been chilled long enough.
Can I make this recipe in a springform pan?
Absolutely. This quantity fits well in a 9-inch or 10-inch springform pan. The slices will be thicker, so you may need to chill it slightly longer to ensure the center is firm.
Do I need to remove the cream from the Oreos for the crust?
No, leave the cream filling in! It acts as a binder along with the butter, helping the crust hold together better.
How do I get clean cuts when slicing?
Use a sharp chef’s knife. Dip the blade into a tall glass of hot water, wipe it dry with a paper towel, make one cut, and repeat the process for every single slice.
Can I use whipped topping instead of heavy cream?
Yes, you can substitute the 16oz of heavy cream with about 16oz (two standard tubs) of thawed frozen whipped topping like Cool Whip. It makes the preparation faster and slightly sweeter.
Is this recipe gluten-free?
It is not gluten-free if using standard Oreos. However, if you use gluten-free Oreo-style cookies, the rest of the ingredients (cream cheese, sugar, cream, butter) are naturally gluten-free.
Can I add gelatin for a firmer set?
You can, but it isn’t necessary if you whip the cream properly. If you need it to withstand hot weather, dissolve 1 teaspoon of unflavored gelatin in 1 tablespoon of water, warm it to dissolve, and beat it into the cream cheese mixture before folding in the cream.
Conclusion
This Easy No Bake Oreo Cheesecake in a 9×13 pan is the ultimate testament to the fact that delicious food doesn’t have to be complicated. It combines the beloved flavors of America’s favorite cookie with a sophisticated, creamy texture that rivals any high-end bakery. Whether you are a novice baker looking for a foolproof win or a seasoned pro needing a quick, crowd-pleasing dessert, this recipe delivers every time. The contrast of the crunchy, buttery crust against the smooth, airy filling is simply irresistible. So, grab your mixer, clear some space in the fridge, and get ready to become the hero of your next potluck or family dinner.