The Ultimate Easy No-Bake Lemon Cheesecake with Cloud-Like Whipped Cream Topping
Easy No Bake Lemon Cheesecake With Whipped Cream Topping Recipe
Discover the perfect balance of zesty citrus and creamy indulgence with this foolproof No-Bake Lemon Cheesecake. Featuring a buttery graham cracker crust and a luscious, mousse-like filling, it’s the ultimate make-ahead dessert for warm days or festive gatherings.
25 minutes
0 minutes
6 hours 25 minutes (includes chilling)
10-12 servings
Dessert
No-Bake / Chilling
American
Vegetarian
There is something undeniably magical about the marriage of tart, bright lemon and rich, velvety cream cheese. This Easy No-Bake Lemon Cheesecake with Whipped Cream Topping is a celebration of that classic flavor profile, designed for those who crave bakery-quality results without the fuss of a water bath or the heat of an oven. As a food blogger who lives for that perfect bite—where the crunch of a buttery crust meets a silky, dissolving filling—I can confidently say this recipe is a game-changer. It captures the essence of summer sunshine on a plate, yet it is comforting enough to serve year-round.
The texture here is distinct from a baked New York-style cheesecake; rather than being dense and heavy, this no-bake version is light, airy, and almost mousse-like, thanks to the incorporation of homemade whipped cream directly into the batter. The lemon flavor is punchy and authentic, derived from both fresh juice and zest, cutting through the richness of the dairy to cleanse the palate. This dessert is not just about taste; it is about the experience of creating something beautiful with minimal effort. Whether you are hosting a bridal shower, looking for a refreshing end to a barbecue, or simply treating yourself after a long week, this cheesecake delivers high-impact flavor with low-stress preparation. It sits proudly on the dessert table, gleaming with a cloud of whipped cream, inviting everyone to take a slice of pure bliss.
History & Origins
The history of cheesecake is a journey that spans millennia and continents, evolving from a simple energy source to the decadent dessert we know today. While many associate cheesecake with the iconic New York delis of the 20th century, its origins can be traced back to ancient Greece. Historians believe that cheesecake was served to athletes during the first Olympic Games in 776 B.C. on the island of Samos. These early versions were far more rustic, consisting of pounded cheese, honey, and wheat heated in an earthenware pot.
As the Roman Empire expanded, they adopted the recipe, adding eggs and baking it under hot bricks, calling it ‘libum’. The concept spread across medieval Europe, adapting to local ingredients. However, the modern cheesecake revolution began in 1872 in Chester, New York, when dairyman William Lawrence accidentally invented cream cheese while trying to replicate French Neufchâtel. This smoother, richer cheese became the backbone of the American cheesecake.
The ‘No-Bake’ phenomenon gained traction in the mid-20th century, coinciding with the rise of modern refrigeration and convenience cooking. Home cooks sought ways to create impressive desserts without occupying the oven, especially during hot summers. Gelatin-set pies and icebox cakes paved the way for the no-bake cheesecake, which relies on the coagulation of proteins and fats upon chilling rather than egg coagulation through heat. This specific lemon variation pays homage to the icebox pies of the 1950s, blending the nostalgia of retro Americana with the sophisticated, fresh flavors preferred by today’s palate.
Why This Recipe Works
This recipe succeeds because it meticulously balances the science of aeration and acid coagulation. Traditional baked cheesecakes rely on eggs to provide structure, which requires careful temperature control to avoid cracking or curdling. In contrast, this no-bake method utilizes the natural properties of heavy cream and the reaction between lemon acid and cream cheese to set the filling.
First, beating the heavy cream to stiff peaks introduces millions of tiny air bubbles. When this is gently folded into the sweetened cream cheese mixture, it lightens the density, creating a texture that is substantial yet ethereal. Secondly, the addition of fresh lemon juice does more than just flavor the dish; the citric acid actually helps to firm up the proteins in the cream cheese and condensed milk (if used) or heavy cream mixture, acting as a mild thickener.
Furthermore, the crust ratio is optimized to ensure it holds together without being rock-hard. We use a specific amount of melted butter to moisten the graham cracker crumbs, ensuring that when the butter solidifies in the fridge, it acts as a flavorful glue. The chilling time is the final, crucial ingredient, allowing the fats to recrystallize and the moisture to redistribute, resulting in a slice that holds its shape perfectly when cut, without the need for gelatin fillers that can sometimes create a rubbery texture.
Why You’ll Love This Recipe
- ✓Requires absolutely no oven time, keeping your kitchen cool.
- ✓Features a light, mousse-like texture that melts in your mouth.
- ✓Packed with fresh lemon zest and juice for a natural citrus kick.
- ✓Can be made up to 2 days in advance, perfect for party prep.
- ✓Foolproof method avoiding cracks, water baths, or sinking centers.
Equipment You’ll Need
- ✓9-inch Springform Pan
- ✓Electric Hand Mixer or Stand Mixer
- ✓Large Mixing Bowls
- ✓Rubber Spatula
- ✓Microplane or Zester
- ✓Measuring Cups and Spoons
- ✓Food Processor (for crumbs)
Ingredients
- ✓2 cups Graham Cracker crumbs (approx. 14-16 full sheets)
- ✓1/2 cup Unsalted Butter, melted
- ✓1/3 cup Granulated Sugar (for crust)
- ✓24 oz (3 blocks) Full-fat Cream Cheese, softened to room temperature
- ✓1 1/2 cups Powdered Sugar, sifted
- ✓1/4 cup Sour Cream, room temperature
- ✓1 tbsp Lemon Zest (approx. 2 lemons)
- ✓1/3 cup Fresh Lemon Juice
- ✓1 tsp Pure Vanilla Extract
- ✓1 1/4 cups Heavy Whipping Cream (cold)
- ✓Garnish: Lemon slices, fresh mint, extra whipped cream
Instructions
- Prepare the crust: In a medium bowl, combine graham cracker crumbs and granulated sugar. Pour in the melted butter and mix until the texture resembles wet sand.
- Press the mixture firmly into the bottom and slightly up the sides of a 9-inch springform pan. Use the bottom of a measuring cup to pack it down tightly. Place in the freezer for 10-15 minutes to set while you make the filling.
- Whip the cream: In a chilled bowl, whip the cold heavy cream until stiff peaks form. Be careful not to over-whip into butter. Set aside in the refrigerator.
- Beat the cheese: In a large mixing bowl using a hand mixer or stand mixer fitted with the paddle attachment, beat the softened cream cheese and powdered sugar together on medium speed until completely smooth and creamy (about 2-3 minutes). Scrape down the sides of the bowl.
- Add flavors: Add the sour cream, lemon zest, fresh lemon juice, and vanilla extract to the cream cheese mixture. Beat on medium-low until combined and smooth.
- Fold in cream: Gently fold the whipped cream into the cream cheese mixture using a rubber spatula. Do this in two batches to preserve the air bubbles. Fold until no white streaks of cream remain, but do not overmix.
- Assemble: Remove the crust from the freezer. Pour the filling over the crust and smooth the top with an offset spatula.
- Chill: Cover loosely with plastic wrap and refrigerate for at least 6 hours, preferably overnight, to allow the cheesecake to set completely.
- Serve: When ready to serve, run a thin knife around the edge of the pan before releasing the springform ring. Top with extra whipped cream, lemon slices, and fresh mint.
Expert Cooking Tips
- ✓Room temperature ingredients are non-negotiable; cold cream cheese will result in a lumpy batter.
- ✓Use fresh lemon juice, not bottled, for the brightest and most authentic flavor.
- ✓Chill your mixing bowl and beaters before whipping the cream to achieve volume faster.
- ✓Press the crust firmly; a loose crust will crumble when you try to slice the cheesecake.
- ✓Do not rush the chilling time; 6 hours is the minimum for clean slices, overnight is best.
- ✓Wipe your knife with a warm, damp cloth between cuts for professional-looking slices.
Substitutions and Variations
This recipe is quite versatile if you need to make adjustments based on dietary needs or pantry availability. For the crust, if graham crackers aren’t available, digestive biscuits, vanilla wafers, or even Biscoff cookies make excellent alternatives. For a gluten-free version, simply use gluten-free graham style crumbs. In the filling, full-fat brick cream cheese is essential for the structure, but you can substitute the sour cream with full-fat Greek yogurt for a slightly tangier, protein-rich profile. If you prefer a lime variation, swap the lemon juice and zest for lime in equal quantities to make a Key Lime No-Bake Cheesecake. For the sweetener, powdered sugar is preferred because it contains cornstarch which helps stabilize the filling, but in a pinch, you can use very fine granulated sugar, though the texture may be slightly grainier. Vegans can attempt this with high-quality dairy-free cream cheese and coconut cream, though setting times may vary.
Common Mistakes to Avoid
The most common mistake with no-bake cheesecake is under-mixing the cream cheese or using it cold. If the cream cheese isn’t perfectly room temperature and beaten until smooth before adding other ingredients, you will end up with small white lumps that ruin the silky texture. Another frequent error is over-mixing after adding the whipped cream. The air in the whipped cream provides the lift; if you beat it aggressively, you deflate the mixture, resulting in a dense, heavy filling that may not set properly. Additionally, using low-fat or tub-style cream cheese (whipped cream cheese) is a recipe for disaster; these products have higher water content and air, which prevents the cheesecake from firming up. Finally, rushing the chill time is a temptation to avoid. If you cut into it too soon, the filling will bulge out the sides and lose its structural integrity.
Serving Suggestions
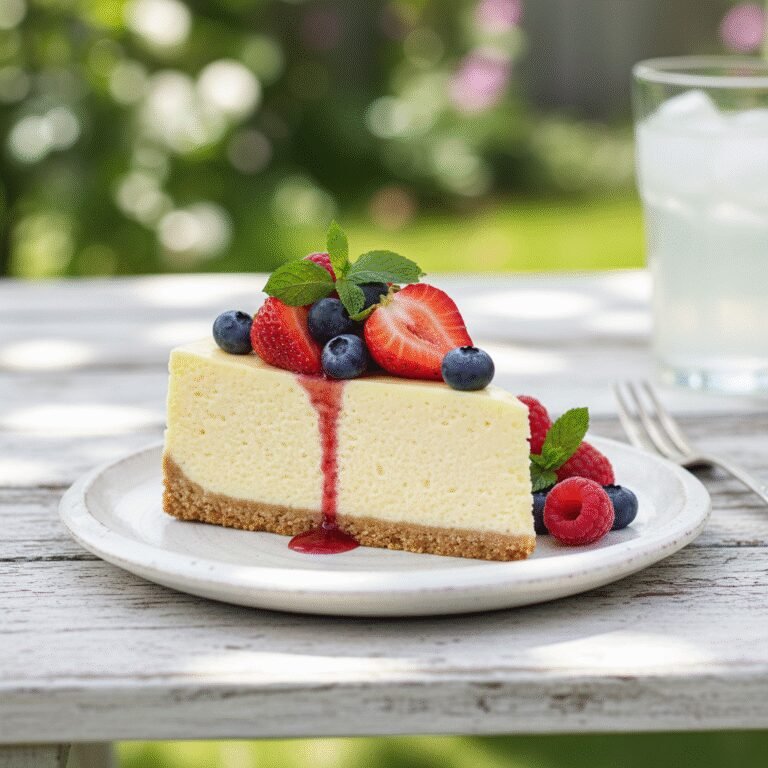
This Easy No-Bake Lemon Cheesecake is a stunner on its own, but proper presentation takes it to the next level. Serve it chilled, straight from the refrigerator, as it softens quickly at room temperature. A dollop of freshly whipped cream on each slice adds height and luxury. For a burst of color, garnish with candied lemon slices, fresh raspberries, or blueberries, which pair beautifully with lemon. A sprig of fresh mint adds a pop of green contrast. If you want to get fancy, a drizzle of raspberry coulis or a spoonful of lemon curd on the plate adds an extra layer of tartness. Pair this dessert with a light sparkling wine, an Earl Grey tea, or a cold brew coffee to cut through the richness.
Storage and Reheating Tips
This cheesecake is an excellent candidate for making ahead. It should be stored in the refrigerator at all times when not being served. Cover the cake loosely with plastic wrap or store it in an airtight cake carrier to prevent it from absorbing fridge odors. It will keep fresh for up to 5 days in the refrigerator. For longer storage, this cheesecake freezes exceptionally well. To freeze, let it set completely in the fridge first. Then, wrap the whole cheesecake (without toppings) or individual slices tightly in plastic wrap, followed by a layer of aluminum foil. It can be frozen for up to 3 months. Thaw it in the refrigerator overnight before serving. Do not microwave to thaw, as the filling will melt.
Nutrition Facts (Estimated)
| Serving Size | 1 slice |
| Calories | 420 |
| Fat | 32g |
| Saturated Fat | 19g |
| Unsaturated Fat | 11g |
| Trans Fat | 0.5g |
| Cholesterol | 95mg |
| Sodium | 210mg |
| Carbohydrates | 34g |
| Fiber | 0.5g |
| Sugar | 28g |
| Protein | 5g |
Frequently Asked Questions
Can I use bottled lemon juice instead of fresh?
While you can technically use bottled juice, it is highly discouraged. Bottled juice often contains preservatives that alter the flavor, giving it a metallic or artificial taste. Fresh lemon juice provides the bright, floral acidity that makes this dessert shine.
Why is my cheesecake filling runny?
A runny filling usually results from under-whipping the heavy cream or over-mixing the batter after the cream was added. It can also happen if you used low-fat cream cheese or didn’t chill the cheesecake long enough.
Do I need to use gelatin?
No, this recipe relies on the stiffness of the whipped cream and the thickness of the cream cheese to set. It results in a creamier texture than gelatin-set cheesecakes.
Can I make this in a different size pan?
Yes, you can use an 8-inch pan for a taller cheesecake or a 10-inch pan for a flatter one. Just keep in mind the crust thickness will vary. You can also make these in individual jars or dessert cups.
How do I get clean slices?
Use a sharp, thin-bladed knife. Dip the knife in hot water and wipe it dry with a paper towel before every single cut. This melts through the cheese cleanly.
Can I use a store-bought crust?
Absolutely. While homemade tastes better, a store-bought graham cracker crust is a great time-saver. You may have leftover filling as store-bought crusts are often smaller than a 9-inch springform.
Is this recipe gluten-free?
The filling is naturally gluten-free. To make the entire dessert gluten-free, simply use gluten-free graham crackers or cookies for the crust.
Why did my cheesecake crack?
Cracking is rare in no-bake cheesecakes, but it can happen if the crust is uneven or if the pan is flexed too much while moving it. Ensure the crust is level and handle the pan gently.
Conclusion
In the world of desserts, few things rival the satisfaction of a perfectly executed cheesecake, especially one that requires so little effort. This Easy No-Bake Lemon Cheesecake with Whipped Cream Topping is a testament to the fact that simple ingredients, treated with care, can produce spectacular results. It is a recipe that invites you to slow down, enjoy the process of whipping and folding, and anticipate the reward of that first cool, creamy, citrus-infused bite. Whether you are a seasoned baker looking for a summer staple or a novice wanting to impress guests without touching an oven, this recipe is your new best friend. So, grab your lemons, soften that cream cheese, and get ready to fall in love with the brightest, most delightful dessert you’ll make all year.