The Ultimate Easy No-Bake Chocolate Cheesecake in a 9×13 Pan
Easy No Bake Chocolate Cheesecake In 9×13 Pan Recipe
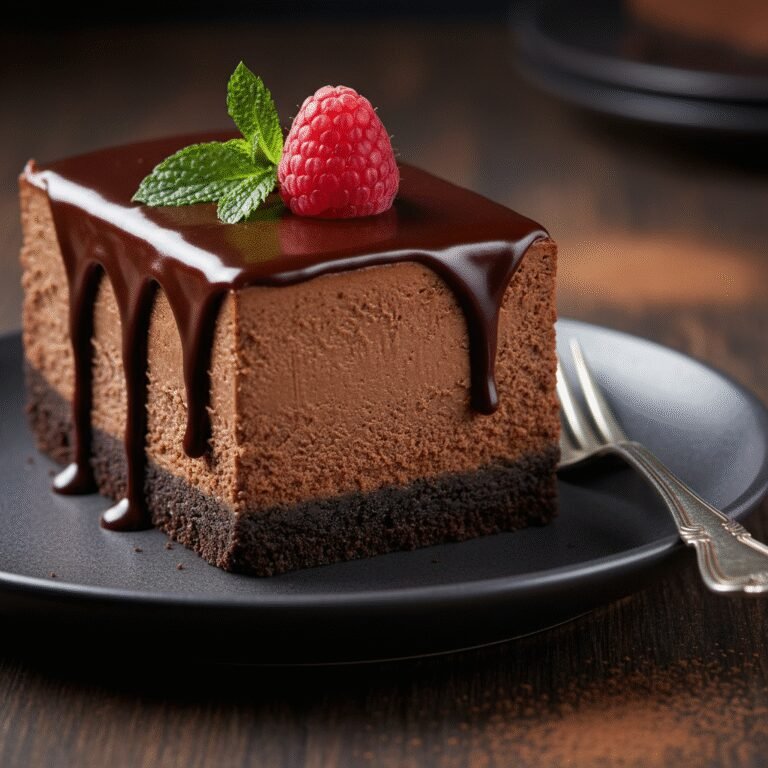
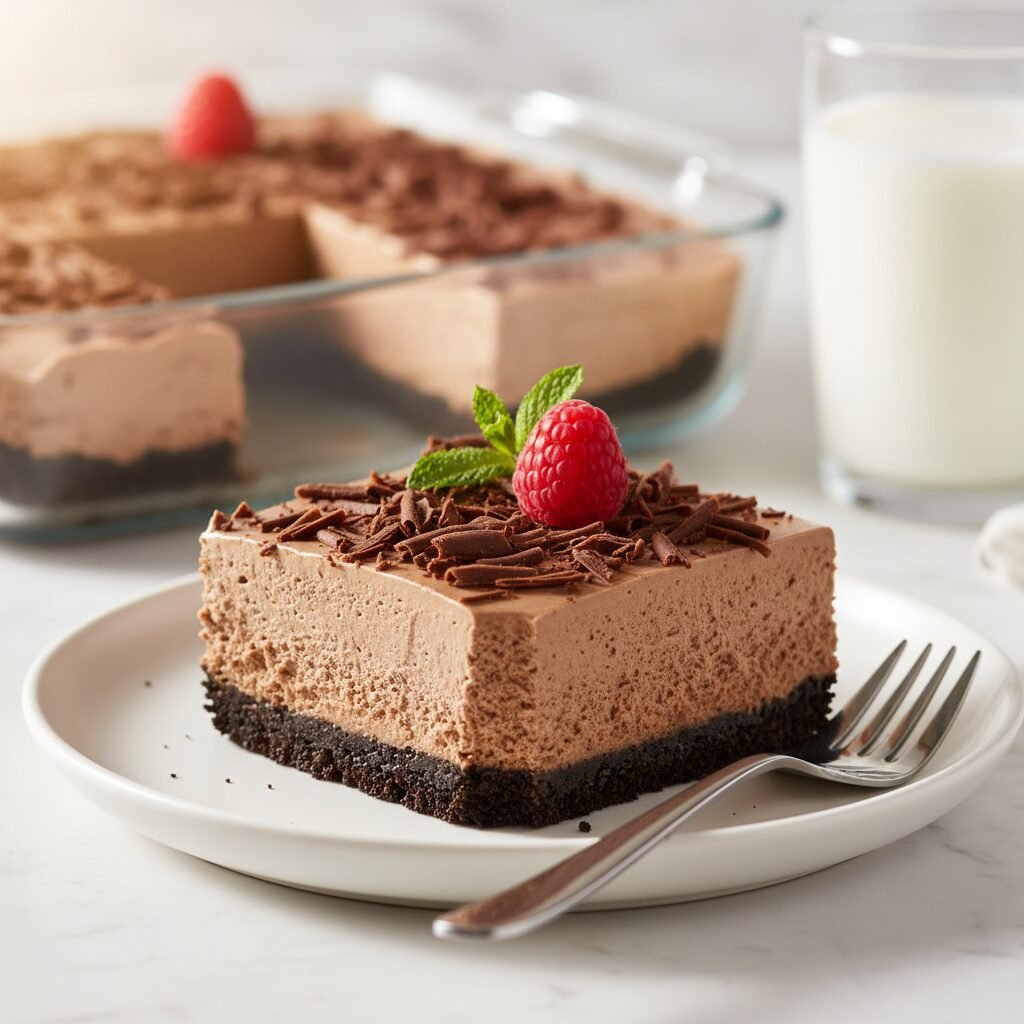
Indulge in this velvety, rich chocolate cheesecake that requires absolutely no oven time. Made conveniently in a 9×13 pan, this recipe feeds a crowd and delivers a mousse-like texture on a crunchy Oreo crust, making it the perfect stress-free dessert for potlucks and holidays.
25 minutes
0 minutes
4 hours 25 minutes (includes chilling)
24 squares
Dessert
No-Bake / Refrigeration
American
Vegetarian
There are few things in the culinary world as universally adored as cheesecake, and perhaps even fewer things as intimidating to bake. The water baths, the cracking tops, the precise oven temperatures—it is enough to scare away even competent home cooks. Enter the Easy No-Bake Chocolate Cheesecake in a 9×13 pan. This recipe is the antithesis of baking stress. It is a celebration of creamy, decadent chocolate flavor without the hassle of turning on the oven, making it the ultimate dessert for sweltering summer days or busy holiday kitchens where oven space is at a premium.
What sets this specific recipe apart is its texture. Unlike some no-bake cheesecakes that can feel heavy or waxy due to excessive gelatin or stabilizers, this version relies on the natural setting properties of high-quality melted chocolate and cream cheese to create a filling that is light, airy, and reminiscent of a dense chocolate mousse. By utilizing a 9×13 sheet pan, we also solve the portioning problem. A traditional round springform pan yields 12 large slices, but a 9×13 pan can easily yield 24 squares, making this the go-to recipe for church socials, family reunions, and office parties. The ratio of crunchy chocolate cookie crust to the silky, tangy, sweet filling is perfectly balanced in every single bite. Prepare to be the most popular person at the potluck with a dessert that looks like it took days to prepare but actually comes together in under 30 minutes of active time.
History & Origins
The history of cheesecake is a journey that spans millennia, long before the invention of the 9×13 pan or the refrigerator. The earliest known cheesecake dates back to ancient Greece on the island of Samos around 2,000 B.C., where it was considered a potent source of energy and served to athletes at the first Olympic Games in 776 B.C. These early versions were simple mixtures of flour, wheat, honey, and cheese, baked in wood-fired ovens. As the Romans conquered Greece, they adopted the recipe, adding crushed cheese and eggs, calling it ‘libum.’
However, the cheesecake we know and love today—specifically the smooth, dense style—is a distinctly American innovation born out of an accident. In 1872, a New York dairyman named William Lawrence was attempting to replicate the French cheese Neufchâtel. Instead, he accidentally added too much cream and created a richer, spreadable cheese that would eventually be marketed as ‘Philadelphia Cream Cheese.’ This revolutionized the dessert, moving it away from the curd-heavy textures of European styles.
The concept of the ‘No-Bake’ cheesecake gained massive popularity in the mid-20th century. As electric refrigerators became a standard household appliance in the 1940s and 50s, and as distinct ‘convenience cooking’ trends emerged, recipes that utilized chilling rather than baking flourished. The adaptation of recipes for the 9×13 pan—the workhorse of the American kitchen—solidified this dish as a staple of community cookbooks across the Midwest and South. This specific iteration, utilizing chocolate for stability, represents the modern evolution of the dessert: maximizing flavor while minimizing effort.
Why This Recipe Works
This recipe succeeds where many other no-bake cheesecakes fail because of the dual-stabilization method. Many no-bake recipes rely solely on the stiffness of cream cheese or the addition of gelatin, which can sometimes result in a rubbery texture or a filling that melts too quickly at room temperature. In this recipe, we use melted semi-sweet chocolate mixed directly into the batter. As the chocolate cools in the refrigerator, it hardens, providing a firm structure to the cheesecake without compromising its creamy mouthfeel. This mimics the density of a baked cheesecake without the eggs.
Furthermore, the inclusion of both sour cream and heavy whipping cream is chemically significant. The heavy cream is whipped to stiff peaks and folded in, introducing air bubbles that lighten the mixture, preventing it from becoming a solid block of fudge. The sour cream introduces acidity, which cuts through the intense richness of the sugar and chocolate, providing that classic ‘tang’ associated with authentic New York-style cheesecake. Finally, the 9×13 format works better than a deep springform pan for no-bake recipes because the increased surface area allows the dessert to chill and set significantly faster and more evenly, reducing the wait time from overnight to just a few hours.
Why You’ll Love This Recipe
- ✓Requires absolutely no baking or water baths.
- ✓Perfect ratio of crust to filling in every bite.
- ✓Feeds a large crowd (up to 24 servings).
- ✓Rich, mousse-like texture that isn’t rubbery.
- ✓Can be made up to 2 days in advance.
Equipment You’ll Need
- ✓9×13 inch baking pan
- ✓Food processor or zip-top bag and rolling pin
- ✓Electric hand mixer or stand mixer
- ✓Large mixing bowls
- ✓Microwave-safe bowl
- ✓Rubber spatula
- ✓Offset spatula
Ingredients
- ✓36 Oreo cookies (regular stuff, not double stuff), whole
- ✓1/2 cup (1 stick) unsalted butter, melted
- ✓24 oz (3 blocks) full-fat cream cheese, softened to room temperature
- ✓1 1/2 cups powdered sugar, sifted
- ✓1/4 cup unsweetened cocoa powder
- ✓12 oz semi-sweet chocolate chips or chopped chocolate bars
- ✓1 cup full-fat sour cream, room temperature
- ✓2 teaspoons pure vanilla extract
- ✓1 1/2 cups heavy whipping cream, cold
- ✓Optional garnish: Chocolate shavings, extra whipped cream, or chocolate sauce
Instructions
- Prepare the crust: Place the Oreo cookies (filling and all) into a food processor. Pulse until they are fine crumbs. If you don’t have a processor, place them in a gallon zip-top bag and crush with a rolling pin.
- Combine the cookie crumbs with the melted butter in a medium bowl. Stir until the mixture resembles wet sand.
- Dump the crumb mixture into a 9×13 inch pan. Using the bottom of a measuring cup or glass, press the crust firmly and evenly into the bottom of the pan. Place the pan in the freezer to set while you make the filling.
- Melt the chocolate: Place the semi-sweet chocolate chips in a microwave-safe bowl. Microwave in 30-second intervals, stirring well between each interval, until completely smooth. Set aside to cool slightly (it should be liquid but not hot).
- Whip the cream: In a separate cold bowl, beat the cold heavy whipping cream until stiff peaks form. Be careful not to overbeat into butter. Set this bowl aside.
- Make the cheesecake base: In a large mixing bowl, beat the softened cream cheese until completely smooth and creamy. There should be no lumps.
- Add the powdered sugar and cocoa powder to the cream cheese. Beat on low speed initially to avoid a dust cloud, then increase to medium until combined.
- Add the slightly cooled melted chocolate, sour cream, and vanilla extract to the cream cheese mixture. Beat until fully incorporated and glossy.
- Fold in the cream: Gently fold the whipped heavy cream into the chocolate cream cheese mixture using a rubber spatula. Use a ‘cut and fold’ motion to keep the mixture airy. Do not stir vigorously, or you will deflate the air.
- Assemble: Remove the crust from the freezer. Pour the cheesecake filling over the crust. Use an offset spatula to spread it into an even layer, pushing it into the corners.
- Chill: Cover the pan loosely with plastic wrap or foil (try not to let it touch the surface). Refrigerate for at least 4 hours, or preferably overnight, to allow it to set completely.
- Serve: Once set, cut into 24 squares. Wipe your knife with a warm, damp cloth between cuts for clean edges. Garnish with chocolate shavings or whipped cream if desired.
Expert Cooking Tips
- ✓Room Temperature is Key: Ensure your cream cheese and sour cream are truly at room temperature. If they are cold, the melted chocolate will seize up when added, creating gritty chocolate chunks instead of a smooth filling.
- ✓Cool the Chocolate: Do not pour boiling hot chocolate into the cream cheese. Let it cool for about 5-10 minutes so it is still fluid but tepid to the touch.
- ✓Press the Crust Firmly: A loose crust will crumble when you try to serve the bars. Really pack it down hard.
- ✓Sift the Cocoa: Cocoa powder tends to be lumpy. Sifting it with the powdered sugar ensures a smooth batter.
- ✓Don’t Skimp on Chill Time: While it might look set after 2 hours, 4 hours is the minimum for clean slices. Overnight is best.
- ✓Use High-Quality Chocolate: Since chocolate is the primary flavor, use a brand like Ghirardelli or Guittard rather than generic chips for the best taste.
Substitutions and Variations
This recipe is quite versatile regarding ingredients. For the crust, if you find Oreos too sweet, you can substitute them with chocolate graham crackers or even standard honey graham crackers for a s’mores vibe. For a gluten-free version, simply use gluten-free chocolate sandwich cookies or gluten-free graham crackers; the filling itself is naturally gluten-free.
Regarding the dairy, full-fat ingredients are strongly recommended for the proper set and mouthfeel. However, you can use Neufchâtel cheese (1/3 less fat) instead of regular cream cheese, though the texture will be slightly softer. Do not use fat-free cream cheese, as it will not set. If you don’t have sour cream, full-fat plain Greek yogurt is an excellent 1:1 substitute that maintains the tanginess. For the chocolate, you can use milk chocolate chips for a sweeter, milder cake, or dark chocolate (60%+) for a more intense, sophisticated flavor profile. If you want to save time, you can use an 8oz tub of Cool Whip instead of whipping your own heavy cream, though the flavor will be sweeter and less rich.
Common Mistakes to Avoid
The most common mistake with no-bake cheesecake is using cold cream cheese. When cold cream cheese hits melted chocolate, the chocolate instantly hardens into tiny, grainy specks, ruining the velvety texture. Always leave your cheese out for at least 2 hours before starting. Another mistake is over-mixing the heavy cream. If you beat it too long, it turns into butter and separates; stop as soon as you see stiff peaks. Finally, rushing the chilling process is a recipe for disaster. If you cut into the pan too early, the squares will lose their shape and slump. Patience is the secret ingredient here. Lastly, avoid using ‘chocolate flavored coating’ or cheap compound chocolate; real cocoa butter is needed for the proper flavor and texture set.
Serving Suggestions
These bars are rich, so they pair beautifully with tart or fresh elements. Top each square with a fresh raspberry or strawberry to cut through the chocolate intensity. A drizzle of salted caramel sauce or a dollop of tart cherry pie filling also works wonders. For a coffee-house vibe, serve alongside a hot espresso or a cold brew coffee. If serving for a birthday, you can cover the entire top with chocolate ganache before chilling for a truffle-like finish. For easy removal, you can line the 9×13 pan with parchment paper leaving an overhang on the sides, allowing you to lift the entire cheesecake out onto a cutting board before slicing.
Storage and Reheating Tips
This cheesecake must be kept refrigerated. Store leftovers in the pan, tightly covered with plastic wrap or aluminum foil, in the fridge for up to 5 days. The crust may soften slightly after day 3. For longer storage, these bars freeze exceptionally well. Cut the chilled cheesecake into squares and place them on a baking sheet to freeze solid (about 1 hour). Once frozen, wrap each square individually in plastic wrap and place them in a freezer-safe heavy-duty bag. They can be frozen for up to 3 months. To eat, thaw in the refrigerator overnight or on the counter for 20-30 minutes before serving.
Nutrition Facts (Estimated)
| Serving Size | 1 square |
| Calories | 340 |
| Fat | 24g |
| Saturated Fat | 14g |
| Unsaturated Fat | 8g |
| Trans Fat | 0g |
| Cholesterol | 65mg |
| Sodium | 180mg |
| Carbohydrates | 28g |
| Fiber | 2g |
| Sugar | 22g |
| Protein | 4g |
Frequently Asked Questions
Can I use milk chocolate instead of semi-sweet?
Yes, you can use milk chocolate, but keep in mind the result will be significantly sweeter and the chocolate flavor will be milder. Because milk chocolate is softer than semi-sweet, the bars might also be slightly softer in texture.
Why is my cheesecake filling lumpy?
Lumps usually occur because the cream cheese wasn’t soft enough before mixing. It must be at room temperature. If you’ve already mixed it and have lumps, you can try passing the mixture through a fine-mesh sieve before folding in the whipped cream.
Can I make this in a round springform pan?
Absolutely. This recipe makes a large amount of filling, so it will fill a deep 9-inch or 10-inch springform pan nicely. You will likely need to chill it longer (overnight is mandatory) because the filling will be much thicker.
Do I need to use gelatin?
No! This recipe relies on the cocoa butter in the melted chocolate and the fat in the cream cheese/heavy cream to set the mixture. It sets up firm enough to slice without any gelatin.
Can I halve the recipe?
Yes. If you want a smaller batch, you can halve all the ingredients and prepare it in an 8×8 or 9×9 inch square pan. The chilling time will remain roughly the same.
Can I use store-bought whipped topping (Cool Whip)?
Yes, you can substitute the 1.5 cups of heavy cream with one 8-ounce tub of thawed Cool Whip. The texture will be slightly lighter and the taste sweeter, but it works as a convenient shortcut.
How long can this sit out at a party?
Since it contains dairy, it shouldn’t sit out at room temperature for more than 2 hours. If it’s a very hot day or an outdoor event, try to keep it in a cooler or serve it directly from the fridge.
My cheesecake didn’t set firm. What happened?
This usually happens if the whipped cream was under-whipped (too liquid) or if low-fat cream cheese/cream was used. It also happens if the chocolate was omitted or reduced, as the chocolate provides the structure.
Is this recipe gluten-free?
The filling is naturally gluten-free. To make the entire dessert gluten-free, simply use gluten-free chocolate sandwich cookies (like GF Oreos) for the crust.
Conclusion
This Easy No-Bake Chocolate Cheesecake in a 9×13 pan is proof that you don’t need complicated techniques or hours of baking to create a show-stopping dessert. It combines the ease of a sheet cake with the sophisticated, creamy decadence of a high-end truffle. Whether you are a seasoned baker looking for a break from the oven or a beginner wanting to impress your friends, this recipe delivers consistent, delicious results every time. So grab your mixer, melt that chocolate, and get ready to enjoy one of the most satisfying chocolate treats you’ll ever make. Don’t forget to pin this recipe for your next gathering!