The Ultimate Creamy Vanilla Cheesecake With Digestive Biscuit Crust
Creamy Vanilla Cheesecake With Digestive Biscuit Crust Recipe
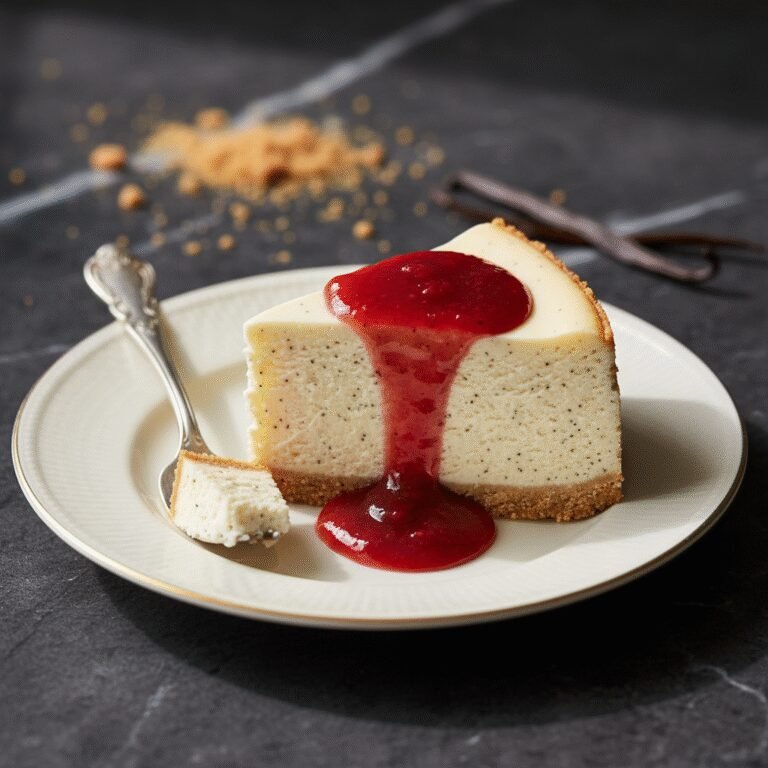
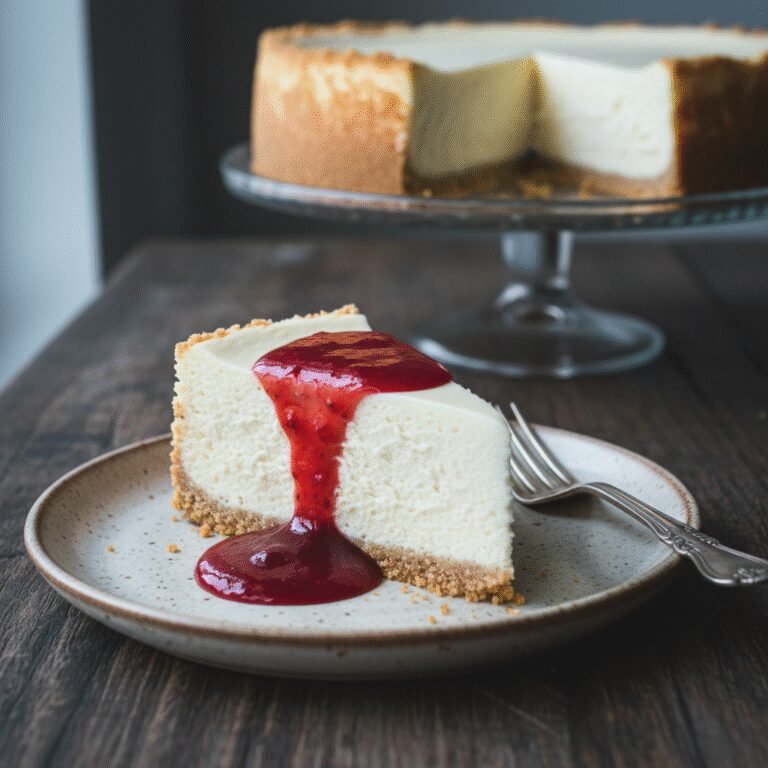
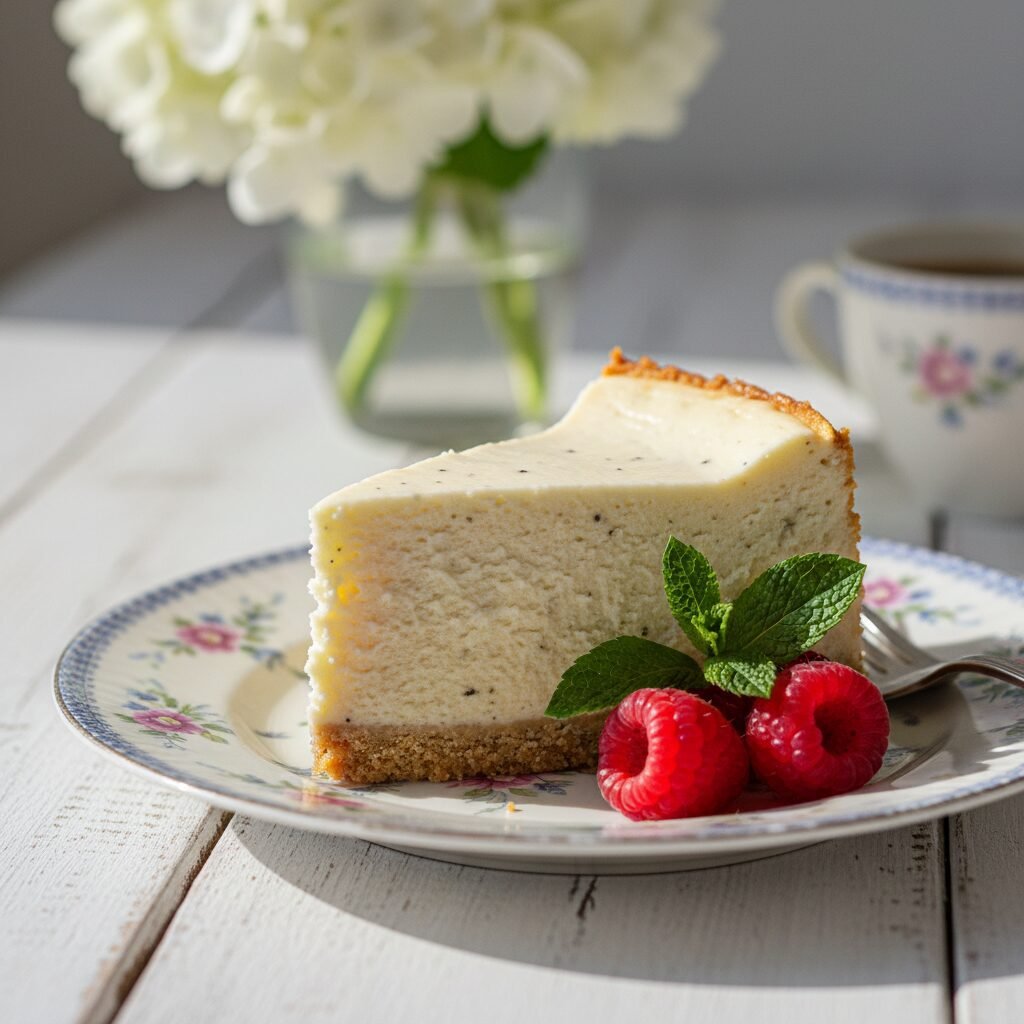
Experience the epitome of dessert luxury with this ultra-creamy vanilla cheesecake sitting atop a buttery, crumbly digestive biscuit crust. Perfect for special occasions or a sophisticated weekend treat, this foolproof recipe delivers a silky smooth texture and rich flavor without the need for a complex water bath.
30 minutes
1 hour 15 minutes
8 hours (includes cooling and chilling)
12 servings
Dessert
Baking
American / British Fusion
Vegetarian
There are few desserts as universally adored as a perfectly executed cheesecake, but finding the ‘perfect’ recipe can be a lifelong quest for many home bakers. Some are too dense, sticking to the roof of your mouth, while others are too airy, lacking that signature decadence we crave. This recipe for Creamy Vanilla Cheesecake with a Digestive Biscuit Crust strikes the ultimate balance. It is velvety smooth, rich without being cloying, and carries the sophisticated, floral aroma of premium vanilla beans throughout every bite. While many American recipes rely on the standard graham cracker crust, we are elevating this dish by utilizing British Digestive biscuits. These biscuits, often found in the international aisle of US supermarkets, offer a coarser texture and a slightly less sweet, nuttier flavor profile derived from whole wheat flour. This savory-sweet nuance provides a magnificent counterpoint to the rich, sweet cream cheese filling, creating a dessert that is complex and mature. The filling itself is a labor of love, designed to be baked low and slow to ensure a pristine, crack-free surface and a texture that essentially melts on the tongue. Whether you are serving this plain to showcase the vanilla speckles or topping it with a tart berry coulis, this cheesecake is destined to become your signature dessert. It requires patience, particularly during the cooling process, but the reward is a slice of heaven that rivals any high-end bakery in New York or London. Prepare to impress your guests and yourself with a dessert that truly celebrates the beauty of simple, high-quality ingredients coming together in harmony.
History & Origins
The history of cheesecake is a fascinating journey that spans millennia, far predating the New York delis with which it is most commonly associated today. Anthropologists have found cheese molds dating back to 2,000 B.C. on the Greek island of Samos. In ancient Greece, cheesecake was considered a source of energy, and there is evidence that it was served to athletes during the first Olympic Games in 776 B.C. The Greeks called it ‘plakous’ or ‘libum’, and it was a simple mixture of flour, wheat, honey, and cheese formed into a cake and baked. When the Romans conquered Greece, they adopted the recipe, modifying it to include crushed cheese and eggs, served hot from a fire—a dish they called ‘savillum’. As the Roman Empire expanded, the concept of the cheesecake spread across Europe, with each region adapting the recipe to local ingredients and tastes. However, the modern cheesecake as we know it is largely a result of an accidental invention in America. In 1872, a New York dairyman named William Lawrence was attempting to replicate the French cheese Neufchâtel. In the process, he accidentally discovered a method to produce an ‘unripened cheese’ that was richer and creamier—which we now know as cream cheese. This invention revolutionized the dessert, leading to the dense, smooth, and rich New York Style cheesecake. On the other side of the Atlantic, the base of the cheesecake took a different turn. In 1839, two Scottish doctors developed the Digestive biscuit to aid digestion. By the late 19th century, these biscuits became a staple in British pantries and eventually the standard base for cheesecakes in the UK, prized for their sturdy structure and wheat flavor. This recipe marries that historic British crust with the luxurious American cream cheese filling, creating a transatlantic masterpiece.
Why This Recipe Works
This recipe succeeds where many others fail due to a precise balance of ingredients and a strict adherence to thermal physics. First, the use of Digestive biscuits instead of graham crackers is not just a stylistic choice; the Digestives have a higher fat content and a coarser crumb, which stays crunchier under the moist filling and provides a structural integrity that prevents the slice from crumbling on the plate. Secondly, the filling incorporates both heavy cream and a touch of sour cream. The heavy cream aerates the mixture slightly, preventing it from becoming a brick, while the sour cream introduces an essential acidity that cuts through the fat of the cream cheese, brightening the flavor profile. We also utilize a small amount of cornstarch (cornflour). This is a secret weapon in cheesecake baking; the starch molecules swell and form a mesh that helps hold the egg proteins in place, significantly reducing the risk of the cheesecake cracking or curdling during baking. Furthermore, the baking method is designed to be gentle. By baking at a lower temperature, we ensure the eggs cook slowly and evenly, preventing the edges from drying out before the center is set. Finally, the ‘cool-down’ method—leaving the cheesecake in the turned-off oven—allows the cake to finish cooking gently and cool gradually. This prevents the thermal shock that causes the dreaded surface cracks, ensuring a professional, smooth finish every time.
Why You’ll Love This Recipe
- ✓Ultra-creamy texture that melts in your mouth.
- ✓Sturdy, buttery Digestive biscuit crust adds a nutty depth.
- ✓No water bath required due to the low-temperature baking method.
- ✓Heavy dose of vanilla bean paste for a luxurious aroma.
- ✓Freezes exceptionally well for make-ahead convenience.
- ✓Crack-free surface technique included.
Equipment You’ll Need
- ✓9-inch Springform Pan
- ✓Electric Stand Mixer or Hand Mixer
- ✓Large Mixing Bowl
- ✓Food Processor or Ziploc Bag and Rolling Pin
- ✓Rubber Spatula
- ✓Parchment Paper
- ✓Measuring Cups and Spoons
Ingredients
- ✓250g (8.8 oz) Digestive biscuits
- ✓120g (1/2 cup) Unsalted butter, melted
- ✓900g (32 oz) Full-fat cream cheese, room temperature
- ✓250g (1 1/4 cups) Granulated white sugar
- ✓3 tbsp Cornstarch (Cornflour)
- ✓4 large Eggs, room temperature
- ✓180ml (3/4 cup) Heavy cream (Double cream)
- ✓120ml (1/2 cup) Sour cream, room temperature
- ✓1 tbsp Vanilla bean paste (or high-quality extract)
- ✓1 tsp Lemon zest (optional)
- ✓Pinch of salt
Instructions
- 1. Preheat your oven to 350°F (175°C). Grease the bottom and sides of a 9-inch springform pan with butter and line the bottom with parchment paper.
- 2. Prepare the crust: Place the Digestive biscuits in a food processor and pulse until they are fine crumbs. Alternatively, place them in a sealed bag and crush with a rolling pin. Pour the melted butter and a pinch of salt over the crumbs and mix until it resembles wet sand.
- 3. Press the crumb mixture firmly into the bottom of the prepared pan. You can use the bottom of a flat glass to ensure it is packed down evenly. Bake the crust for 10 minutes. Remove from the oven and set aside to cool. Reduce the oven temperature to 300°F (150°C).
- 4. Make the filling: In a large bowl or stand mixer fitted with the paddle attachment, beat the room temperature cream cheese and sugar on medium-low speed until completely smooth and creamy (about 2-3 minutes). Scrape down the sides of the bowl to ensure no lumps remain.
- 5. Add the cornstarch, vanilla bean paste, lemon zest, sour cream, and heavy cream. Beat on low speed until just combined and smooth.
- 6. Add the eggs one at a time, beating on low speed after each addition just until the yolk disappears. Do not overmix at this stage, as incorporating too much air can cause cracks.
- 7. Pour the batter over the cooled crust. Smooth the top with a spatula. Tap the pan gently on the counter a few times to release any trapped air bubbles.
- 8. Bake in the center of the oven at 300°F (150°C) for 60 to 75 minutes. The cheesecake is done when the edges are set and slightly puffy, but the center still has a wobble like Jell-O when you gently shake the pan.
- 9. Turn off the oven and crack the door open slightly (you can use a wooden spoon to hold it ajar). Leave the cheesecake in the cooling oven for 1 hour. This slow cooling process prevents cracks.
- 10. Remove the cheesecake from the oven and run a thin knife around the edge to loosen it from the pan (do not remove the ring yet). Let it cool completely to room temperature.
- 11. Cover the pan loosely with plastic wrap and refrigerate for at least 6 hours, preferably overnight, to set completely before slicing and serving.
Expert Cooking Tips
- ✓Ensure all dairy ingredients (cream cheese, eggs, sour cream) are at room temperature before starting; this is crucial for a lump-free batter.
- ✓Do not overbeat the batter once the eggs are added; too much air leads to rising and falling, which causes cracks.
- ✓Use a springform pan for easy removal; if you don’t have one, lining a regular cake pan with excess parchment paper to lift it out is a risky but possible alternative.
- ✓If your oven runs hot, consider using an oven thermometer to ensure you are baking at the correct low temperature.
- ✓To get clean slices, dip a sharp knife in hot water and wipe it dry between every single cut.
- ✓If the top does crack, don’t panic; simply cover it with whipped cream, fresh berries, or a ganache, and no one will know.
- ✓The ‘wobble’ test is key; if the center looks liquid, it needs more time, but if it looks firm, it is overbaked.
Substitutions and Variations
If you cannot find Digestive biscuits, Graham crackers are the closest standard American substitute, though they will result in a sweeter crust; you may want to reduce the sugar in the filling slightly to compensate. For a gluten-free version, simply use gluten-free Digestive biscuits or gluten-free graham style crackers. If you are out of sour cream, full-fat Greek yogurt is an excellent substitute that provides a similar tang and texture. Vanilla bean paste adds beautiful visual specks and a stronger flavor, but a high-quality pure vanilla extract works perfectly fine. If you prefer a zestier cheesecake, increase the lemon zest or add a teaspoon of lemon juice, though this will alter the pure vanilla profile. For the sugar, superfine (caster) sugar dissolves easier than standard granulated, but standard granulated works if you beat the cream cheese well.
Common Mistakes to Avoid
The most common mistake is using cold ingredients. Cold cream cheese will never blend perfectly with the sugar, resulting in tiny white lumps in your final cheesecake that no amount of baking will fix. Another major error is opening the oven door during baking. The sudden drop in temperature can cause the cheesecake to sink or crack. Patience is key here. Overbaking is also a frequent issue; remember that the cheesecake continues to cook as it cools. If you bake it until it is completely firm in the oven, the texture will be grainy and dry rather than smooth and creamy. Finally, rushing the chilling process is a mistake. The cheesecake needs time for the fats to solidify and the structure to set; cutting into it while warm will result in a runny mess.
Serving Suggestions
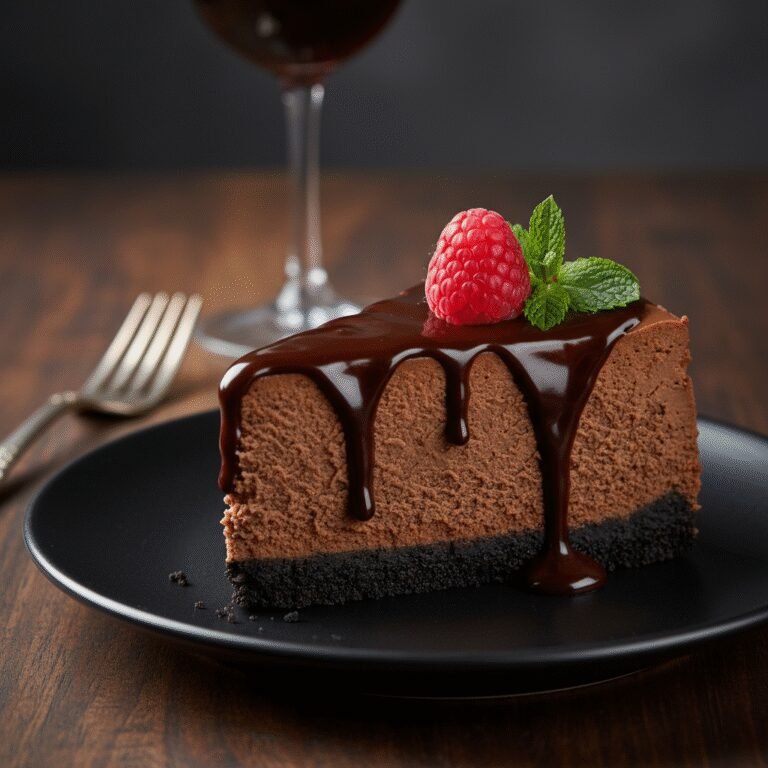
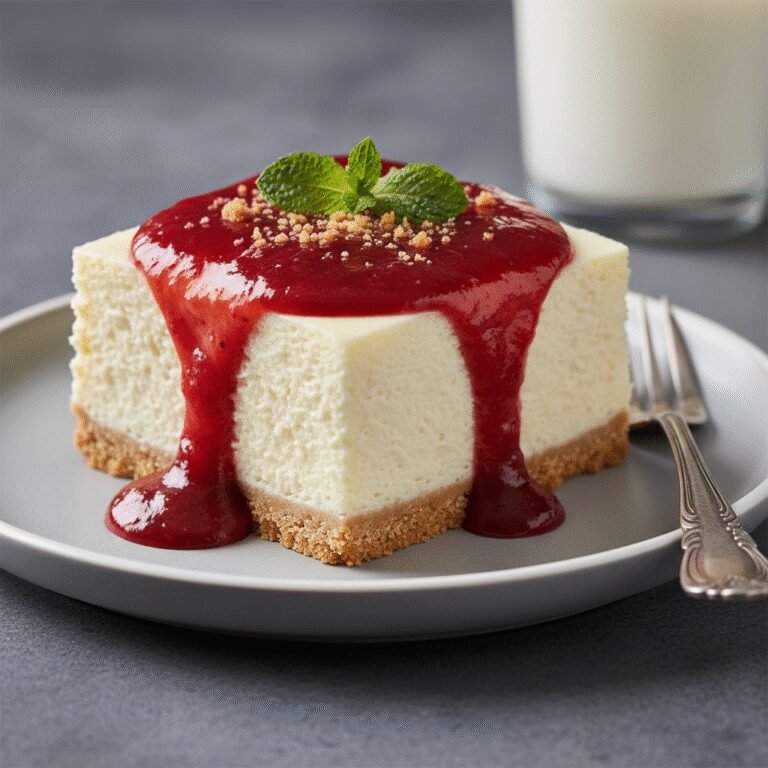
This cheesecake is rich enough to stand on its own, but it serves as a wonderful canvas for toppings. A classic strawberry or raspberry coulis (pureed berries with a little sugar and lemon juice) cuts through the richness beautifully. For a decadent twist, drizzle with salted caramel sauce and sprinkle with sea salt flakes. Fresh berries, such as blueberries, blackberries, or sliced strawberries, add a fresh pop of texture. A dollop of lightly sweetened whipped cream on the side is always a crowd-pleaser. Serve with a strong espresso or a glass of dessert wine like Sauternes to complement the vanilla notes.
Storage and Reheating Tips
Store the cheesecake in the refrigerator, loosely covered with plastic wrap or in a cake dome, for up to 5 days. The crust may soften slightly over time. For longer storage, this cheesecake freezes beautifully. To freeze, let it set completely in the fridge first. Then, you can freeze the whole cake or individual slices. Wrap each slice tightly in plastic wrap, followed by a layer of aluminum foil to prevent freezer burn. It can be frozen for up to 2 months. To thaw, place the wrapped cheesecake in the refrigerator overnight. Do not thaw in the microwave or at room temperature, as this can affect the texture.
Nutrition Facts (Estimated)
| Serving Size | 1 slice |
| Calories | 480 |
| Fat | 36g |
| Saturated Fat | 21g |
| Unsaturated Fat | 12g |
| Trans Fat | 0.5g |
| Cholesterol | 145mg |
| Sodium | 320mg |
| Carbohydrates | 34g |
| Fiber | 1g |
| Sugar | 28g |
| Protein | 7g |
Frequently Asked Questions
Do I really need a water bath for this recipe?
No, this recipe is designed to be baked at a lower temperature (300°F) which mimics the gentle heat of a water bath. As long as you don’t overbeat the eggs and you let it cool in the oven, you shouldn’t need one.
Why did my cheesecake crack?
Cracks are usually caused by overmixing the batter (incorporating too much air), overbaking (drying it out), or cooling it too quickly (thermal shock). Follow the cooling instructions carefully to avoid this.
Can I use low-fat cream cheese?
It is not recommended. Low-fat cream cheese has a higher water content and different stabilizers, which can lead to a runny or rubbery texture. For the best results, stick to full-fat brick-style cream cheese.
Where can I buy Digestive biscuits in the US?
Digestive biscuits (often the McVitie’s brand) are usually found in the ‘International’ or ‘British’ aisle of large supermarkets. They are also widely available online or at specialty food stores.
How do I know when the cheesecake is done?
Perform the wobble test. Gently shake the pan with an oven mitt. The outer 2 inches should look firm and set, while the center should jiggle slightly like gelatin. If it ripples like milk, it needs more time.
Can I make this recipe ahead of time?
Absolutely. In fact, cheesecake tastes better after resting for 24 hours as the flavors meld. It’s the perfect make-ahead dessert for parties.
My ingredients are cold, can I microwave them?
You can microwave the cream cheese in short 10-second bursts to soften it, but be very careful not to melt it. Eggs can be placed in a bowl of warm (not hot) water for 10 minutes to bring them to room temp.
Can I use a different size pan?
Yes, but baking times will vary. A 10-inch pan will result in a thinner cheesecake that bakes faster, while an 8-inch pan will be thicker and take longer. Adjust accordingly and watch the wobble.
Why do I need to run a knife around the edge after baking?
As the cheesecake cools, it shrinks slightly. If it is stuck to the sides of the pan, the tension created by shrinking will pull the cake apart, causing cracks in the center.
Conclusion
Mastering the art of the perfect vanilla cheesecake is a milestone for any home cook, and this recipe with its distinct Digestive biscuit crust is sure to become a cherished favorite in your repertoire. The contrast between the savory-sweet, crunchy base and the impossibly smooth, fragrant filling is a testament to how simple ingredients can create something truly spectacular. Whether you are celebrating a birthday, a holiday, or just the joy of the weekend, this cheesecake brings a touch of elegance and comfort to the table. Don’t be intimidated by the steps; patience is your only real requirement. Give this recipe a try, and you will likely find yourself retiring your old cheesecake recipes for good. We would love to hear how yours turned out, so please leave a comment and share your baking triumph!