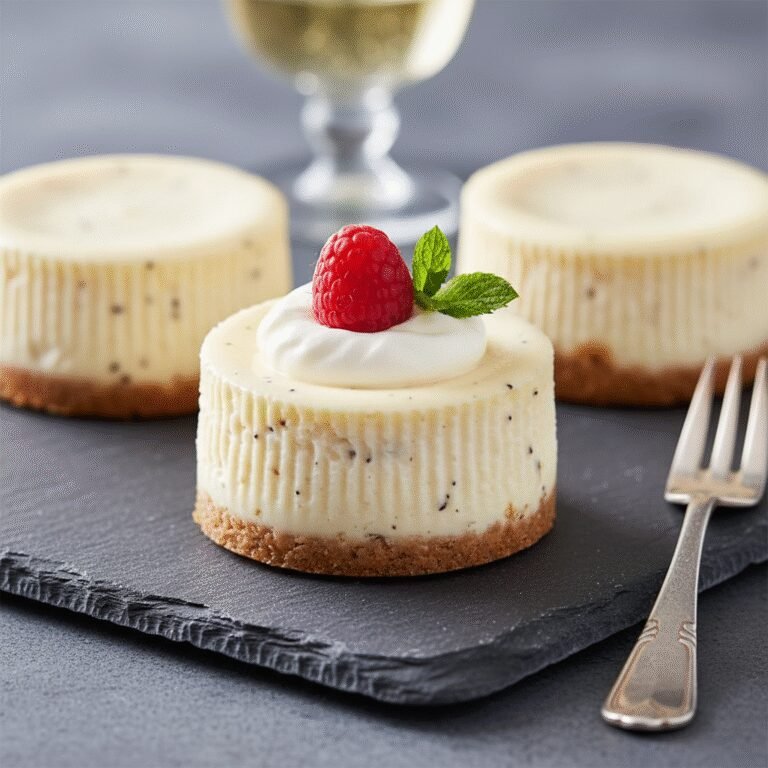
The Best Creamy Vanilla Cheesecake In 9×13 Pan (Perfect for Crowds!)
Creamy Vanilla Cheesecake In 9×13 Pan Recipe
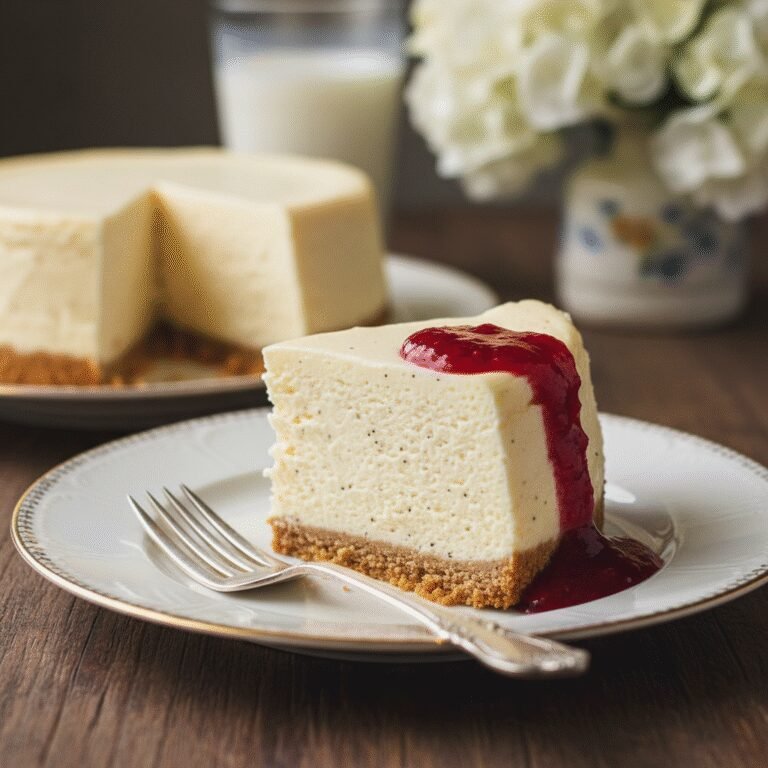
Skip the water bath and the springform pan anxiety with this effortlessly elegant Creamy Vanilla Cheesecake baked right in a 9×13 pan. It yields perfectly smooth, rich, and decadent cheesecake squares that are ideal for parties, potlucks, and holiday gatherings.
25 minutes
45 minutes
4 hours 10 minutes (includes cooling)
24 squares
Dessert
Baking
American
Vegetarian
There is something undeniably magical about a classic vanilla cheesecake. It is the little black dress of the dessert world: timeless, sophisticated, and always in style. However, the traditional method of baking a cheesecake—fiddling with a leaky springform pan, creating a precarious water bath, and praying to the baking gods that the top doesn’t crack—can be enough to scare off even seasoned home cooks. Enter the 9×13 pan cheesecake, a complete game-changer that delivers all the luscious, tangy richness of a New York-style slice without half the hassle. This recipe transforms the daunting architectural project of a round cheesecake into approachable, shareable bars that feed a crowd with ease.
Imagine sinking your fork into a layer of buttery, golden graham cracker crust, followed by a thick, velvety blanket of vanilla bean-flecked cream cheese filling. Because we are baking this in a larger, shallower pan, the heat distributes more evenly, significantly reducing the risk of those dreaded surface cracks and eliminating the need for a water bath entirely. The result is a dessert that feels fancy enough for a wedding shower but is simple enough for a Tuesday night treat. Whether you serve it plain, drizzled with salted caramel, or topped with fresh macerated berries, this creamy vanilla cheesecake is destined to become your go-to recipe for entertaining. It strikes the perfect balance between dense and fluffy, sweet and tangy, making it an absolute showstopper on any dessert table.
History & Origins
The history of cheesecake is a journey that spans millennia, long before the iconic New York style became a staple of American diners. Its origins can be traced back to ancient Greece, specifically on the island of Samos, where physical anthropologists excavated cheese molds dating back to circa 2,000 B.C. In ancient Greece, cheesecake was considered a potent source of energy and was even served to athletes during the first Olympic Games in 776 B.C. These early versions were far simpler than our modern counterparts, typically consisting of flour, wheat, honey, and cheese formed into a cake and baked on an earthenware griddle.
As the Romans conquered Greece, they adopted the recipe, adding eggs and serving it warm under a heated brick, a dish they called ‘libum.’ As the Roman Empire expanded, so did the cheesecake, spreading across Europe where each region began to put its own spin on the ingredients. It wasn’t until the 18th century that the cheesecake began to resemble what we know today, thanks to the development of beaten eggs to leaven the cake instead of yeast. However, the true revolution occurred in 1872 in Chester, New York, when a dairyman named William Lawrence accidentally invented cream cheese while trying to reproduce a French cheese called Neufchâtel. This creamy, tangy invention became the backbone of the American cheesecake. By the early 1900s, ‘New York Style’ cheesecake—defined by its dense, smooth consistency and heavy use of cream cheese and egg yolks—cemented its place in culinary history. This 9×13 adaptation is the modern evolution, prioritizing convenience and shareability while honoring that rich, historical flavor profile.
Why This Recipe Works
This recipe works exceptionally well because it addresses the two biggest pain points of cheesecake baking: texture consistency and structural integrity. By utilizing a 9×13 inch rectangular pan, we increase the surface area of the batter. This allows the cheesecake to bake more quickly and evenly than it would in a deep, round springform pan. The shallower depth means the center sets before the edges have a chance to overcook and dry out, which is the primary cause of cracking. Consequently, you get that coveted creamy, silky texture from edge to edge without needing a humid water bath to regulate the temperature.
Furthermore, the ratio of crust to filling in this recipe is optimized for the perfect bite. In a thick slice of round cheesecake, you often run out of crust halfway through. Here, the sturdy graham cracker base supports the filling in every single square, providing a necessary textural contrast of crunch against the smooth custard. We also use a combination of sour cream and heavy cream in the batter. The sour cream introduces acidity that cuts through the richness of the cream cheese and tenderizes the protein network, ensuring the cheesecake is velvety rather than rubbery. Finally, cooling the cheesecake gradually in the turned-off oven allows the structure to settle slowly, preventing sinking and ensuring a perfectly flat, professional-looking surface ready for toppings.
Why You’ll Love This Recipe
- ✓No water bath required, simplifying the baking process significantly.
- ✓Feeds a large crowd, yielding 24 generous bars perfect for parties.
- ✓Even baking in a 9×13 pan prevents the dreaded surface cracks.
- ✓Versatile base that pairs with fruit, chocolate, or caramel toppings.
- ✓Can be made ahead of time and freezes beautifully for later enjoyment.
Equipment You’ll Need
- ✓9×13 inch baking pan (metal or glass)
- ✓Electric hand mixer or stand mixer
- ✓Large mixing bowls
- ✓Rubber spatula
- ✓Measuring cups and spoons
- ✓Parchment paper
- ✓Food processor (for crust)
Ingredients
- ✓3 cups graham cracker crumbs (approx. 2 sleeves)
- ✓1/2 cup unsalted butter, melted
- ✓1/4 cup granulated sugar (for crust)
- ✓4 packages (8 oz each) full-fat cream cheese, softened to room temperature
- ✓1 1/2 cups granulated sugar (for filling)
- ✓1/2 cup full-fat sour cream, room temperature
- ✓1/2 cup heavy whipping cream, room temperature
- ✓1 tablespoon pure vanilla extract
- ✓1/2 teaspoon salt
- ✓4 large eggs, room temperature
Instructions
- Preheat your oven to 325°F (163°C). Line a 9×13 inch baking pan with parchment paper, leaving an overhang on the sides to act as a sling for easy removal later. Lightly grease the paper.
- In a medium bowl, combine the graham cracker crumbs, 1/4 cup sugar, and melted butter. Stir until the mixture resembles wet sand.
- Press the crumb mixture firmly and evenly into the bottom of the prepared pan. You can use the bottom of a measuring cup to pack it down tight. Bake the crust for 10 minutes, then remove and set aside to cool slightly.
- In a large mixing bowl or the bowl of a stand mixer fitted with the paddle attachment, beat the softened cream cheese and 1 1/2 cups sugar on medium-low speed until completely smooth and creamy. Scrape down the sides of the bowl to ensure no lumps remain. Do not overbeat.
- Add the sour cream, heavy whipping cream, vanilla extract, and salt. Mix on low speed just until combined.
- Add the eggs one at a time, mixing on low speed after each addition just until the yolk disappears. Be careful not to overmix at this stage, as incorporating too much air can cause cracks.
- Pour the cheesecake batter over the pre-baked crust and smooth the top with a rubber spatula or offset spatula.
- Bake in the preheated oven for 40-50 minutes. The edges should be set and slightly puffy, but the center should still have a slight jiggle when you gently shake the pan.
- Turn off the oven and crack the oven door open about an inch. Let the cheesecake cool inside the oven for 1 hour. This gradual cooling prevents cracking.
- Remove the cheesecake from the oven and let it cool completely on a wire rack at room temperature.
- Cover the pan with plastic wrap and refrigerate for at least 4 hours, preferably overnight, to allow the cheesecake to fully set.
- Once chilled, use the parchment paper overhang to lift the cheesecake out of the pan. Slice into squares using a sharp knife dipped in hot water, wiping the blade clean between cuts.
Expert Cooking Tips
- ✓Room temperature ingredients are non-negotiable; cold cream cheese causes lumps.
- ✓Avoid overmixing the batter once the eggs are added to prevent air bubbles and cracks.
- ✓Use a flat-bottomed glass or measuring cup to press the crust down firmly for a solid base.
- ✓Do not open the oven door during the first 30 minutes of baking to maintain heat.
- ✓The ‘jiggle test’ is key: the center should wobble like Jell-O, not slosh like liquid.
- ✓Chill thoroughly; cutting into a warm cheesecake will result in a messy disaster.
- ✓Dip your knife in hot water and wipe it clean between every single cut for clean edges.
Substitutions and Variations
If you find yourself missing a few ingredients or have specific dietary needs, there are several substitutions you can make without sacrificing the integrity of the cheesecake. For the crust, graham crackers are traditional, but you can easily swap them for digestive biscuits, vanilla wafers, or even Oreos (filling included) for a cookies-and-cream base. If you need a gluten-free option, simply use gluten-free graham style crackers or a nut-based crust made from almond flour and butter. regarding the filling, full-fat ingredients are crucial for the texture, but in a pinch, you can substitute the sour cream with full-fat Greek yogurt. It will add a slightly tangier profile but maintain the creaminess. While heavy cream is recommended for richness, you can omit it and slightly increase the sour cream amount, though the texture may be slightly denser. We strongly advise against using low-fat or fat-free cream cheese, as the stabilizers in those products can ruin the texture and prevent the cheesecake from setting properly.
Common Mistakes to Avoid
The most common mistake home bakers make with cheesecake is temperature management, both of the ingredients and the oven. Using cold cream cheese is the number one culprit for lumpy batter; no amount of mixing will smooth out cold chunks without over-aerating the eggs. Another frequent error is overmixing the batter after adding the eggs. This incorporates too much air, which expands in the oven causing the cheesecake to puff up like a soufflé and then collapse and crack as it cools. Opening the oven door repeatedly to check on the cake causes temperature fluctuations that can also lead to sinking or cracking. Finally, impatience is the enemy of a good cheesecake. Rushing the cooling process by putting a hot cheesecake directly into the fridge will cause ‘cheesecake sweat’ (condensation) on the surface and can shock the structure into cracking. Always let it cool gradually in the oven and then on the counter.
Serving Suggestions
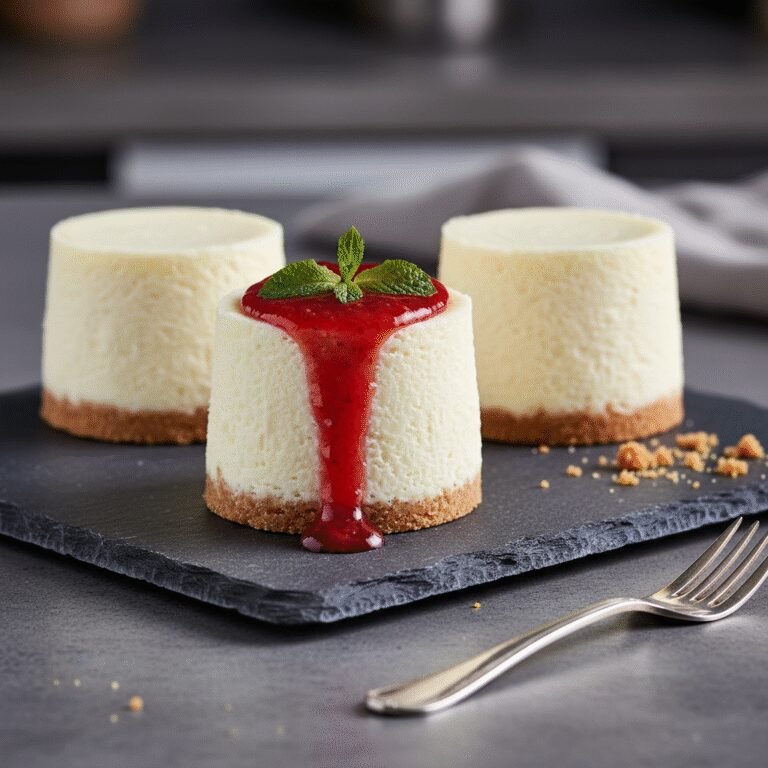
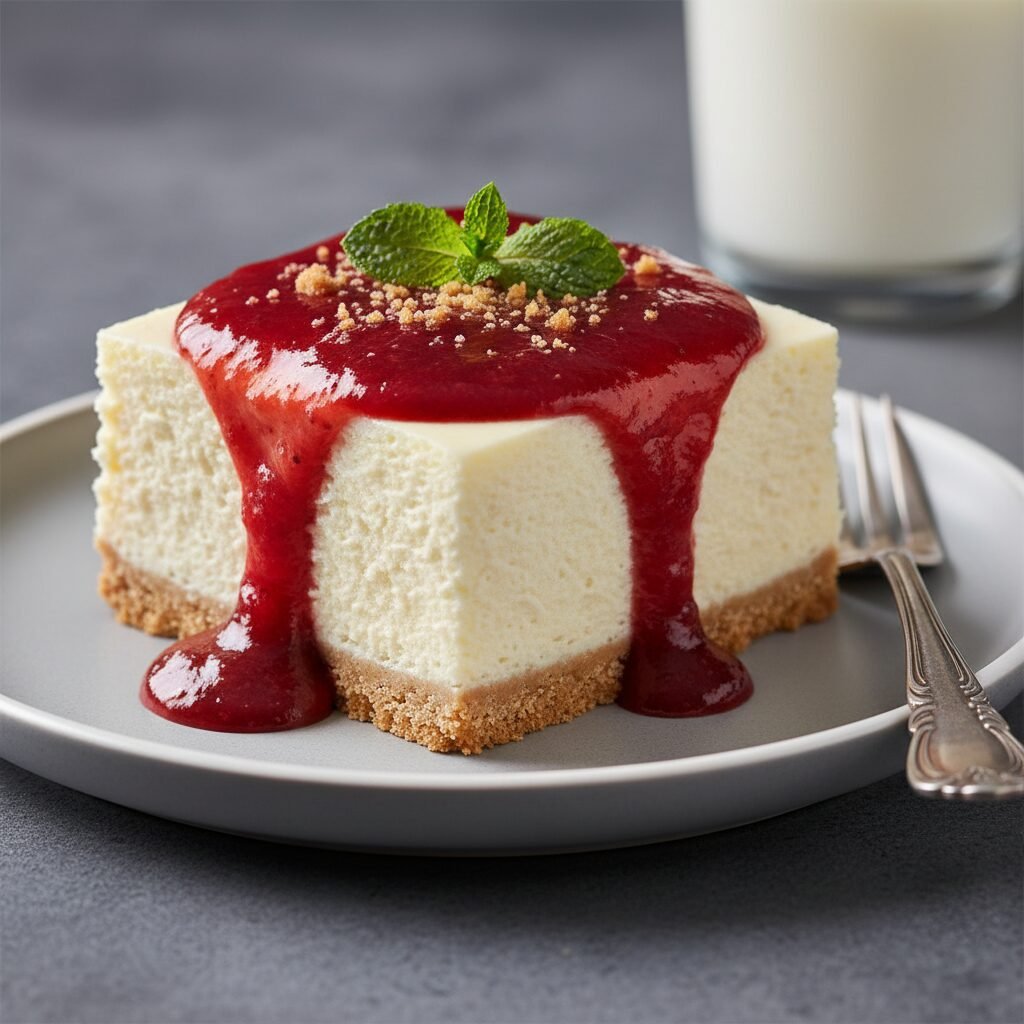
This creamy vanilla cheesecake is a versatile canvas that pairs beautifully with a wide array of toppings. For a classic presentation, serve chilled squares topped with a dollop of whipped cream and fresh strawberries or raspberries. A homemade berry compote or a drizzle of salted caramel sauce adds a luxurious touch that guests love. If you are serving this for a fall gathering, consider topping it with cinnamon-spiced sautéed apples or a pumpkin spice whipped cream. For chocolate lovers, a ganache drizzle or chocolate shavings provide a rich contrast to the tangy filling. You can also set up a ‘cheesecake bar’ station where guests can customize their own slices with bowls of crushed nuts, cookie crumbles, fruit sauces, and sprinkles.
Storage and Reheating Tips
Proper storage is essential to maintain the freshness and texture of your cheesecake. Leftover bars should be stored in an airtight container in the refrigerator, where they will keep well for up to 5 days. If you want to store the cheesecake for longer, it freezes exceptionally well. To freeze, first chill the cheesecake completely and slice it into bars. Wrap each individual bar tightly in plastic wrap, followed by a layer of aluminum foil to prevent freezer burn. Place the wrapped bars in a heavy-duty freezer bag or container. They can be frozen for up to 3 months. When you are ready to eat, thaw the unwrapped bars in the refrigerator overnight or on the counter for about 30 minutes. Avoid freezing the cheesecake with toppings; add fresh toppings just before serving.
Nutrition Facts (Estimated)
| Serving Size | 1 square |
| Calories | 320 |
| Fat | 24g |
| Saturated Fat | 14g |
| Unsaturated Fat | 8g |
| Trans Fat | 0g |
| Cholesterol | 85mg |
| Sodium | 180mg |
| Carbohydrates | 26g |
| Fiber | 0.5g |
| Sugar | 22g |
| Protein | 5g |
Frequently Asked Questions
Can I halve this recipe?
Yes, you can halve the ingredients and bake it in an 8×8 or 9×9 inch square pan. The baking time may need to be reduced slightly, so start checking for doneness around the 30-35 minute mark.
Why did my cheesecake crack?
Cracks are usually caused by overmixing the batter (adding too much air), overbaking (drying out the eggs), or cooling too quickly (thermal shock). Follow the cooling instructions carefully to avoid this.
Do I really need to use a water bath?
Not for this 9×13 recipe! Because the layer of batter is thinner than a traditional round cheesecake, it bakes more evenly without the need for the steam and humidity of a water bath.
How do I know when it is done?
The cheesecake is done when the edges are slightly puffy and set, but the center still has a slight wobble or jiggle when you gently shake the pan. It will continue to firm up as it cools.
Can I make this ahead of time?
Absolutely. In fact, cheesecake tastes better after resting in the fridge for 24 hours. It is the perfect make-ahead dessert for parties.
Can I use low-fat cream cheese?
It is not recommended. Low-fat cream cheese contains more water and different stabilizers, which can lead to a runny filling or a rubbery texture. Full-fat brick style cream cheese is best.
My ingredients are cold, how can I warm them up quickly?
Place the foil-wrapped cream cheese blocks in a bowl of warm water for 10 minutes. For eggs, submerge them in a bowl of warm tap water for 5 minutes. Microwave butter in short bursts.
Can I leave the cheesecake out at room temperature?
Cheesecake should not be left out for more than 2 hours due to its dairy and egg content. Always store it in the refrigerator when not being served.
Conclusion
Baking a cheesecake doesn’t have to be an intimidating ordeal reserved for professional pastry chefs. This Creamy Vanilla Cheesecake in a 9×13 pan proves that you can achieve gourmet results with standard kitchen equipment and a little bit of patience. By ditching the water bath and opting for the reliable rectangular pan, you ensure a smooth, crack-free, and utterly delicious dessert every single time. Whether you are baking for a holiday feast, a summer potluck, or just a weekend indulgence, these cheesecake bars are guaranteed to disappear fast. So grab your mixer, soften that cream cheese, and get ready to accept all the compliments coming your way!