The Ultimate Creamy New York Cheesecake With Digestive Biscuit Crust
Creamy New York Cheesecake With Digestive Biscuit Crust Recipe
Experience the epitome of dessert luxury with this ultra-creamy New York Cheesecake. Featuring a buttery, slightly nutty digestive biscuit crust that perfectly offsets the rich, tangy filling, this foolproof recipe guarantees a crack-free, velvety masterpiece every time.
30 minutes
1 hour 15 minutes
9 hours (includes cooling and chilling)
12 servings
Dessert
Baking
American / British Fusion
Vegetarian
There is something undeniably magical about a perfectly executed New York Cheesecake. It is the heavy hitter of the dessert world—dense, rich, and unapologetically creamy. While the classic American version typically relies on a graham cracker crust, this recipe elevates the experience by swapping in digestive biscuits. Popular in the UK and increasingly beloved in the US, digestive biscuits offer a slightly less sweet, wheaty, and nutty profile that cuts through the richness of the cream cheese filling with sophisticated balance.
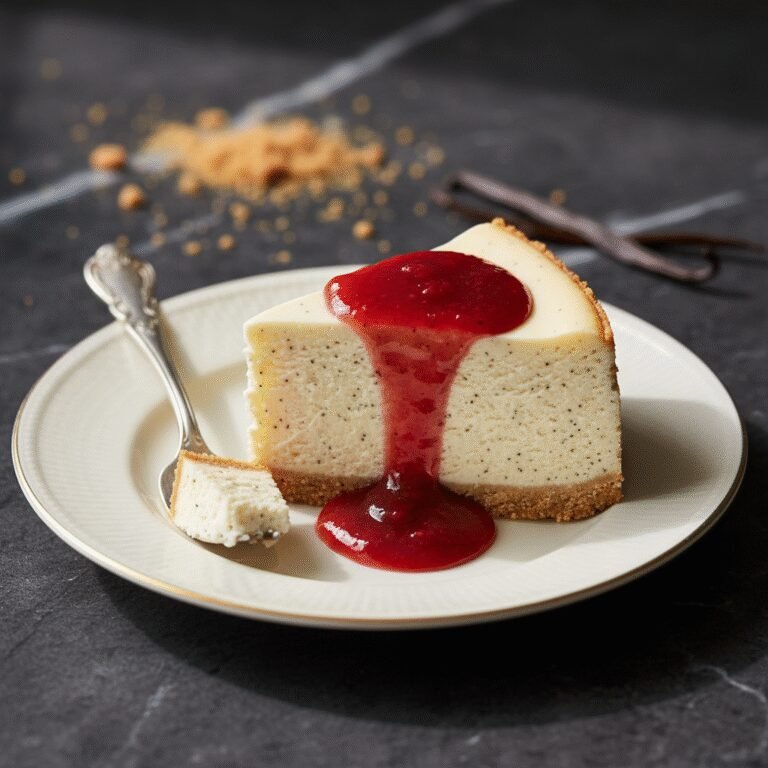
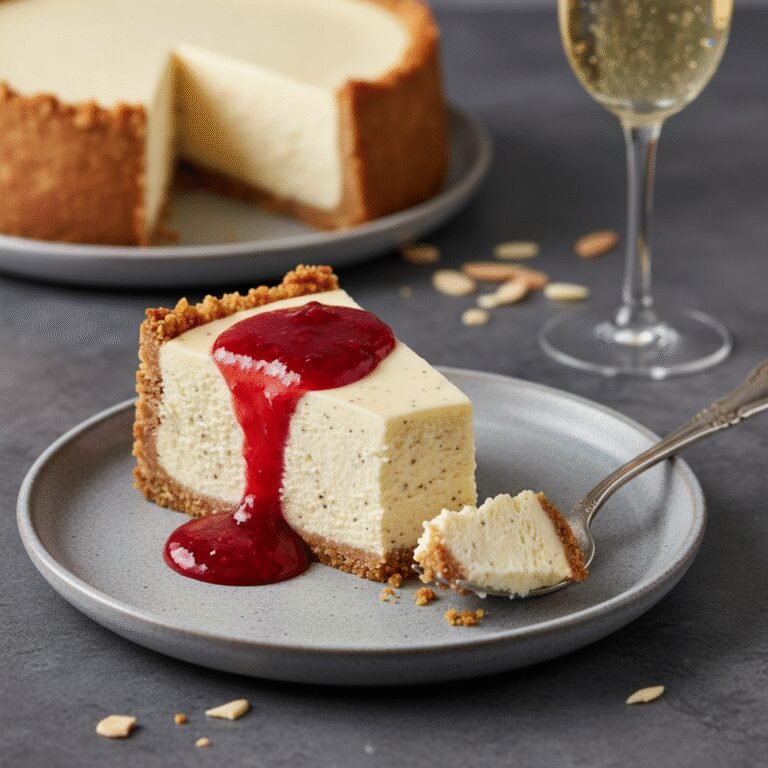
Imagine sinking your fork into a slice that is tall, pale, and smooth as silk. The texture is not fluffy like a sponge cake, nor is it gelatinous like a no-bake variety; it is substantial and velvety, melting slowly on the tongue to release notes of vanilla, tangy sour cream, and sweet cream cheese. The crust, golden and crisp, provides the necessary textural contrast, holding up the heavy filling without becoming soggy.
This recipe is designed for the home baker who wants bakery-quality results. We strip away the intimidation factor often associated with cheesecakes—fear of cracks, sinking centers, or grainy textures—and replace them with science-backed techniques. From the importance of room-temperature ingredients to the gentle steam of a water bath, every step is curated to ensure perfection. Whether you are topping it with a vibrant berry compote, a drizzle of salted caramel, or enjoying it in its pure, unadorned glory, this New York Cheesecake with a Digestive Biscuit Crust is destined to become your signature dessert for holidays, dinner parties, or those moments when only the best will do.
History & Origins
The lineage of the cheesecake is as rich and layered as the dessert itself, stretching far back into antiquity. While we associate the ‘New York’ style with the bustling delis of 20th-century Manhattan, the concept of a cheese-based cake dates back to ancient Greece. Known as ‘plakous’, these early versions were simple mixtures of cheese, honey, and wheat, often served to athletes at the first Olympic Games in 776 BC for energy.
The Romans later adopted the recipe, spreading it across Europe as they expanded their empire. However, the modern cream cheese that defines the New York style is a distinctly American innovation. In 1872, a New York dairyman named William Lawrence accidentally created a super-rich cheese while attempting to replicate French Neufchâtel. This ‘cream cheese’ became the foundation for the dense, smooth cakes we know today.
The specific ‘New York Style’ cheesecake is often attributed to Arnold Reuben, the owner of the legendary Turf Restaurant in NYC, in the 1920s. Unlike other variations that used cottage cheese or ricotta, Reuben’s recipe relied heavily on cream cheese and eggs, resulting in the iconic dense and smooth texture. The introduction of digestive biscuits for the crust is a nod to British culinary traditions. Invented in the 19th century by Scottish doctors to aid digestion, these semi-sweet biscuits became a staple for tea time and eventually found their perfect partner in the rich, tangy cream cheese filling, creating a transatlantic fusion that has stood the test of time.
Why This Recipe Works
This recipe succeeds where others fail because it meticulously controls the two enemies of a perfect cheesecake: air incorporation and rapid temperature changes. First, the choice of digestive biscuits over graham crackers provides a sturdier base with a deeper flavor profile. The whole wheat flour in digestives adds a savory undertone that balances the high sugar content of the filling.
Technically, the success of the filling relies on the emulsion of fat and liquid. By ensuring the cream cheese, eggs, and sour cream are all at room temperature, they blend seamlessly without the need for high-speed mixing. Over-mixing incorporates air bubbles, which expand in the oven and then collapse, causing the dreaded surface cracks. We mix on low speed just until combined to maintain a dense, creamy consistency.
Furthermore, the addition of cornstarch (cornflour) acts as an insurance policy. It interacts with the egg proteins, preventing them from coagulating too tightly, which keeps the texture smooth rather than grainy. Finally, the baking process utilizes a water bath (bain-marie) to regulate heat, ensuring the custard cooks gently and evenly. The slow cooling process—letting the cheesecake sit in the turned-off oven—allows the structure to set gradually, preventing thermal shock and ensuring a perfectly flat, pristine top.
Why You’ll Love This Recipe
- ✓Ultra-creamy, dense texture characteristic of authentic NY style.
- ✓Digestive biscuit crust adds a unique, nutty depth of flavor.
- ✓Foolproof water bath method prevents cracks and sinking.
- ✓Detailed cooling instructions ensure a perfect set.
- ✓Versatile base that pairs with fruit, chocolate, or caramel.
- ✓Can be made ahead of time, actually improving in flavor after 24 hours.
Equipment You’ll Need
- ✓9-inch Springform Pan
- ✓Electric Stand Mixer or Hand Mixer
- ✓Large Roasting Pan (for water bath)
- ✓Aluminum Foil (heavy duty)
- ✓Food Processor
- ✓Rubber Spatula
- ✓Measuring Cups and Spoons
- ✓Parchment Paper
Ingredients
- ✓2 cups (approx. 250g) Digestive Biscuits, crushed into fine crumbs
- ✓6 tbsp (85g) Unsalted Butter, melted
- ✓2 tbsp (25g) Granulated Sugar (for crust)
- ✓32 oz (900g) Full-fat Cream Cheese, room temperature
- ✓1 1/4 cups (250g) Granulated Sugar (for filling)
- ✓2 tbsp Cornstarch
- ✓1/2 cup (120ml) Sour Cream, room temperature
- ✓2 tsp Vanilla Extract
- ✓1 tsp Lemon Zest, freshly grated
- ✓4 large Eggs, room temperature
Instructions
- Preheat your oven to 350°F (175°C). Line the bottom of a 9-inch springform pan with parchment paper and grease the sides lightly.
- In a medium bowl, combine the crushed digestive biscuit crumbs, melted butter, and 2 tablespoons of sugar. Mix until the texture resembles wet sand.
- Press the crumb mixture firmly into the bottom of the prepared pan. You can use the bottom of a measuring cup to pack it down evenly. Bake for 10 minutes, then remove and let cool. Reduce oven temperature to 325°F (160°C).
- Wrap the outside of the springform pan securely with multiple layers of heavy-duty aluminum foil to ensure no water seeps in during the water bath.
- In a large mixing bowl or stand mixer fitted with the paddle attachment, beat the room temperature cream cheese on medium-low speed until creamy and smooth (about 2 minutes). Scrape down the sides of the bowl.
- In a small bowl, whisk together the 1 1/4 cups sugar and cornstarch. Gradually add this to the cream cheese, mixing on low speed until combined.
- Add the sour cream, vanilla extract, and lemon zest. Mix on low speed until just incorporated, scraping down the bowl again to ensure no lumps remain.
- Add the eggs one at a time, mixing on the lowest speed just until the yolk disappears. Do not overmix. Over-beating at this stage introduces air, which leads to cracks.
- Pour the batter over the cooled crust. Tap the pan gently on the counter a few times to release any trapped air bubbles.
- Place the springform pan inside a large roasting pan. Pour boiling water into the roasting pan until it reaches halfway up the sides of the springform pan.
- Bake in the preheated oven (325°F/160°C) for 60-75 minutes. The edges should be set and slightly puffed, but the center should still wobble slightly like Jell-O when the pan is gently shaken.
- Turn off the oven and crack the door open slightly (use a wooden spoon to hold it ajar). Let the cheesecake cool in the oven for 1 hour. This slow cooling prevents cracks.
- Remove the cheesecake from the water bath and foil. Run a thin knife around the edge to loosen it from the pan (this helps prevent cracking as it shrinks while cooling).
- Let it cool completely at room temperature, then refrigerate for at least 6 hours, preferably overnight, before slicing and serving.
Expert Cooking Tips
- ✓Ensure all dairy ingredients are at room temperature before starting; this is crucial for a lump-free batter.
- ✓Do not skip the water bath; the steam keeps the oven moisture high and the heat gentle.
- ✓Use heavy-duty foil or a slow-cooker liner bag around the pan to guarantee no water leaks into the crust.
- ✓Avoid opening the oven door during the first 45 minutes of baking to prevent temperature fluctuation.
- ✓When slicing, dip a sharp knife in hot water and wipe it clean between each cut for perfect slices.
- ✓If the top browns too quickly, tent a piece of foil loosely over the top for the last 15 minutes of baking.
Substitutions and Variations
If you cannot find digestive biscuits, you can substitute them with an equal weight of Graham crackers for a more traditional American flavor, or even Biscoff cookies for a spiced, caramel note. For a gluten-free version, use gluten-free digestive biscuits or gluten-free graham crackers and ensure your cornstarch is certified gluten-free. If you don’t have sour cream, full-fat Greek yogurt is an excellent alternative that provides a similar tang and texture. While heavy cream can be used instead of sour cream, the cheesecake will be richer and slightly less tangy. You can omit the lemon zest if you prefer a purely vanilla profile, or swap it for orange zest for a citrus twist. Salted butter can be used in the crust if you prefer a sweet-salty contrast, but reduce the added salt elsewhere if applicable.
Common Mistakes to Avoid
The most common mistake is using cold ingredients. Cold cream cheese will not blend smoothly, leading to a lumpy batter and over-mixing as you try to smooth it out. Over-mixing, especially after adding the eggs, incorporates air which causes the cheesecake to rise rapidly and then collapse and crack. Another frequent error is overbaking. People often wait until the center looks firm, but by then, the eggs have tightened too much, resulting in a dry, grainy texture. Trust the wobble! Lastly, rushing the cooling process by putting a hot cheesecake directly into the fridge will almost certainly cause condensation on the surface and significant cracking due to thermal shock.
Serving Suggestions
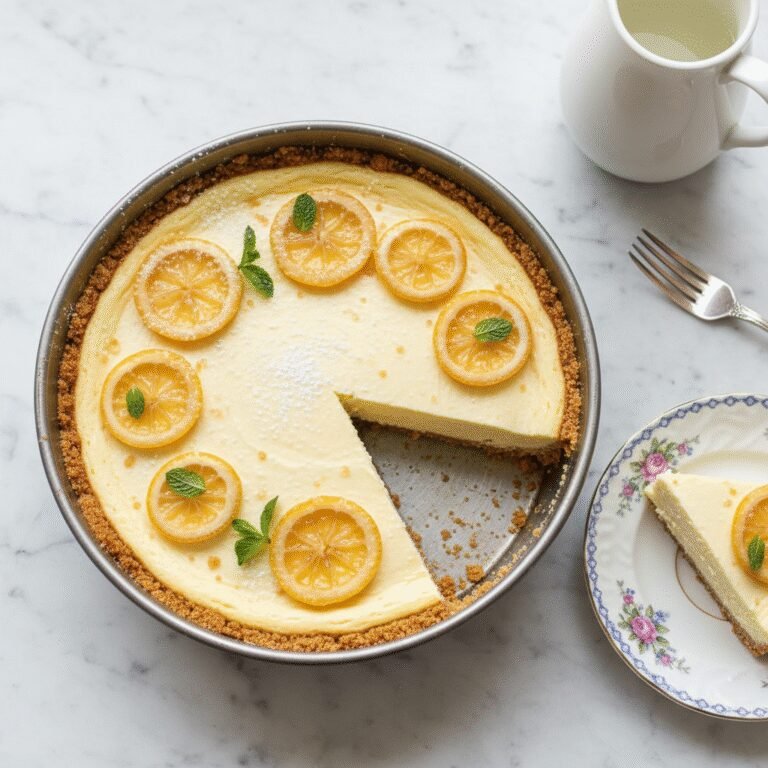
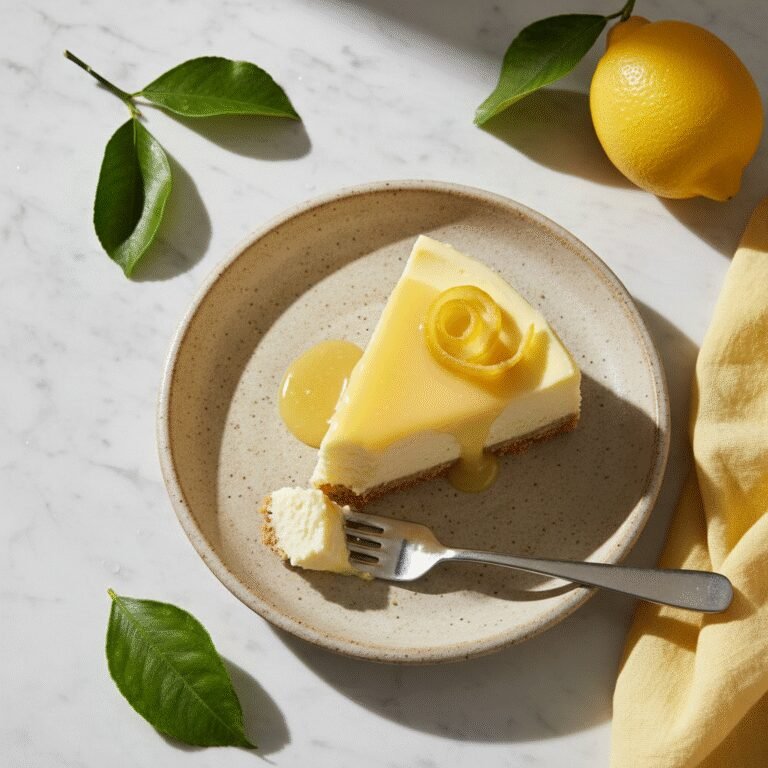
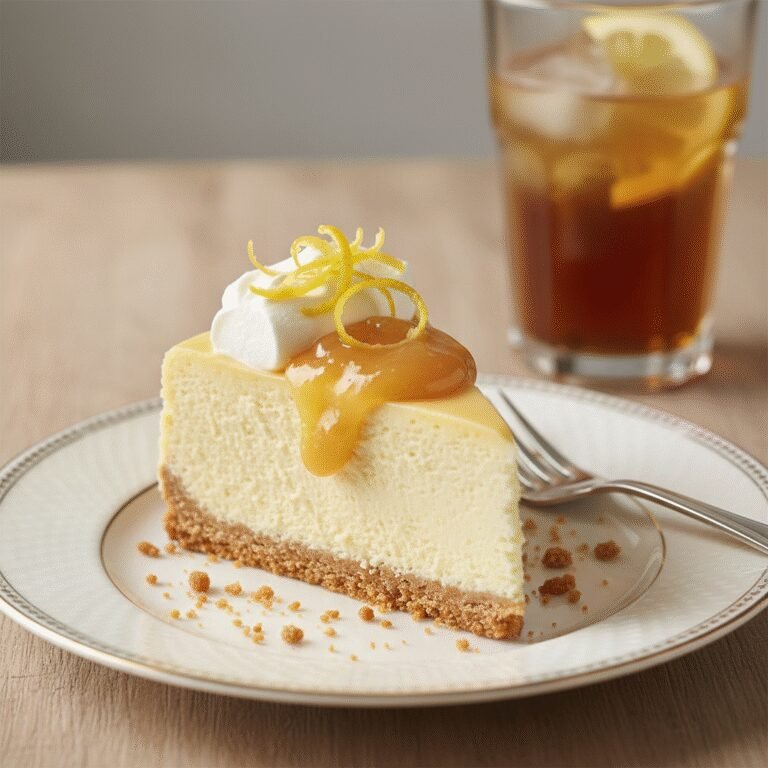
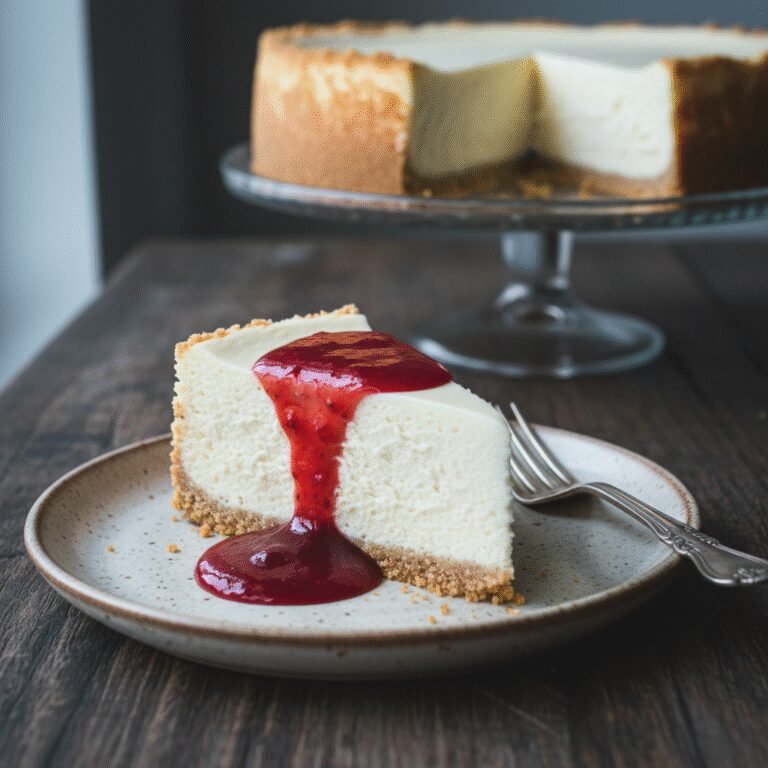
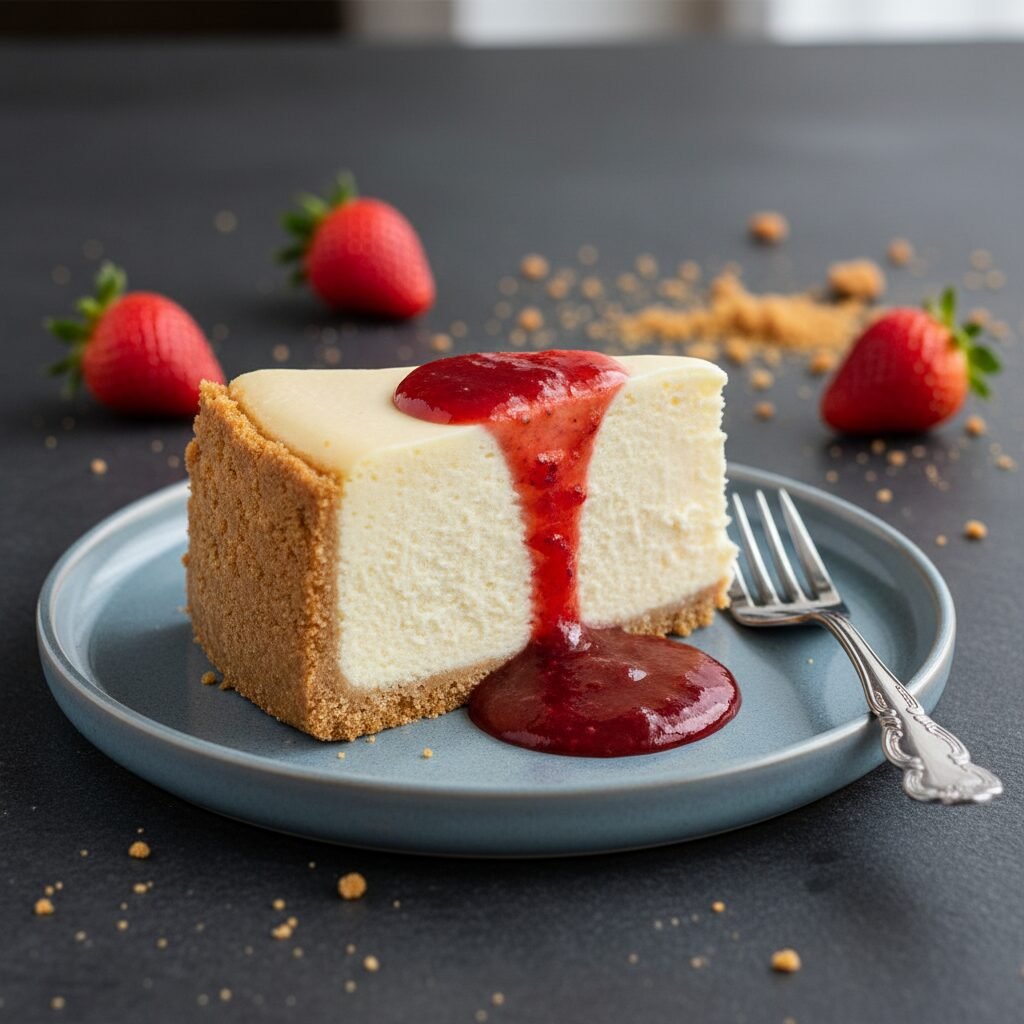
This cheesecake is rich enough to stand alone, but it pairs beautifully with tart or fresh elements. A classic strawberry or raspberry coulis (fruit sauce) cuts through the richness perfectly. Fresh berries, a sprig of mint, and a dusting of powdered sugar make for an elegant presentation. For decadence, drizzle with warm salted caramel sauce or chocolate ganache. Serve chilled, but let the slices sit at room temperature for 15-20 minutes before eating to maximize flavor and creaminess. Pair with a strong espresso or a glass of dessert wine like Sauternes.
Storage and Reheating Tips
Store the cheesecake in the refrigerator, loosely covered with plastic wrap or in a cake dome, for up to 5 days. The flavor often improves after the first 24 hours. For long-term storage, this cheesecake freezes exceptionally well. Wrap individual slices or the whole cake (minus any toppings) tightly in plastic wrap, followed by a layer of aluminum foil. It can be frozen for up to 3 months. Thaw overnight in the refrigerator before serving. Do not refreeze thawed cheesecake as the texture will suffer.
Nutrition Facts (Estimated)
| Serving Size | 1 slice |
| Calories | 580 |
| Fat | 42g |
| Saturated Fat | 24g |
| Unsaturated Fat | 14g |
| Trans Fat | 0.5g |
| Cholesterol | 165mg |
| Sodium | 340mg |
| Carbohydrates | 45g |
| Fiber | 1g |
| Sugar | 38g |
| Protein | 9g |
Frequently Asked Questions
Why did my cheesecake crack?
Cracks are usually caused by over-mixing the batter (adding too much air), over-baking (drying it out), or cooling it too quickly (thermal shock). Using a water bath and the oven-door-ajar cooling method helps prevent this.
Can I make this recipe without a water bath?
Technically yes, but the texture will be different. It will likely be denser, drier around the edges, and more prone to cracking and sinking. The water bath is highly recommended for that signature creamy NY texture.
What are digestive biscuits and where can I find them?
Digestive biscuits are semi-sweet, whole-wheat biscuits popular in the UK. In the US, they are often found in the international aisle of supermarkets (brands like McVitie’s) or can be ordered online.
How do I know exactly when it is done?
The edges (about 2 inches from the rim) should be set and firm, but the center 3-4 inches should still jiggle like gelatin or firm pudding. It will continue to set as it cools.
Can I use low-fat cream cheese?
It is not recommended. Low-fat cream cheese has a higher water content and stabilizers that can affect the setting ability and creamy mouthfeel. For the best results, stick to full-fat brick cream cheese.
Why do I need to run a knife around the edge after baking?
As the cheesecake cools, it shrinks slightly. If the edges are stuck to the pan, the tension created by the shrinking center will pull the cake apart, causing cracks. Loosening it allows it to contract freely.
My cheesecake is runny in the middle after cooling. What happened?
It was likely under-baked. If the center was liquid rather than jiggly when you took it out, it needed more time. Unfortunately, you cannot re-bake it once cooled. Freeze it and eat it as a frozen treat!
Can I make this in a different size pan?
Yes, but you will need to adjust baking times. A smaller, deeper pan (e.g., 8-inch) will take longer, while a larger, shallower pan (e.g., 10-inch) will bake faster. Keep a close eye on the wobble.
Conclusion
Mastering the New York Cheesecake with a Digestive Biscuit Crust is a culinary milestone that yields incredibly delicious rewards. While the process requires patience and attention to detail, the result is a dessert that rivals the best bakeries in Manhattan. The interplay between the nutty, wholesome crust and the luxurious, tangy filling creates a harmony of flavors that is simply unforgettable. We hope this guide gives you the confidence to tackle this classic dessert. Happy baking, and get ready to impress everyone at your table!