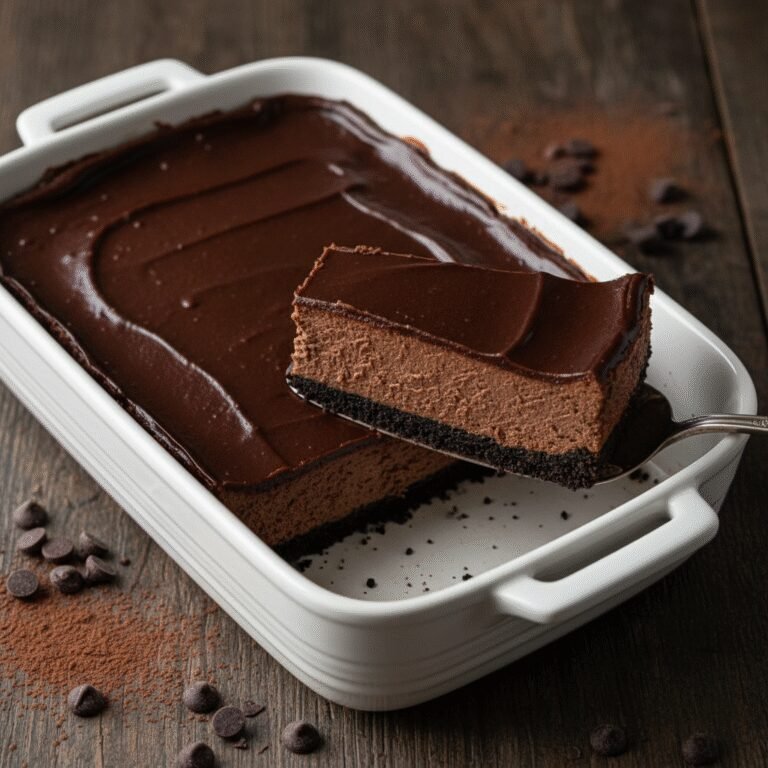
The Ultimate Creamy New York Cheesecake: A Step-by-Step Guide
Creamy New York Cheesecake In Springform Pan Recipe
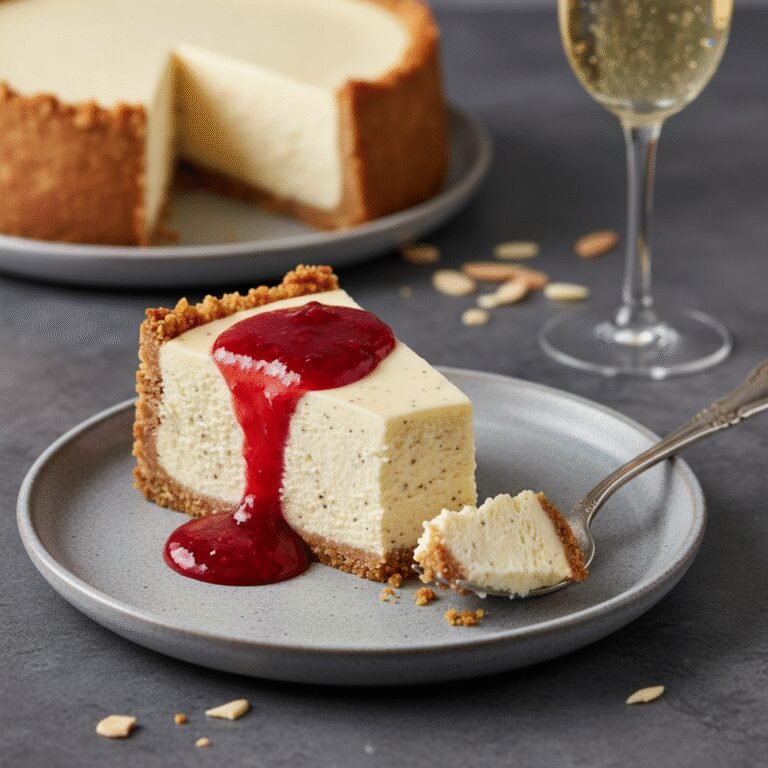
Discover the secret to a flawless, bakery-style New York Cheesecake right in your own kitchen. This recipe delivers a tall, dense, and velvety smooth dessert with a buttery graham cracker crust, all without the dreaded surface cracks.
30 minutes
1 hour 15 minutes
8 hours (includes cooling)
12-16 servings
Dessert
Baking
American
Vegetarian
There are few desserts as iconic, intimidating, and utterly rewarding as a classic New York Cheesecake. Unlike its lighter, fluffier counterparts, the New York style is famous for being unapologetically dense, rich, and incredibly creamy. It stands tall on the plate, demanding attention with its smooth, golden surface and a texture that literally melts in your mouth. For many home bakers, the cheesecake is the final frontier—a test of patience and precision often marred by the fear of the dreaded crack running down the center. But I am here to tell you that with the right technique, a trusty springform pan, and a little bit of science, you can produce a cheesecake that rivals iconic New York delis like Lindy’s or Junior’s.
This recipe is a labor of love that celebrates the pure, tangy flavor of high-quality cream cheese, balanced perfectly with just the right amount of sugar and a hint of lemon zest to cut through the richness. We aren’t taking any shortcuts here; we are using a traditional water bath and a slow-cooling method to ensure that velvety consistency. Whether you are topping it with a fresh strawberry compote, a drizzle of salted caramel, or enjoying it in its pristine, plain glory, this cheesecake is the ultimate showstopper for any dinner party or holiday gathering. Get ready to master the art of the perfect slice.
History & Origins
The history of cheesecake is a journey that spans thousands of years, long before it became synonymous with the Big Apple. The earliest known cheesecake recipes date back to ancient Greece, specifically on the island of Samos, where anthropologists have excavated cheese molds dating to 2,000 B.C. These early versions were considered a great source of energy and were even served to athletes during the first Olympic Games in 776 B.C. The Romans later adopted the recipe, adding crushed cheese and eggs, and spread the concept across Europe as they expanded their empire.
However, the ‘New York’ cheesecake as we know it today owes its existence to a fortunate accident in 1872. William Lawrence, a dairyman from Chester, New York, was attempting to recreate a French cheese known as Neufchâtel. In the process, he accidentally added too much cream, resulting in a heavier, richer substance that eventually became branded as ‘Philadelphia Cream Cheese.’ This invention revolutionized cheesecake making in America. In the early 20th century, German-Jewish immigrants in New York City began using this new cream cheese to create a denser, smoother version of the cake, moving away from the coarser curd-style cheeses used in Europe. Legendary establishments like Reuben’s Restaurant and Delicatessen and Lindy’s competed fiercely for the title of the best cheesecake, solidifying the ‘New York Style’—characterized by its high sides, lack of fancy toppings, and reliance on pure cream cheese, eggs, and sugar—as a culinary icon of the city.
Why This Recipe Works
This recipe succeeds where others fail because it meticulously manages temperature and moisture, the two biggest enemies of a smooth cheesecake. First, the inclusion of a small amount of cornstarch (or flour) acts as a stabilizer. It prevents the egg proteins from coagulating too tightly, which is the primary cause of a grainy texture. Second, the heavy reliance on room-temperature ingredients cannot be overstated. If your cream cheese is cold, you will have to over-beat the batter to get the lumps out, incorporating too much air. Air bubbles expand in the oven and then collapse, leading to cracks. By starting with soft ingredients, we achieve a smooth emulsion with minimal mixing.
Furthermore, the water bath (bain-marie) method is non-negotiable for this recipe. It surrounds the springform pan with gentle, consistent heat, preventing the edges from cooking faster than the center and ensuring the custard sets slowly and evenly. Finally, the ‘cool-down’ phase—leaving the cake in the turned-off oven with the door cracked—allows the structure to settle gradually. Sudden temperature changes cause the cheesecake to shrink rapidly, pulling away from the pan and tearing the surface. This recipe controls every variable to guarantee a flawless result.
Why You’ll Love This Recipe
- ✓Achieves the classic dense and creamy New York texture.
- ✓Uses a water bath method to prevent surface cracking.
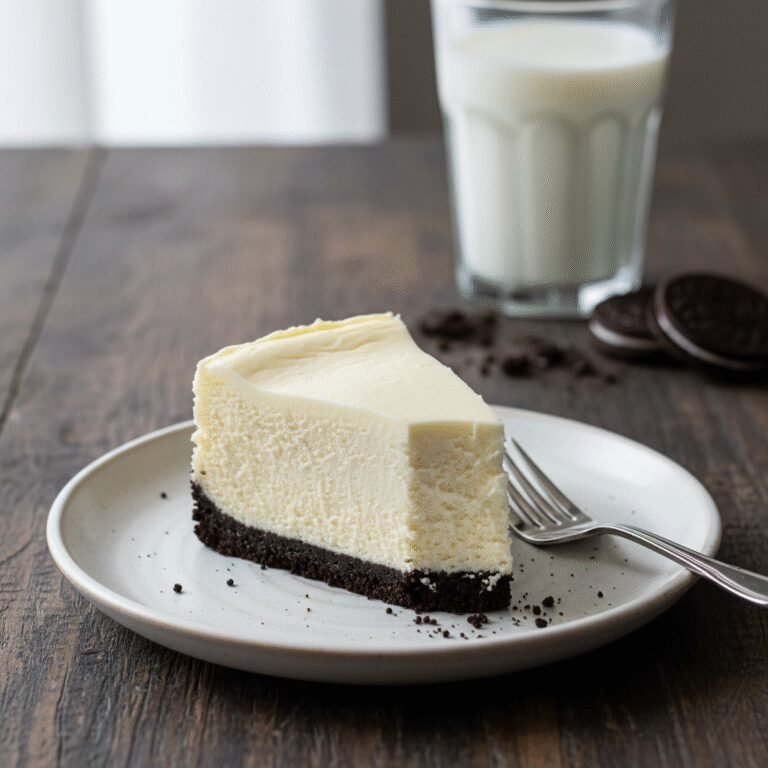
- ✓Features a sturdy, buttery graham cracker crust that doesn’t get soggy.
- ✓Includes lemon zest and vanilla for a complex, bakery-quality flavor profile.
- ✓Detailed cooling instructions ensure a perfectly level top.
Equipment You’ll Need
- ✓9-inch Springform Pan
- ✓Large Roasting Pan (for water bath)
- ✓Electric Stand Mixer or Hand Mixer
- ✓Heavy Duty Aluminum Foil
- ✓Rubber Spatula
- ✓Measuring Cups and Spoons
- ✓Parchment Paper
Ingredients
- ✓2 cups graham cracker crumbs (about 14 sheets)
- ✓1/2 cup unsalted butter, melted
- ✓1/4 cup granulated sugar (for crust)
- ✓2 lbs (4 blocks) full-fat cream cheese, softened to room temperature
- ✓1 1/4 cups granulated sugar (for filling)
- ✓1/2 cup sour cream, room temperature
- ✓2 teaspoons vanilla extract
- ✓2 teaspoons fresh lemon juice
- ✓1 teaspoon lemon zest
- ✓4 large eggs, room temperature
- ✓2 tablespoons cornstarch
Instructions
- Preheat your oven to 350°F (175°C). Line the bottom of a 9-inch springform pan with parchment paper and grease the sides lightly.
- In a medium bowl, combine the graham cracker crumbs, melted butter, and 1/4 cup sugar. Mix until the texture resembles wet sand.
- Press the crumb mixture firmly into the bottom and slightly up the sides of the springform pan. Bake the crust for 10 minutes, then remove and let it cool completely. Reduce oven temperature to 325°F (163°C).
- Prepare the pan for the water bath: Wrap the outside of the springform pan with 2-3 layers of heavy-duty aluminum foil to ensure no water seeps in.
- In a large bowl or stand mixer fitted with the paddle attachment, beat the softened cream cheese and 1 1/4 cups sugar on medium-low speed until completely smooth and creamy (about 2-3 minutes). Scrape down the bowl often.
- Add the sour cream, vanilla extract, lemon juice, lemon zest, and cornstarch. Beat on low speed until combined. Do not overmix.
- Add the eggs one at a time, beating on low speed just until blended after each addition. Scrape the bowl again to ensure no lumps remain at the bottom.
- Pour the batter over the cooled crust and smooth the top with a spatula. Tap the pan gently on the counter a few times to release any trapped air bubbles.
- Place the foil-wrapped springform pan into a large roasting pan. Pour boiling water into the roasting pan until it comes about halfway up the sides of the springform pan.
- Bake in the preheated oven at 325°F for 1 hour and 10 minutes to 1 hour and 20 minutes. The edges should be set, but the center should still jiggle slightly like Jell-O.
- Turn off the oven and crack the oven door open about an inch. Let the cheesecake cool in the oven for 1 hour. This prevents thermal shock.
- Remove the cheesecake from the water bath and foil. Run a thin knife gently around the edge to loosen it from the pan (this helps prevent cracking as it shrinks slightly).
- Let it cool completely on a wire rack, then refrigerate for at least 6 hours, preferably overnight, before removing the springform ring and serving.
Expert Cooking Tips
- ✓Room temperature ingredients are mandatory; cold ingredients cause lumps.
- ✓Do not overmix the batter once the eggs are added to avoid incorporating air.
- ✓Use heavy-duty foil or slow-cooker liners to waterproof your springform pan perfectly.
- ✓Don’t open the oven door during the first hour of baking to maintain consistent heat.
- ✓The ‘jiggle’ test is the best way to check doneness; if it’s firm, it’s overbaked.
- ✓Clean your knife with hot water between every slice for professional-looking cuts.
Substitutions and Variations
If you are looking to tweak the recipe based on dietary needs or pantry availability, there are a few safe swaps. For the crust, you can substitute graham crackers with digestive biscuits, vanilla wafers, or even gluten-free graham style crackers for a gluten-free base. If you prefer a chocolate crust, chocolate sandwich cookies (with the cream removed) work wonderfully. For the filling, full-fat cream cheese is essential for the texture, but you can substitute the sour cream with full-fat Greek yogurt or heavy cream if you’re in a pinch. The cornstarch can be swapped for all-purpose flour in equal amounts. However, do not try to substitute low-fat cream cheese or egg whites, as the fat content is structural to a New York cheesecake. For a different flavor profile, you can swap the lemon zest for orange zest or omit it entirely for a pure vanilla flavor.
Common Mistakes to Avoid
The most common mistake when making cheesecake is overmixing the batter, particularly after adding the eggs. High-speed mixing introduces air bubbles, which expand in the oven and then collapse, causing the cheesecake to crack and fall. Another major error is rushing the cooling process. Moving a hot cheesecake directly to the fridge will cause ‘cheesecake sweat’ (condensation) and significant cracking due to the rapid temperature shift. Always let it cool in the turned-off oven, then on the counter, before chilling. Lastly, water leakage into the springform pan is a tragedy; if you don’t have wide heavy-duty foil, place the springform pan inside a slightly larger cake pan, and place *that* pan into the water bath.
Serving Suggestions
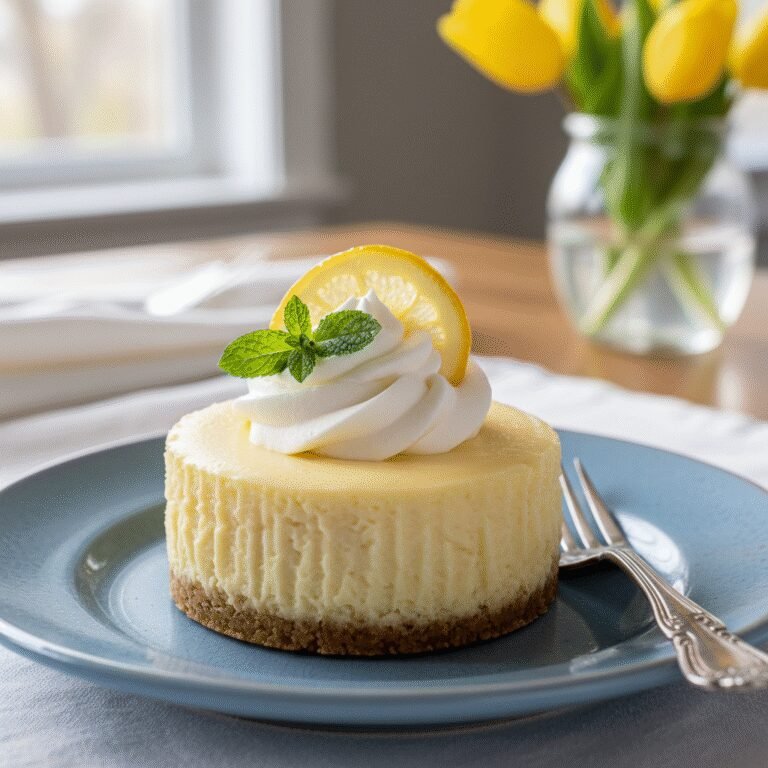
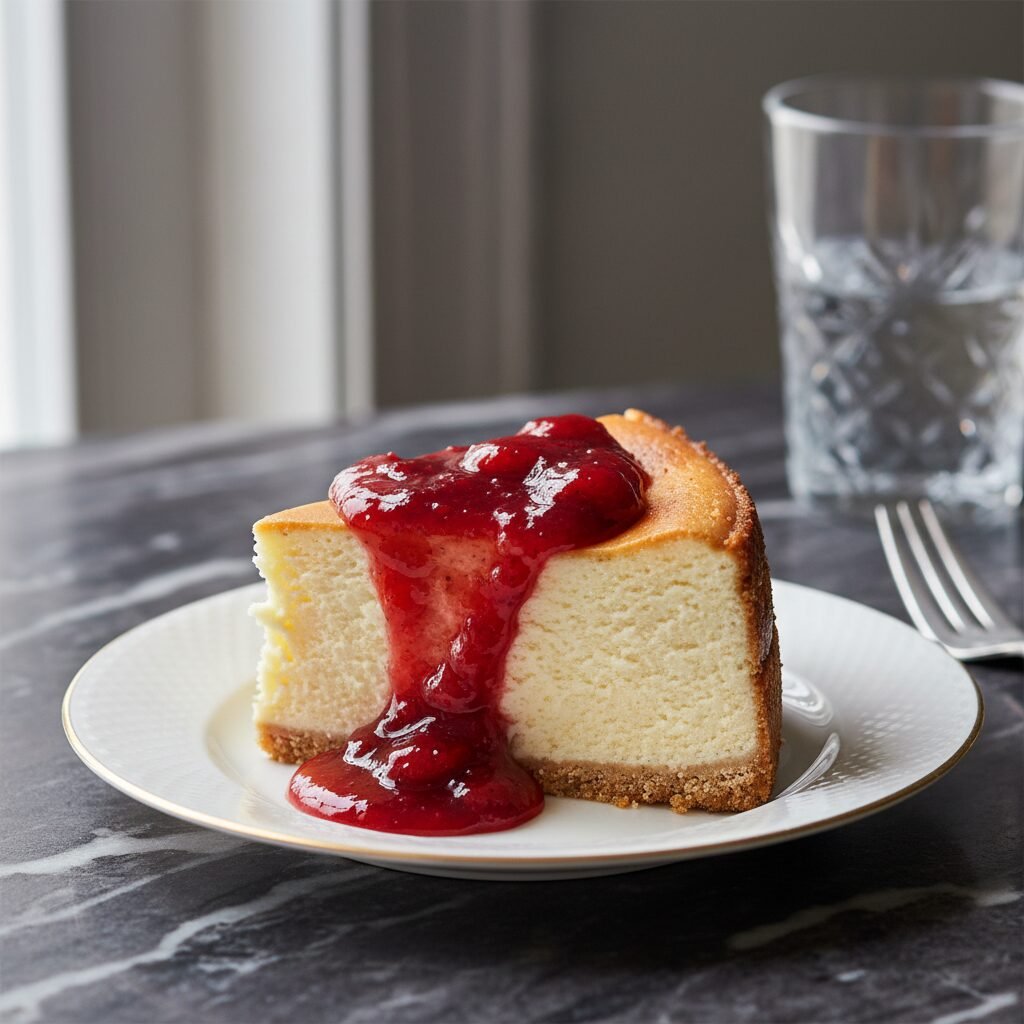
A classic New York Cheesecake is rich enough to stand on its own, but it pairs beautifully with tart or fruity elements to cut through the creaminess. A fresh strawberry or raspberry coulis is the most traditional topping. For a decadent twist, drizzle with warm salted caramel sauce or dark chocolate ganache. Fresh berries, mint leaves, or a dollop of unsweetened whipped cream also add a nice visual contrast. Serve this with a strong cup of coffee or an espresso to balance the sweetness. Ensure you remove the cheesecake from the fridge about 20 minutes before serving to take the chill off, which maximizes the flavor and creamy texture.
Storage and Reheating Tips
Cheesecake is one of those desserts that actually tastes better the next day, making it perfect for making ahead. Store the cheesecake in the springform pan or an airtight container in the refrigerator for up to 5 days. If you want to freeze it, cool the cake completely and chill it overnight first. You can freeze the whole cake or individual slices. Wrap the cake (without toppings) tightly in plastic wrap, followed by a layer of aluminum foil. It will keep well in the freezer for up to 2 months. Thaw overnight in the refrigerator before serving. Do not refreeze previously frozen cheesecake as the texture will become grainy.
Nutrition Facts (Estimated)
| Serving Size | 1 slice |
| Calories | 520 |
| Fat | 38g |
| Saturated Fat | 21g |
| Unsaturated Fat | 14g |
| Trans Fat | 0.5g |
| Cholesterol | 145mg |
| Sodium | 340mg |
| Carbohydrates | 36g |
| Fiber | 1g |
| Sugar | 28g |
| Protein | 8g |
Frequently Asked Questions
Why did my cheesecake crack?
Cracks usually happen due to overmixing the batter (too much air), overbaking (drying it out), or cooling it too quickly (thermal shock). Using the water bath and the oven-door-ajar cooling method solves most of these issues.
Do I really need a water bath?
For a true New York style texture, yes. The water bath moderates the heat, keeping the oven moisture high and the temperature around the pan gentle. Without it, the edges will overcook and curdle before the center is set.
Can I use low-fat cream cheese?
It is not recommended. Low-fat cream cheese has a higher water content and different stabilizers that can prevent the cheesecake from setting properly or result in a rubbery texture.
How do I know when it is done?
Gently shake the pan. The outer 2 inches should look set and matte, while the center usually wobbles slightly like gelatin. It will firm up significantly as it cools.
Can I make this without a springform pan?
It is difficult to remove a cheesecake from a standard cake pan without damaging it. If you don’t have a springform pan, line a deep cake pan with parchment paper with long overhangs to lift the cake out, but proceed with caution.
Why are my ingredients required to be room temperature?
Room temperature ingredients blend together easily into a smooth emulsion. If the cream cheese is cold, you will leave lumps or have to overbeat the mixture to smooth it out, leading to air bubbles.
My cheesecake is sinking in the middle, why?
This is usually a sign that the cheesecake was not baked long enough or was removed from the oven too abruptly. The center needs to be structurally sound before cooling begins.
Can I add mix-ins like chocolate chips?
Yes, but toss them in a little flour or cornstarch first to prevent them from sinking to the bottom of the batter.
Conclusion
Mastering the New York Cheesecake is a badge of honor for any home baker, and with this detailed guide, you are well on your way to dessert perfection. The combination of the crisp, buttery crust and the ultra-creamy, tangy filling is a timeless classic that never fails to impress. Remember that patience is the most critical ingredient in this recipe—from bringing ingredients to room temperature to the slow cooling process. Once you take that first bite of your homemade creation, you’ll realize that every minute of effort was worth it. Happy baking, and enjoy your slice of New York!