The Ultimate Creamy Lemon Cheesecake With Digestive Biscuit Crust
Creamy Lemon Cheesecake With Digestive Biscuit Crust Recipe
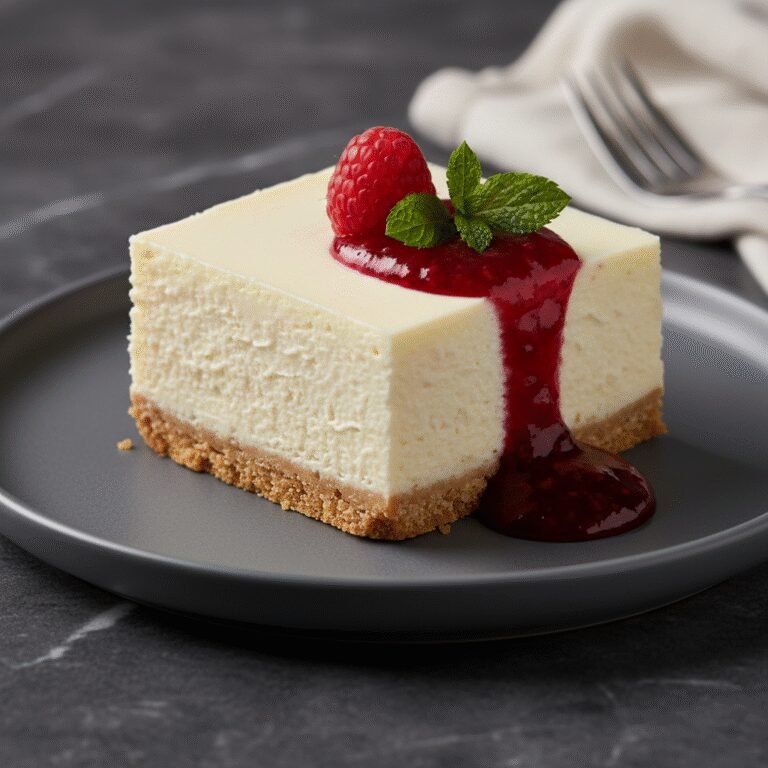
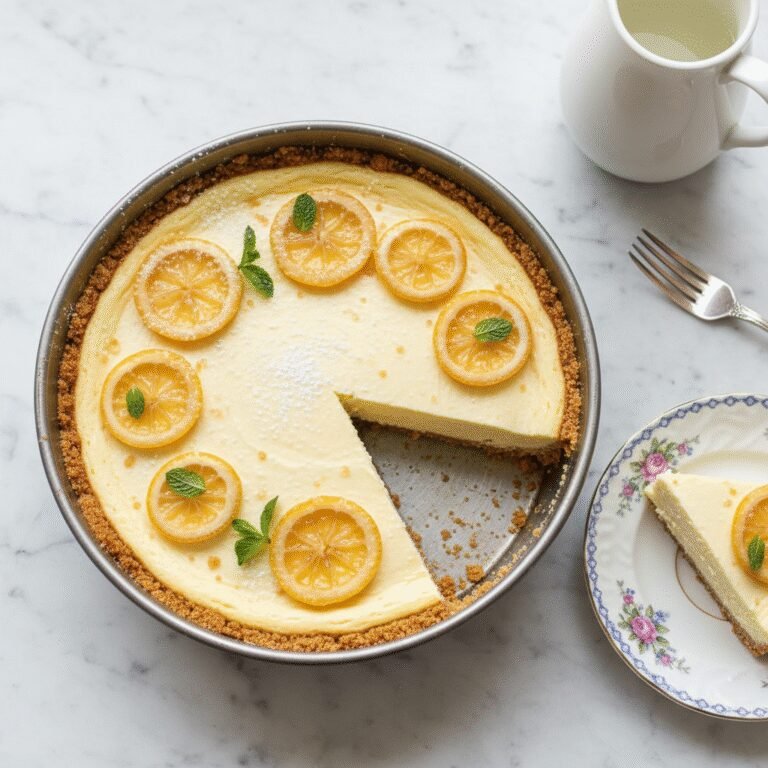
Experience the perfect balance of zesty brightness and velvety richness with this foolproof lemon cheesecake. Featuring a buttery, nutty digestive biscuit crust that perfectly offsets the sweet, tangy filling, this dessert is a showstopper that guarantees a crack-free result every time.
30 minutes
1 hour 15 minutes
8 hours (includes cooling)
12 servings
Dessert
Baking
American / British Fusion
Vegetarian
There is something profoundly satisfying about a perfectly executed cheesecake. It sits at the intersection of comfort food and elegance, demanding patience but rewarding you with a texture that is nothing short of luxurious. This Creamy Lemon Cheesecake with a Digestive Biscuit Crust is designed for those who crave that specific, melt-in-your-mouth consistency paired with a vibrant citrus punch. Unlike the dense, heavy blocks of cream cheese often found in deli cases, this recipe lightens the load with the addition of sour cream and heavy cream, creating a batter that is silky, airy, and incredibly smooth. The lemon is not shy here; we use both fresh juice and plenty of zest to ensure the flavor cuts through the richness of the dairy, cleansing the palate with every bite. But the true secret weapon of this recipe lies at the bottom. While the American standard is the graham cracker, we are opting for the British classic: the Digestive Biscuit. These semi-sweet, whole-wheat cookies offer a nuttier, more substantial crunch and a depth of flavor that graham crackers simply cannot match. When crushed and bound with melted butter and a whisper of salt, they form a crust that holds its own against the creamy filling, providing a textural contrast that is essential to the cheesecake experience. Whether you are hosting a summer garden party or looking for a cozy winter dessert to brighten up a gray day, this lemon cheesecake is a versatile masterpiece. We will walk you through the dreaded water bath method—demystifying the process to ensure your surface remains pristine and crack-free—and guide you through the crucial cooling stages that lock in that perfect texture.
History & Origins
The history of cheesecake is a journey that spans millennia, evolving from simple energy cakes to the decadent dessert we know today. Its origins can be traced back to ancient Greece, specifically the island of Samos, where physical anthropologists excavated cheese molds dating back to 2,000 B.C. In those days, cheesecake was considered a prime source of energy, served to athletes during the first Olympic Games in 776 B.C. The Romans later adopted the recipe, adding eggs and baking it under hot bricks, calling it ‘libum.’ As the Roman Empire expanded, so did the recipe, finding its way into medieval English cookbooks. However, the modern cheesecake we recognize owes its existence to a happy accident in New York. In 1872, a dairyman named William Lawrence was attempting to replicate the French cheese Neufchâtel but accidentally created a richer, creamier product that eventually became Philadelphia Cream Cheese. This innovation paved the way for the dense, rich New York Style cheesecake. The specific variation in this recipe, however, nods to the transatlantic exchange of culinary ideas. The use of Digestive Biscuits for the crust is a distinctly British tradition. Invented in 1839 by two Scottish doctors, digestives were originally believed to aid digestion due to their baking soda content. By the late 19th century, McVitie’s had popularized them as a tea-time staple. Incorporating them into cheesecake crusts became popular in the UK and parts of the Commonwealth because their wheat-heavy, slightly savory profile creates a sophisticated counterpoint to sweet fillings, distinguishing this recipe from its purely sweet American cousin.
Why This Recipe Works
This recipe succeeds where many others fail because it relies on the science of emulsion and gentle heat transfer. First, the insistence on room-temperature ingredients is not a suggestion; it is a chemical necessity. When the cream cheese, eggs, and sour cream are all at the same ambient temperature, they emulsify instantly upon mixing, eliminating the need to over-beat the batter. Over-beating introduces air bubbles, which expand in the oven and then collapse, causing the dreaded cracks. Second, the trio of dairy—cream cheese, sour cream, and heavy whipping cream—creates a complex texture. The cream cheese provides structure, the sour cream introduces a tang that amplifies the lemon, and the heavy cream loosens the protein network, ensuring the cake is velvety rather than chalky. Third, the digestive biscuit crust is superior for fruit-based cheesecakes. Digestive biscuits have a coarser crumb and a slight salinity that graham crackers lack. This prevents the crust from becoming a soggy mush under the moisture of the filling. Finally, the water bath (bain-marie) method regulates the baking temperature. Water boils at 212°F (100°C), meaning the water surrounding the pan will never get hotter than that. This ensures the eggs in the custard cook slowly and evenly, preventing the edges from curdling before the center is set.
Why You’ll Love This Recipe
- ✓Velvety, crack-free texture guaranteed by the water bath method.
- ✓Nutty, buttery digestive biscuit crust offers superior crunch.
- ✓Bright, zesty lemon flavor using fresh juice and zest.
- ✓Perfect balance of sweet and tangy.
- ✓Can be made up to 2 days in advance for easy entertaining.
- ✓Serves a crowd with rich, satisfying slices.
Equipment You’ll Need
- ✓9-inch Springform Pan
- ✓Electric Stand Mixer or Hand Mixer
- ✓Large Roasting Pan (for water bath)
- ✓Heavy Duty Aluminum Foil
- ✓Rubber Spatula
- ✓Microplane or Zester
- ✓Food Processor (for crumbs)
Ingredients
- ✓2 cups Digestive Biscuits, crushed into fine crumbs (approx. 10-12 oz)
- ✓1/2 cup Unsalted Butter, melted
- ✓1/4 cup Granulated Sugar (for crust)
- ✓1/4 tsp Fine Sea Salt
- ✓32 oz Full-Fat Cream Cheese, softened to room temperature
- ✓1 1/4 cups Granulated Sugar (for filling)
- ✓1/2 cup Full-Fat Sour Cream, room temperature
- ✓1/4 cup Heavy Whipping Cream, room temperature
- ✓4 Large Eggs, room temperature
- ✓1 tbsp Vanilla Extract
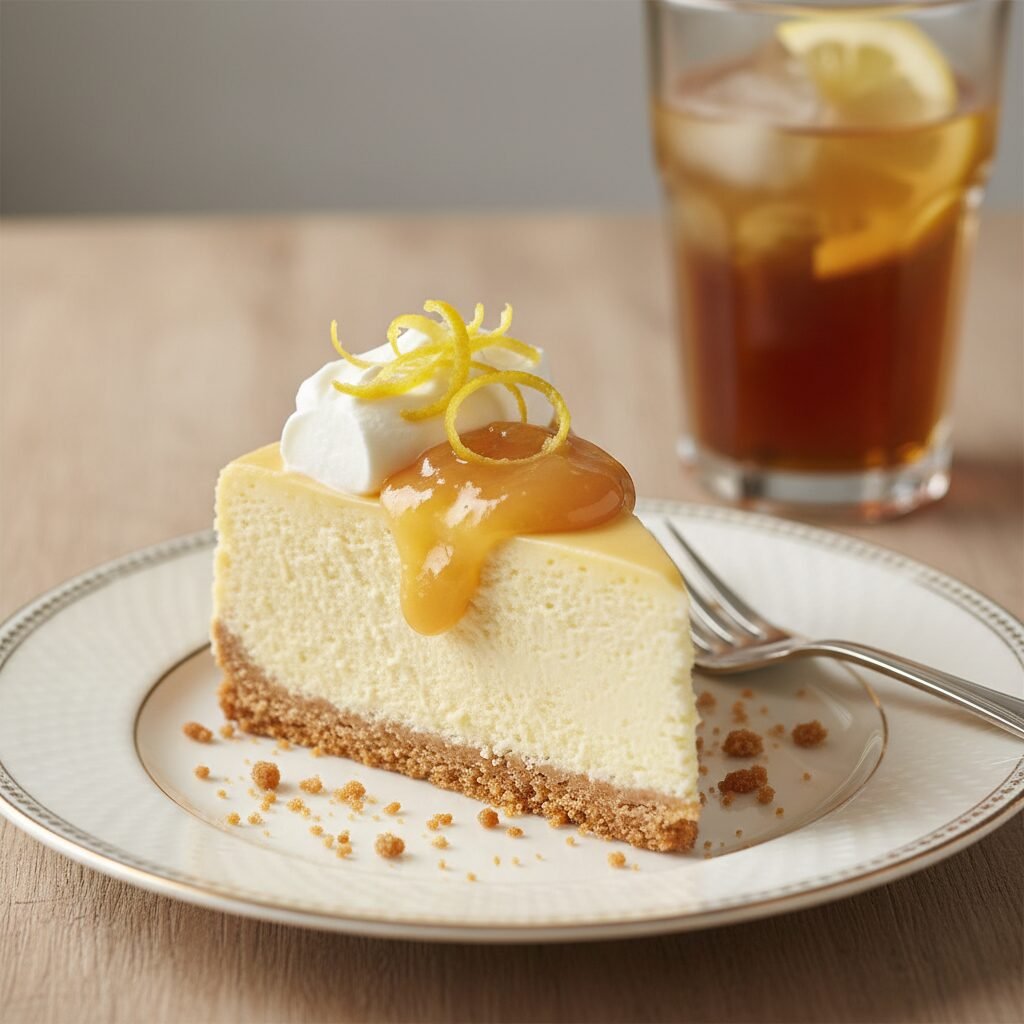
- ✓2 tbsp Fresh Lemon Zest (approx. 2 lemons)
- ✓1/4 cup Fresh Lemon Juice
Instructions
- Preheat your oven to 325°F (163°C). Position the rack in the center of the oven.
- Prepare the crust: In a medium bowl, combine the digestive biscuit crumbs, melted butter, 1/4 cup sugar, and salt. Mix until the texture resembles wet sand.
- Press the crumb mixture firmly into the bottom and slightly up the sides of a 9-inch springform pan. Use the bottom of a measuring cup to pack it down evenly. Bake for 10 minutes, then remove and let cool completely on a wire rack. Reduce oven temperature to 300°F (150°C).
- Waterproof the pan: Once the pan is cool, wrap the outside bottom and sides of the springform pan in 3 layers of heavy-duty aluminum foil to prevent water from seeping in.
- Make the filling: In a stand mixer fitted with the paddle attachment, beat the cream cheese and 1 1/4 cups sugar on medium-low speed until smooth and creamy (about 2-3 minutes). Scrape down the bowl.
- Add the sour cream, heavy cream, vanilla, lemon zest, and lemon juice. Mix on low speed until combined. Do not overmix.
- Add the eggs one at a time, mixing on low speed just until the yolk disappears. Scrape the bowl between additions. Stop mixing as soon as the last egg is incorporated.
- Pour the batter over the cooled crust. Tap the pan gently on the counter a few times to release any trapped air bubbles.
- Place the foil-wrapped springform pan inside a large roasting pan. Place the roasting pan in the oven, then carefully pour boiling water into the roasting pan until it reaches halfway up the sides of the cheesecake pan.
- Bake at 300°F (150°C) for 60-75 minutes. The cheesecake is done when the edges are set but the center still jiggles slightly like Jell-O.
- Turn off the oven. Crack the oven door open about an inch (use a wooden spoon to prop it if needed) and let the cheesecake cool inside the oven for 1 hour. This gradual cooling prevents cracks.
- Remove from the water bath and remove the foil. Run a thin knife around the edge to loosen the cake from the pan. Let it cool completely at room temperature.
- Refrigerate for at least 6 hours, preferably overnight, to set completely before slicing.
Expert Cooking Tips
- ✓Room temperature ingredients are non-negotiable; cold ingredients cause lumps.
- ✓Use a ‘slow’ paddle speed to avoid whipping air into the batter, which causes cracks.
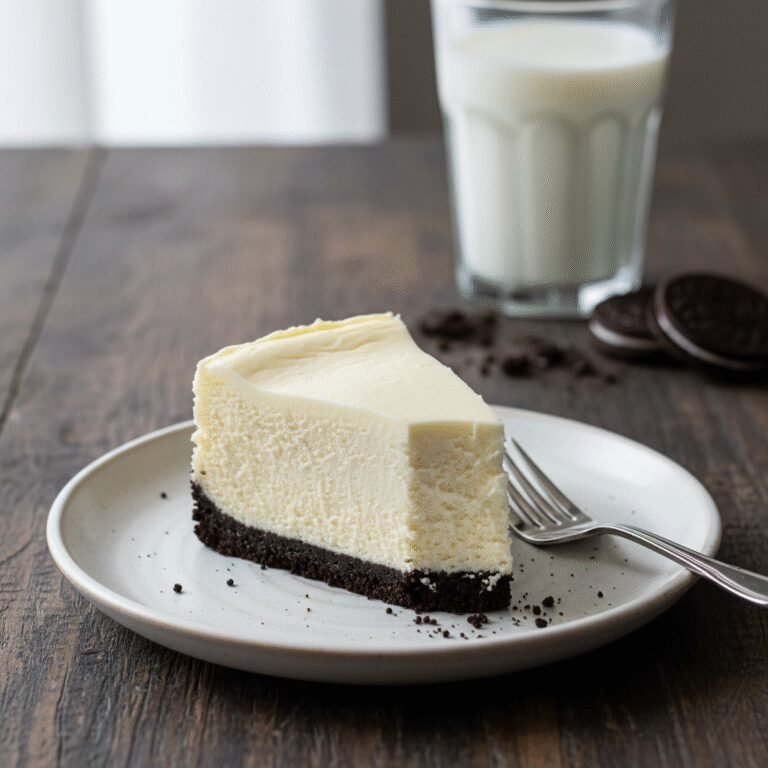
- ✓If you cannot find Digestive Biscuits, Graham Crackers are a 1:1 substitute, though the flavor will be sweeter.
- ✓Zest the lemons before juicing them; it is much harder to zest a squeezed lemon.
- ✓Do not open the oven door during the first 50 minutes of baking to maintain humidity.
- ✓Use a thermometer to check water bath temperature; keep the water boiling before adding to the pan.
- ✓Slice with a knife dipped in hot water and wiped clean between cuts for perfect edges.
Substitutions and Variations
While this recipe is optimized for specific ingredients, substitutions are possible. For the crust, if Digestive Biscuits are unavailable, you can use Graham Crackers, Biscoff cookies (for a spiced caramel flavor), or even vanilla wafers. If you need a gluten-free option, gluten-free Graham crackers or nut-based crusts (almond flour and butter) work beautifully. For the filling, full-fat ingredients are crucial for the texture. However, you can substitute the sour cream with full-fat Greek yogurt for a slightly tangier, higher-protein profile. Do not substitute the heavy cream with milk, as the mixture will be too runny. If you prefer a lime or orange cheesecake, simply swap the citrus zest and juice in equal quantities. For a refined sugar-free version, you can use a granular erythritol or monk fruit sweetener, but be aware that the cooling sensation of some sweeteners might be noticeable.
Common Mistakes to Avoid
The most common mistake is over-beating the batter after adding the eggs. This introduces air, which expands in the oven and causes the cheesecake to puff up and then collapse and crack as it cools. Another major error is baking at too high a temperature or for too long. Cheesecake should not be baked until firm; the ‘jiggle’ in the center is essential as it carries over cooking and sets in the fridge. Skipping the water bath is also a risk; without it, the texture tends to be rubbery rather than creamy. Finally, rushing the cooling process by putting a warm cheesecake directly into the fridge will almost certainly result in condensation forming on the surface (soggy top) and thermal shock cracks.
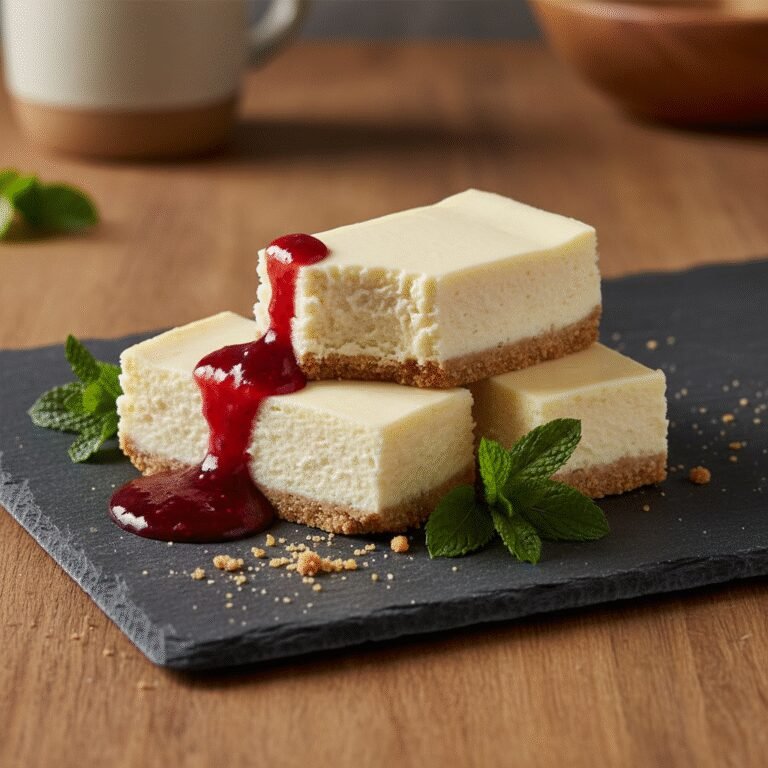
Serving Suggestions
This lemon cheesecake is rich, so it pairs best with toppings that cut through the creaminess. A homemade tart lemon curd spread over the top adds a glossy, professional finish and an extra punch of citrus. Fresh berries—raspberries, blueberries, or sliced strawberries—add a pop of color and freshness. For a simpler approach, a dollop of lightly sweetened whipped cream and a candied lemon slice makes for an elegant presentation. Serve with a hot cup of Earl Grey tea or a dark roast coffee to contrast the sweet and tangy flavors.
Storage and Reheating Tips
Store the cheesecake in the refrigerator, loosely covered with plastic wrap or in a cake dome, for up to 5 days. The crust will soften slightly over time. For long-term storage, this cheesecake freezes exceptionally well. To freeze, cool the cake completely and refrigerate overnight. Then, remove it from the springform pan base. Wrap the entire cake (or individual slices) tightly in two layers of plastic wrap, followed by a layer of heavy-duty aluminum foil. It can be frozen for up to 3 months. To thaw, place the wrapped cheesecake in the refrigerator overnight. Do not thaw in the microwave or at room temperature, as this will ruin the texture.
Nutrition Facts (Estimated)
| Serving Size | 1 slice |
| Calories | 480 |
| Fat | 36g |
| Saturated Fat | 21g |
| Unsaturated Fat | 12g |
| Trans Fat | 0.5g |
| Cholesterol | 145mg |
| Sodium | 340mg |
| Carbohydrates | 38g |
| Fiber | 1g |
| Sugar | 28g |
| Protein | 7g |
Frequently Asked Questions
Why did my cheesecake crack?
Cracks usually happen due to over-mixing the batter (too much air), over-baking (drying it out), or cooling it too quickly (thermal shock). The water bath and ‘oven door open’ cooling method help prevent this.
Can I skip the water bath?
Technically yes, but the texture will be denser, the edges might overcook, and the risk of cracking increases significantly. For a creamy result, the water bath is highly recommended.
What are Digestive Biscuits?
They are semi-sweet, whole-wheat biscuits from the UK, similar to a graham cracker but less sweet, slightly thicker, and with a nuttier flavor profile.
How do I know when it is done?
Gently shake the pan. The outer 2-3 inches should be firm, but the center should wobble like gelatin. If it is liquid, it needs more time; if it is stiff, it is overdone.
Can I use bottled lemon juice?
Fresh is always best for cheesecake. Bottled juice lacks the floral notes and can have a metallic or overly acidic preservative taste that stands out in a dairy-heavy dessert.
Do I have to use a springform pan?
Yes, a springform pan is essential because you cannot flip a cheesecake upside down to get it out of a standard cake pan without destroying it.
Why do ingredients need to be room temperature?
Cold cream cheese creates lumps that are impossible to beat out without over-mixing. Room temperature ingredients blend into a smooth emulsion instantly.
Can I make this ahead of time?
Yes, cheesecake actually tastes better after resting for 24 hours in the fridge, allowing the flavors to meld. It is the perfect make-ahead dessert.
Conclusion
Mastering the art of the lemon cheesecake is a culinary milestone that yields delicious rewards. By combining the rustic, wheaty crunch of digestive biscuits with a sophisticated, citrus-infused creamy filling, you elevate a standard dessert into something memorable. While the steps regarding water baths and cooling times may seem meticulous, they are the guardrails that ensure your success. So, gather your ingredients, let your cream cheese soften, and prepare to bake a dessert that will have your friends and family asking for the recipe before they have even finished their slice.