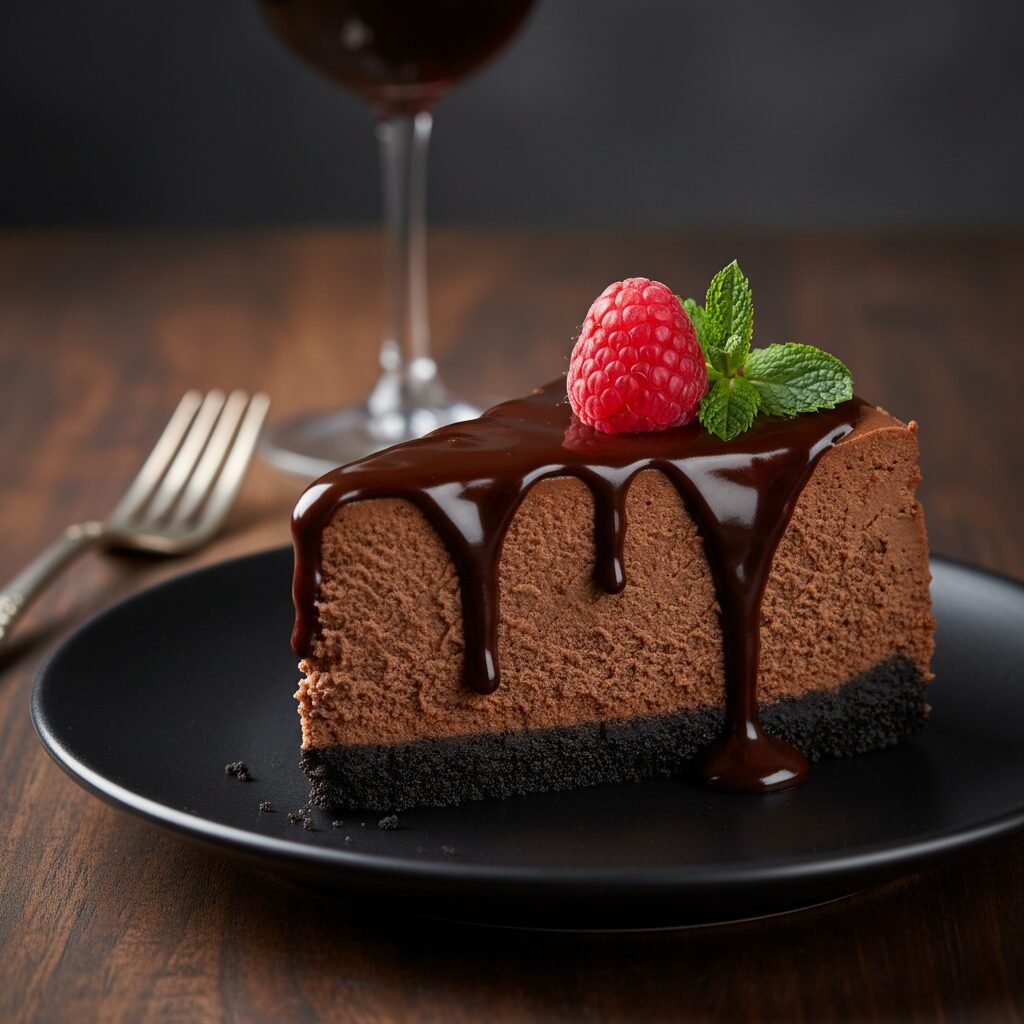
The Ultimate Creamy Chocolate Cheesecake in a Springform Pan
Creamy Chocolate Cheesecake In Springform Pan Recipe
This decadent, velvety chocolate cheesecake is the stuff dreams are made of. Baked to perfection in a springform pan for flawless edges, it features an Oreo crust, a rich triple-chocolate filling, and a silky ganache topping that will steal the show at any gathering.
30 minutes
1 hour 15 minutes
8 hours (includes cooling and chilling)
12 servings
Dessert
Baking
American
Vegetarian
If there is one dessert that universally signals celebration, comfort, and pure indulgence, it is the chocolate cheesecake. But we aren’t talking about just any cheesecake here; we are talking about the kind of dessert that stops conversation the moment the fork hits the plate. This Creamy Chocolate Cheesecake, baked specifically in a springform pan, is designed to be the ultimate showstopper. It strikes the perfect balance between dense and fluffy, offering a texture that is unmistakably creamy without being heavy or cloying. The depth of flavor comes from a triple-threat of chocolate elements: a dark cocoa powder base, melted semi-sweet chocolate folded into the batter, and a glossy, rich ganache poured over the top.
The magic of this recipe lies not just in the ingredients, but in the method. Using a springform pan is non-negotiable for that professional bakery look, allowing you to release the delicate cake without damaging its structural integrity. Whether you are a seasoned baker or a novice looking to impress, this guide breaks down the intimidating process of baking a cheesecake into manageable steps. We will explore the importance of the water bath, the necessity of room-temperature ingredients, and the patience required for the cooling process. By the time you slice into this masterpiece, revealing its smooth, dark interior, you will understand why homemade cheesecake is infinitely superior to anything you can buy frozen. Prepare your taste buds for a journey into the heart of chocolate euphoria.
History & Origins
The history of cheesecake is a culinary voyage that spans millennia, evolving from simple energy cakes to the complex, creamy desserts we adore today. While many associate cheesecake with New York delis, its origins can be traced back to Ancient Greece. Known as ‘plakous’ or ‘libum,’ early versions were made from pounded cheese, honey, and wheat, often served to athletes during the first Olympic Games in 776 B.C. for an energy boost. As the Roman Empire expanded, they adopted the recipe, adding eggs and baking it under hot bricks, calling it ‘savillum.’
The concept of cheesecake spread across Europe, morphing with local ingredients, but the chocolate cheesecake we know today is a much more modern invention. The pivotal moment in cheesecake history occurred in 1872 in Chester, New York, when a dairyman named William Lawrence accidentally invented cream cheese while trying to replicate French Neufchâtel. This denser, richer cheese became the foundation of the American-style cheesecake. The marriage of this creamy base with chocolate likely gained popularity in the mid-20th century as chocolate became more accessible and baking technology improved. The introduction of the springform pan was another game-changer, allowing for taller, more fragile cakes to be baked and presented elegantly. Today, the chocolate cheesecake represents the pinnacle of American dessert innovation—a fusion of ancient traditions and modern indulgence.
Why This Recipe Works
This recipe succeeds where many others fail because it meticulously addresses the science of baking custards. Cheesecake is, effectively, a baked cheese custard, and it requires gentle, even heat to maintain a smooth texture. The combination of full-fat cream cheese and sour cream is the secret to the tangible ‘tang’ and velvety mouthfeel. The sour cream breaks up the density of the cheese, ensuring the cake isn’t too heavy, while the eggs provide the necessary structure.
Furthermore, incorporating both cocoa powder and melted chocolate ensures a multi-dimensional chocolate flavor. Cocoa powder provides a deep, intense chocolate hit, while the melted chocolate contributes to the creaminess and stability of the batter. The water bath (bain-marie) method utilized here is crucial; the steam generates a humid environment that prevents the top from drying out and cracking, while the water buffers the heat, cooking the eggs slowly to prevent curdling. Finally, the cooling process—leaving the cake in the oven with the door cracked—allows the structure to set gradually. Rapid temperature changes cause shrinking and cracking, but this slow-cool method ensures a perfectly flat, pristine surface ready for ganache.
Why You’ll Love This Recipe
- ✓Ultra-creamy texture with no graininess
- ✓Deep, intense chocolate flavor using three forms of chocolate
- ✓Sturdy Oreo crust that doesn’t get soggy
- ✓Professional presentation thanks to the springform pan method
- ✓Freezes beautifully for make-ahead convenience
- ✓Includes a foolproof water bath technique to prevent cracks
Equipment You’ll Need
- ✓9-inch Springform Pan
- ✓Large Roasting Pan (for water bath)
- ✓Heavy-duty Aluminum Foil
- ✓Electric Stand Mixer or Hand Mixer
- ✓Rubber Spatula
- ✓Food Processor (for crust)
- ✓Medium Saucepan
- ✓Parchment Paper
Ingredients
- ✓24 Oreo cookies (filling included)
- ✓5 tbsp Unsalted butter, melted
- ✓32 oz (4 blocks) Full-fat cream cheese, room temperature
- ✓1 1/2 cups Granulated sugar
- ✓1/2 cup Unsweetened cocoa powder
- ✓4 Large eggs, room temperature
- ✓10 oz Semi-sweet chocolate chips, melted and slightly cooled
- ✓1 cup Full-fat sour cream, room temperature
- ✓2 tsp Pure vanilla extract
- ✓1/2 cup Heavy cream (for ganache)
- ✓1 cup Semi-sweet chocolate chips (for ganache)
Instructions
- Preheat your oven to 325°F (163°C). Grease the bottom and sides of a 9-inch springform pan generously with butter or cooking spray.
- Make the crust: Pulse the Oreo cookies in a food processor until they are fine crumbs. Pour in the melted butter and pulse until combined. Press this mixture firmly into the bottom of the prepared springform pan. Bake for 10 minutes, then remove and let cool.
- Prepare the pan for the water bath: Wrap the outside bottom and sides of the springform pan with 2-3 layers of heavy-duty aluminum foil to ensure no water seeps in.
- Make the filling: In a large bowl or stand mixer fitted with the paddle attachment, beat the room temperature cream cheese on medium speed until completely smooth and creamy (about 3 minutes). Scrape down the bowl.
- Add the sugar and cocoa powder to the cream cheese. Beat on low speed until well combined and smooth. Do not overmix to avoid adding too much air.
- Add the eggs one at a time, beating on low speed just until incorporated after each addition. Scrape the bowl as needed.
- Stir in the melted chocolate (ensure it is not hot), sour cream, and vanilla extract. Mix until the batter is uniform in color and texture.
- Pour the batter over the cooled crust in the springform pan. Smooth the top with a spatula.
- Place the foil-wrapped springform pan inside a large roasting pan. Place the roasting pan in the oven, then carefully pour boiling water into the roasting pan until it reaches halfway up the sides of the springform pan.
- Bake for 60 to 75 minutes. The edges should be set, but the center should still jiggle slightly like Jell-O.
- Turn off the oven and crack the door open about an inch. Let the cheesecake cool inside the oven for 1 hour. This prevents cracking.
- Remove from the oven and water bath. Run a thin knife around the edge to loosen it from the pan. Let it cool completely to room temperature on a wire rack.
- Refrigerate the cheesecake (still in the pan) for at least 6 hours, preferably overnight.
- Make the ganache: Heat heavy cream in a small saucepan until it just begins to simmer. Pour over the 1 cup of chocolate chips in a heat-proof bowl. Let sit for 5 minutes, then whisk until smooth and glossy.
- Remove the sides of the springform pan. Pour the ganache over the chilled cheesecake, letting it drip down the sides if desired. Slice and serve.
Expert Cooking Tips
- ✓Ensure all dairy ingredients (cream cheese, eggs, sour cream) are at room temperature before starting to prevent lumps.
- ✓Do not overbeat the batter once the eggs are added; incorporating too much air causes the cheesecake to puff up and then crack.
- ✓Use high-quality chocolate for the melting portion; it significantly impacts the final flavor profile.
- ✓If you don’t have a roasting pan, you can place a pan of water on the rack directly beneath the cheesecake to create humidity.
- ✓To slice cleanly, dip a sharp knife in hot water and wipe it dry between every single cut.
- ✓Don’t skip the slow cooling process in the oven; sudden temperature drops are the enemy of a smooth surface.
Substitutions and Variations
This recipe is versatile enough to handle several substitutions without compromising integrity. For the crust, if you prefer a less intense chocolate flavor, you can use graham crackers or digestive biscuits mixed with a tablespoon of cocoa powder. Gluten-free chocolate sandwich cookies work perfectly as a direct 1:1 swap for Oreos to make this dish gluten-free. Regarding the filling, you can substitute the sour cream with full-fat plain Greek yogurt for a slightly tangier profile and a bit more protein. If you prefer a darker, more bitter cheesecake, use bittersweet chocolate (60% cacao or higher) instead of semi-sweet. Do not substitute low-fat or fat-free cream cheese, as the stabilizers in those products will ruin the texture and prevent the cheesecake from setting properly. For the ganache, you can use heavy coconut cream and dairy-free chocolate chips for a dairy-free topping, though the cheesecake itself relies heavily on dairy.
Common Mistakes to Avoid
The most common mistake when making cheesecake is using cold ingredients. Cold cream cheese will result in a lumpy batter that never smooths out, no matter how long you beat it. Another major pitfall is overbaking. Many home bakers wait until the center is firm before taking it out, which guarantees a dry, grainy texture. Trust the ‘jiggle’—the center should wobble. Skipping the water bath is another error; while it’s a hassle, it ensures gentle cooking. Without it, the edges will overcook before the center is done, and the top will likely crack. Lastly, rushing the chilling process is a mistake. The cheesecake needs time to firm up in the fridge; cutting it too early will result in a runny, messy slice.
Serving Suggestions
This rich dessert pairs beautifully with tart or fresh elements to cut through the chocolate intensity. Serve slices with a generous dollop of freshly whipped cream (unsweetened or lightly sweetened) and a handful of fresh raspberries or strawberries. The acidity of the berries balances the sugar and fat perfectly. For a more decadent approach, drizzle salted caramel sauce over the ganache or sprinkle with flaky sea salt to enhance the chocolate flavor. A dusting of espresso powder or chocolate shavings adds a nice finish. Beverage-wise, this pairs exceptionally well with a hot espresso, a glass of bold red wine like a Cabernet Sauvignon, or an ice-cold glass of milk.
Storage and Reheating Tips
Cheesecake stores exceptionally well, making it a great make-ahead dessert. Leftovers can be stored in the refrigerator, loosely covered with plastic wrap or in an airtight cake carrier, for up to 5 days. For longer storage, you can freeze the cheesecake. To freeze the whole cake, cool it completely (without ganache is best, but with ganache works too), remove the ring, and freeze it on the base until firm. Then, wrap it tightly in two layers of plastic wrap followed by a layer of aluminum foil. It will keep for up to 3 months. To freeze individual slices, wrap each slice in plastic wrap and foil. Thaw in the refrigerator overnight before serving. Do not microwave to thaw, as the texture will melt.
Nutrition Facts (Estimated)
| Serving Size | 1 slice |
| Calories | 580 |
| Fat | 42g |
| Saturated Fat | 24g |
| Unsaturated Fat | 16g |
| Trans Fat | 0.5g |
| Cholesterol | 145mg |
| Sodium | 320mg |
| Carbohydrates | 48g |
| Fiber | 3g |
| Sugar | 38g |
| Protein | 9g |
Frequently Asked Questions
Why did my cheesecake crack?
Cracks usually happen due to overbeating the eggs (adding air), overbaking (drying it out), or cooling it too quickly (thermal shock). Using a water bath and cooling it in the oven helps prevent this.
Can I make this without a springform pan?
It is difficult to remove a cheesecake from a standard cake pan without ruining it. If you don’t have a springform pan, line a standard pan with enough parchment paper so that it hangs over the sides, allowing you to lift the cake out once frozen solid.
Do I really need the water bath?
Technically no, but highly recommended. Without it, the texture will be more like a dense pie, the edges may brown too much, and the surface is very likely to crack.
How do I know when it is done?
Gently shake the pan. The outer 2-3 inches should look set and puffy, while the center should wobble like gelatin. It will continue to firm up as it cools.
Can I use milk chocolate instead of semi-sweet?
You can, but the cheesecake will be significantly sweeter and lighter in color. Semi-sweet or dark chocolate provides the best balance against the sugar and cream cheese.
Why is my cheesecake runny?
It was likely underbaked or not chilled long enough. It needs at least 6 hours, preferably overnight, in the fridge to fully set the structure.
Can I use a different crust?
Absolutely. Graham cracker crust, pretzel crust, or even a brownie base are all delicious alternatives.
My springform pan leaks water. What do I do?
If foil isn’t working, you can place the springform pan inside a slightly larger cake pan, and then place that cake pan into the water bath. This creates a barrier.
Conclusion
Mastering the art of the chocolate cheesecake is a milestone for any home baker. While the steps may seem numerous, the result is a dessert that rivals high-end restaurants in both flavor and presentation. The combination of the crunchy Oreo crust, the silky, tangy chocolate filling, and the luxurious ganache creates a symphony of textures that is hard to beat. Whether for a birthday, a holiday, or just a Tuesday night treat, this Creamy Chocolate Cheesecake in a Springform Pan is guaranteed to impress. Don’t forget to share your beautiful creations on Pinterest and tag us so we can see your baking triumph!