The Ultimate 5-Minute Chocolate Mug Cake for One
Easy Chocolate Mug Cake For One Person Recipe
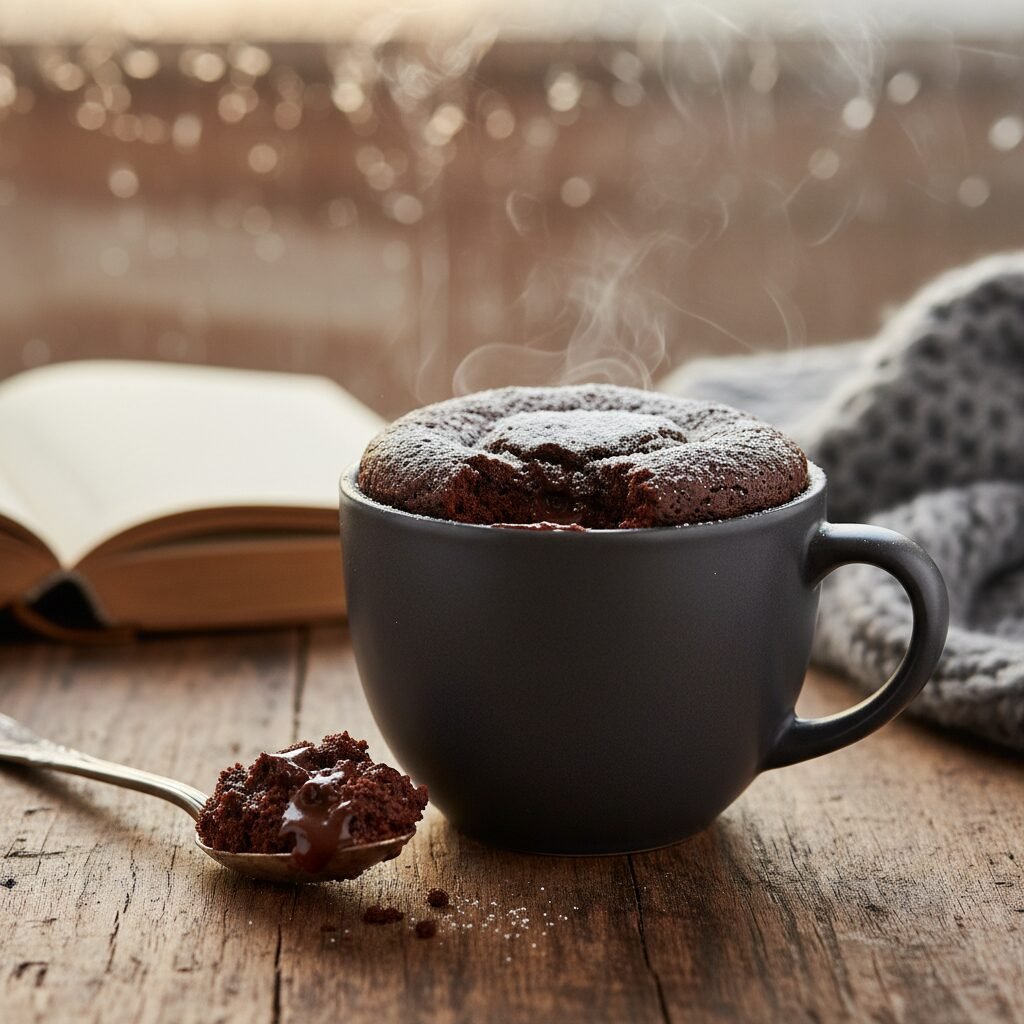
Satisfy your late-night sweet tooth instantly with this incredibly rich and moist chocolate mug cake. Ready in less than five minutes using simple pantry staples, this single-serving dessert is the perfect solution for emergency chocolate cravings without the hassle of baking a whole cake.
2 minutes
2 minutes
4 minutes
1 serving
Dessert
Microwave
American
Vegetarian
We have all been there: it is late at night, the house is quiet, and suddenly, an undeniable craving for something warm, chocolatey, and decadent strikes. You don’t want to drag out the stand mixer, preheat the oven, and wait an hour for a full cake to bake, nor do you want a dozen leftover cupcakes staring at you from the counter for the next three days. Enter the chocolate mug cake—the unsung hero of solo desserts and the answer to your chocolate prayers. This isn’t just any quick fix; it is a carefully tested recipe designed to avoid the rubbery, sponge-like texture that plagues so many microwave desserts. Instead, we are aiming for a texture that sits delightfully somewhere between a fluffy cake and a fudgy brownie.
The beauty of this recipe lies in its simplicity and its forgiveness. It requires nothing more than a standard ceramic mug, a spoon, and a handful of ingredients you likely already have sitting in your pantry. There is something incredibly comforting about wrapping your hands around a warm mug, digging a spoon through a tender crumb, and hitting a pocket of melted chocolate chips. It is a moment of pure self-care, a treat made exclusively for you. Whether you are a college student in a dorm, a busy parent needing a moment of peace, or simply a chocolate lover looking for a quick fix, this easy chocolate mug cake is about to become your go-to recipe. It is rich, deeply chocolatey, and impossibly easy—the trifecta of a perfect dessert.
History & Origins
The concept of baking cakes in small containers is not entirely new, but the specific phenomenon of the ‘microwave mug cake’ is a relatively modern culinary evolution, closely tied to the ubiquity of the microwave oven and the rise of internet food culture. While ‘cupcakes’ have existed for centuries—originally named for the pottery cups they were baked in or the volume measurements used—they were traditionally baked in hearths or ovens. The microwave oven, introduced to American households in the mid-20th century, revolutionized how people thought about speed cooking, though early microwave cookbooks often focused on savory meals rather than delicate baking.
The true explosion of the mug cake occurred in the early 2000s and 2010s, coinciding with the rise of food blogging and social media platforms like Pinterest. As visual content became king, the appeal of a single-serving cake that could be made in minutes was undeniable. It catered to a growing demand for portion control, convenience, and instant gratification. Early iterations were often criticized for their texture—frequently described as rubbery or dry due to the way microwaves heat water molecules rapidly. Over time, however, home cooks and recipe developers refined the science, learning that removing the egg (which often overcooks quickly in small quantities) and adjusting fat ratios could produce a genuine cake texture. Today, the mug cake has cemented its place in modern culinary history as the ultimate comfort food hack, bridging the gap between traditional baking and modern convenience.
Why This Recipe Works
This recipe succeeds where many other mug cakes fail primarily because it eliminates the egg. In a full-sized cake, eggs provide structure and lift, but in a tiny mug cooked in a high-powered microwave, even a fraction of an egg can turn the batter into a rubbery, tough omelet-like puck. By removing the egg and relying on baking powder for lift and milk combined with oil (or melted butter) for moisture, we ensure a tender, soft crumb that remains moist rather than chewy.
Furthermore, the ratio of liquid to dry ingredients is slightly higher here than in a standard oven cake. Microwaves cook by exciting water molecules, which causes rapid evaporation. To counteract this drying effect, this recipe utilizes plenty of fat and liquid to keep the cake fudgy. The addition of chocolate chips is not just for flavor; as they melt, they create pockets of goo that mimic the texture of a molten lava cake, distracting the palate from any potential dryness that might occur if the cake is slightly overcooked. Finally, the cooking time is kept short—usually just 60 to 90 seconds—to prevent the sugars from burning and the flour from toughening.
Why You’ll Love This Recipe
- ✓Ready in under 5 minutes from start to finish
- ✓No eggs required, preventing a rubbery texture
- ✓Uses standard pantry staples you likely have on hand
- ✓Perfect portion control for a single serving
- ✓Minimal cleanup—mix and bake in the same mug
- ✓Easily customizable with nuts, caramel, or fruit
Equipment You’ll Need
- ✓Microwave-safe mug (12-14 oz capacity)
- ✓Tablespoon
- ✓Teaspoon
- ✓Small mixing spoon
- ✓Microwave
Ingredients
- ✓4 tablespoons all-purpose flour
- ✓3 tablespoons granulated sugar
- ✓2 tablespoons unsweetened cocoa powder
- ✓1/2 teaspoon baking powder
- ✓Pinch of salt
- ✓3 tablespoons milk (dairy or non-dairy)
- ✓1 tablespoon vegetable oil or melted butter
- ✓1/4 teaspoon vanilla extract
- ✓1 tablespoon semi-sweet chocolate chips (optional but recommended)
Instructions
- Select a microwave-safe mug that holds at least 12 ounces of liquid to prevent overflowing.
- Add the dry ingredients (flour, sugar, cocoa powder, baking powder, and salt) directly into the mug.
- Use a spoon to mix the dry ingredients thoroughly, ensuring there are no large clumps of cocoa powder or flour at the bottom.
- Add the wet ingredients (milk, oil/butter, and vanilla extract) to the mug.
- Stir the mixture vigorously until the batter is smooth and uniform. Be sure to scrape the bottom edges of the mug to incorporate all the flour.
- Sprinkle the chocolate chips on top of the batter. You can push them down slightly if you want them in the center.
- Place the mug in the microwave and cook on high power for 60 to 90 seconds. The cake should rise and look set, but slightly moist on top.
- Remove the mug carefully (it will be hot!) and let it sit for 1-2 minutes to cool and finish setting.
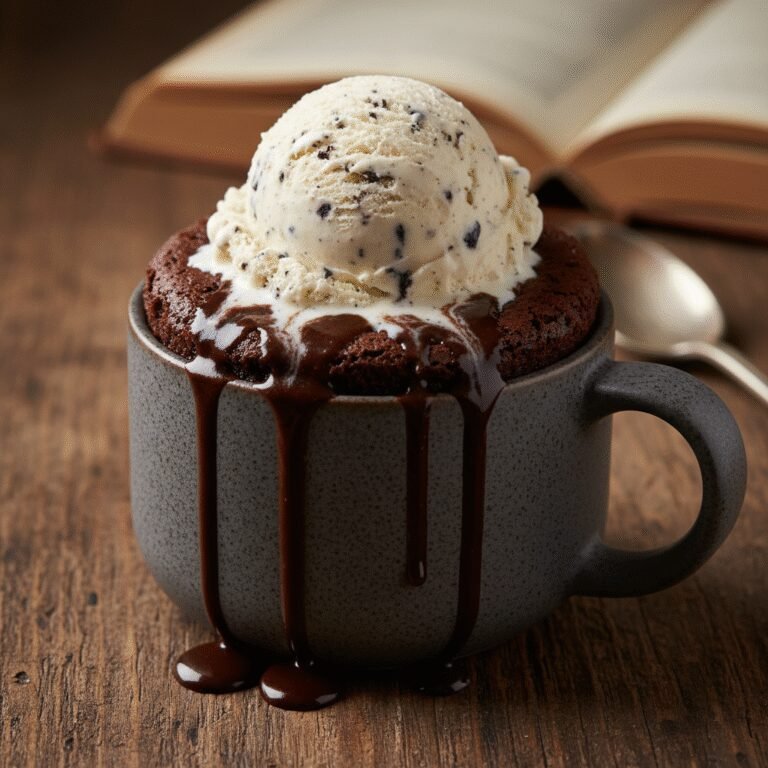
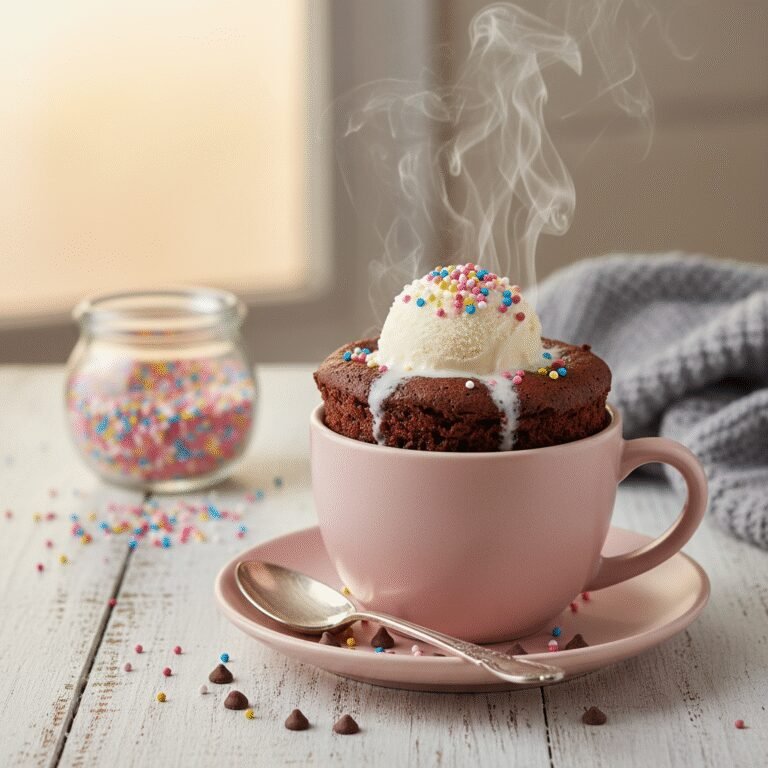
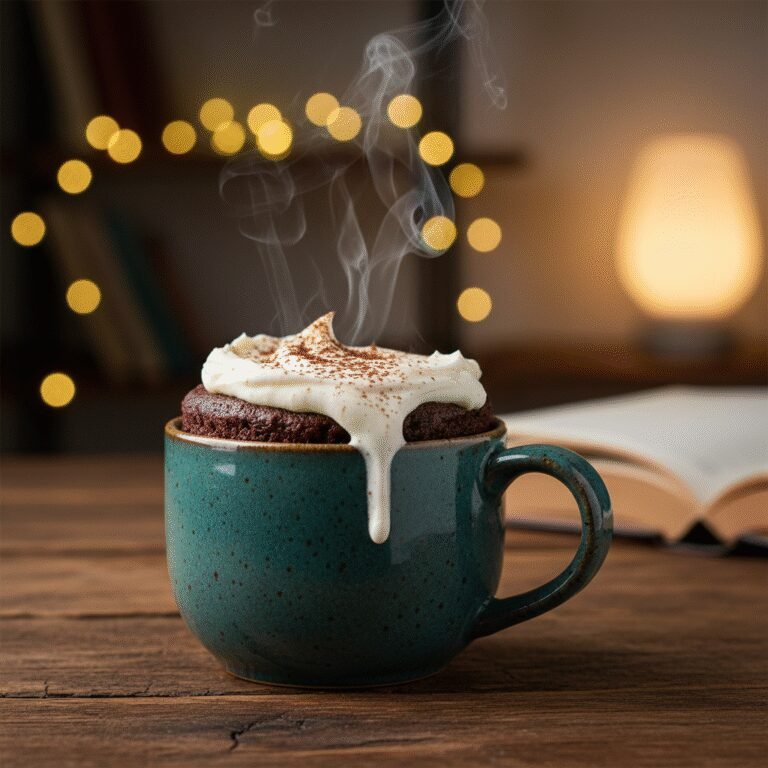
- Enjoy warm, optionally topped with whipped cream or ice cream.
Expert Cooking Tips
- ✓Do not overcook: Microwaves vary in power. Start with 60 seconds; if it looks too wet, add 10-second intervals.
- ✓Use the right mug: A standard coffee cup might be too small. Use a larger mug to prevent the batter from spilling over as it rises.
- ✓Mix well: Flour likes to hide in the bottom corners of the mug. Double-check the bottom before cooking.
- ✓Self-rising flour hack: If you have self-rising flour, you can skip the baking powder and salt.
- ✓Texture check: The cake will pull away from the sides slightly when it is done.
- ✓Let it cool: The sugar and fats get extremely hot. Waiting two minutes prevents tongue burns and improves texture.
Substitutions and Variations
This recipe is incredibly versatile and accommodates various dietary needs. For a gluten-free version, substitute the all-purpose flour with a high-quality 1:1 gluten-free baking flour blend; avoid using almond flour alone as it may not rise sufficiently. If you are vegan or dairy-free, simply use any plant-based milk (almond, soy, oat) and ensure your chocolate chips are dairy-free; the oil in the recipe already makes it butter-free. You can swap granulated sugar for brown sugar for a deeper, caramel-like flavor, or use a heat-stable sweetener like erythritol for a lower-sugar option, though the texture may be slightly drier. Olive oil, coconut oil, or melted butter can all be used interchangeably for the fat component, with butter offering a richer flavor and oil providing a moister crumb.
Common Mistakes to Avoid
The most common mistake with mug cakes is overcooking. Because microwaves heat unevenly and rapidly, a difference of 15 seconds can take a cake from moist to rock-hard. Always err on the side of undercooking, as the residual heat in the mug will continue to cook the batter as it rests. Another frequent error is using a mug that is too narrow or too small; the batter rises significantly due to the baking powder, and a small mug will result in a messy overflow on your microwave turntable. Finally, failing to mix the batter thoroughly often results in mouthfuls of dry flour at the bottom of the cup; take an extra ten seconds to scrape the bottom edges with your spoon.
Serving Suggestions
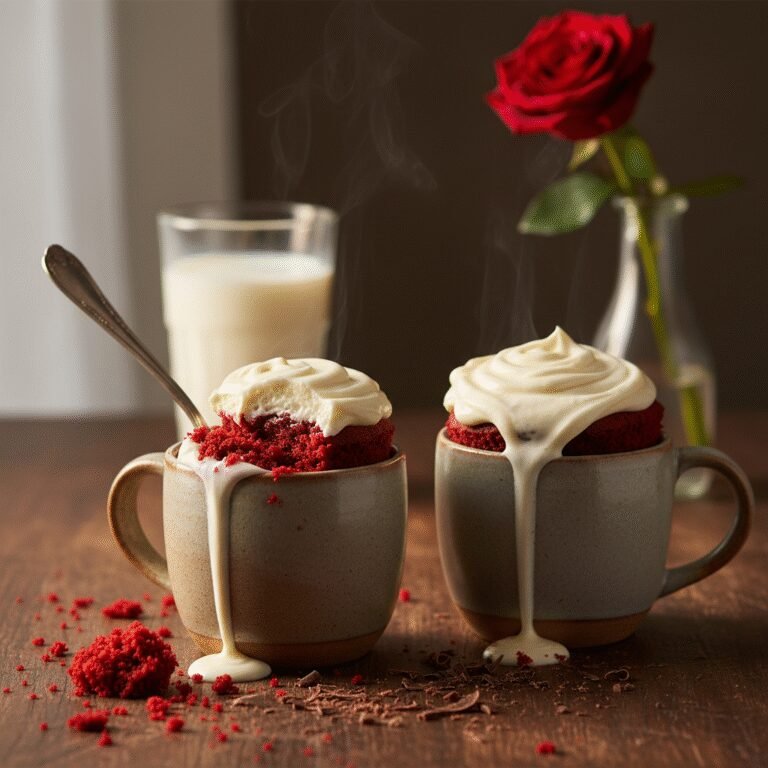
While delicious on its own, this chocolate mug cake shines when dressed up. Serve it warm with a scoop of vanilla bean ice cream, which will slowly melt into the warm cake, creating a creamy sauce. A dollop of whipped cream and a dusting of fresh cocoa powder or chocolate shavings adds a cafe-style touch. For fruit lovers, fresh raspberries or sliced strawberries cut through the richness of the chocolate perfectly. If you are feeling decadent, a drizzle of salted caramel sauce or peanut butter over the top before eating takes it to the next level.
Storage and Reheating Tips
Mug cakes are best enjoyed immediately after cooking. Because they lack preservatives and are cooked in a microwave, they tend to stale or become rubbery once they cool down completely. However, if you cannot finish it, you can cover the mug with plastic wrap and store it in the refrigerator for up to 24 hours. To reheat, microwave specifically in short 10-15 second bursts just until warm; do not overheat it again or it will become tough. Freezing is not recommended for this type of quick-bread recipe.
Nutrition Facts (Estimated)
| Serving Size | 1 mug cake |
| Calories | 380 |
| Fat | 18g |
| Saturated Fat | 4g |
| Unsaturated Fat | 14g |
| Trans Fat | 0g |
| Cholesterol | 5mg |
| Sodium | 180mg |
| Carbohydrates | 48g |
| Fiber | 3g |
| Sugar | 28g |
| Protein | 5g |
Frequently Asked Questions
Why is my mug cake rubbery?
A rubbery texture usually comes from two things: overmixing the batter (which develops too much gluten) or overcooking the cake. Try mixing just until combined and reducing the cooking time by 10-15 seconds.
Can I make this in the oven?
Yes, you can. Bake it in an oven-safe ramekin at 350°F (175°C) for about 15-20 minutes. However, the texture might be slightly different than the microwave version.
Do I have to use cocoa powder?
For a chocolate cake, yes. However, if you want a vanilla mug cake, remove the cocoa powder and add an extra tablespoon or two of flour and a bit more vanilla extract.
Can I double the recipe?
You can double the ingredients, but do not cook it in the same mug unless it is a soup mug or bowl. It is better to make two separate mugs to ensure even cooking.
Is baking powder necessary?
Yes, baking powder is the leavening agent that makes the cake rise. Without it, you will have a dense, heavy pudding rather than a cake.
Can I use water instead of milk?
You can, but the result will be less rich and flavorful. Milk adds fat and sugar that contribute to the tenderness of the crumb.
Why did my cake explode over the mug?
The mug was likely too small for the amount of batter and the rise caused by the baking powder. Always use a mug with extra headspace.
Can I add protein powder?
Yes, you can swap about 1 tablespoon of flour for protein powder, but you may need to add a teaspoon more liquid as protein powder absorbs moisture heavily.
Conclusion
This Easy Chocolate Mug Cake for One is more than just a recipe; it is a reliable companion for those moments when you need a little sweetness in your life without the production of a full baking project. It proves that homemade desserts don’t have to be complicated or time-consuming to be delicious. By mastering this simple technique, you are always just five minutes away from a warm, gooey, chocolatey escape. So, grab your favorite mug, check your pantry, and treat yourself—you deserve it!