The Ultimate Moist Red Velvet Cupcakes for Baby Shower
Moist Red Velvet Cupcake For Baby Shower Recipe
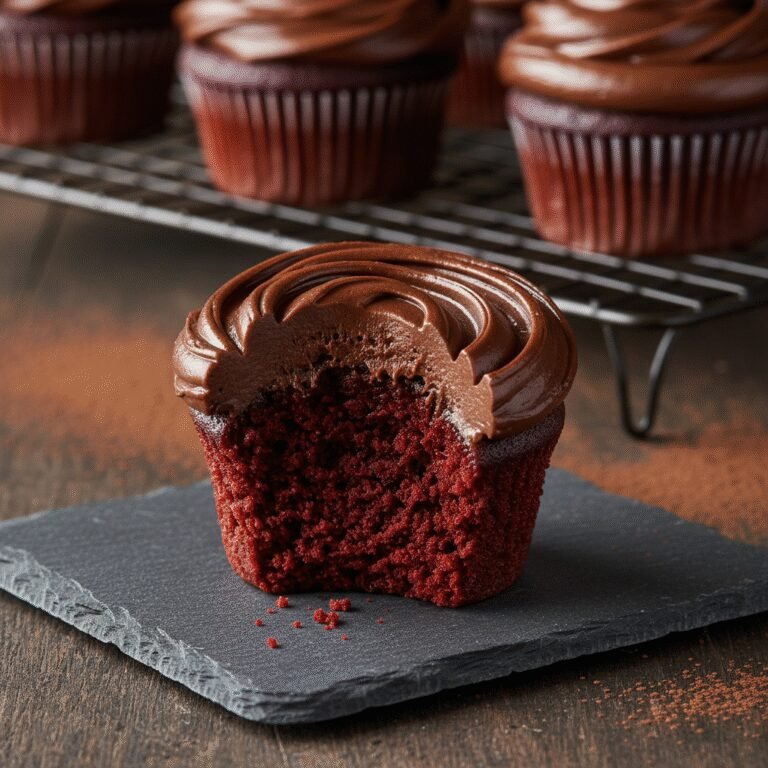
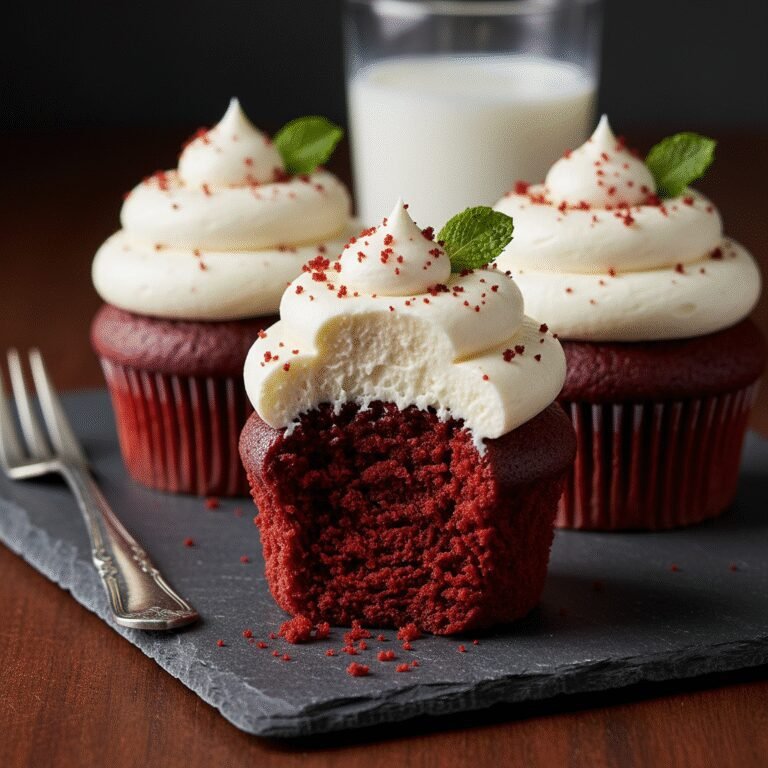
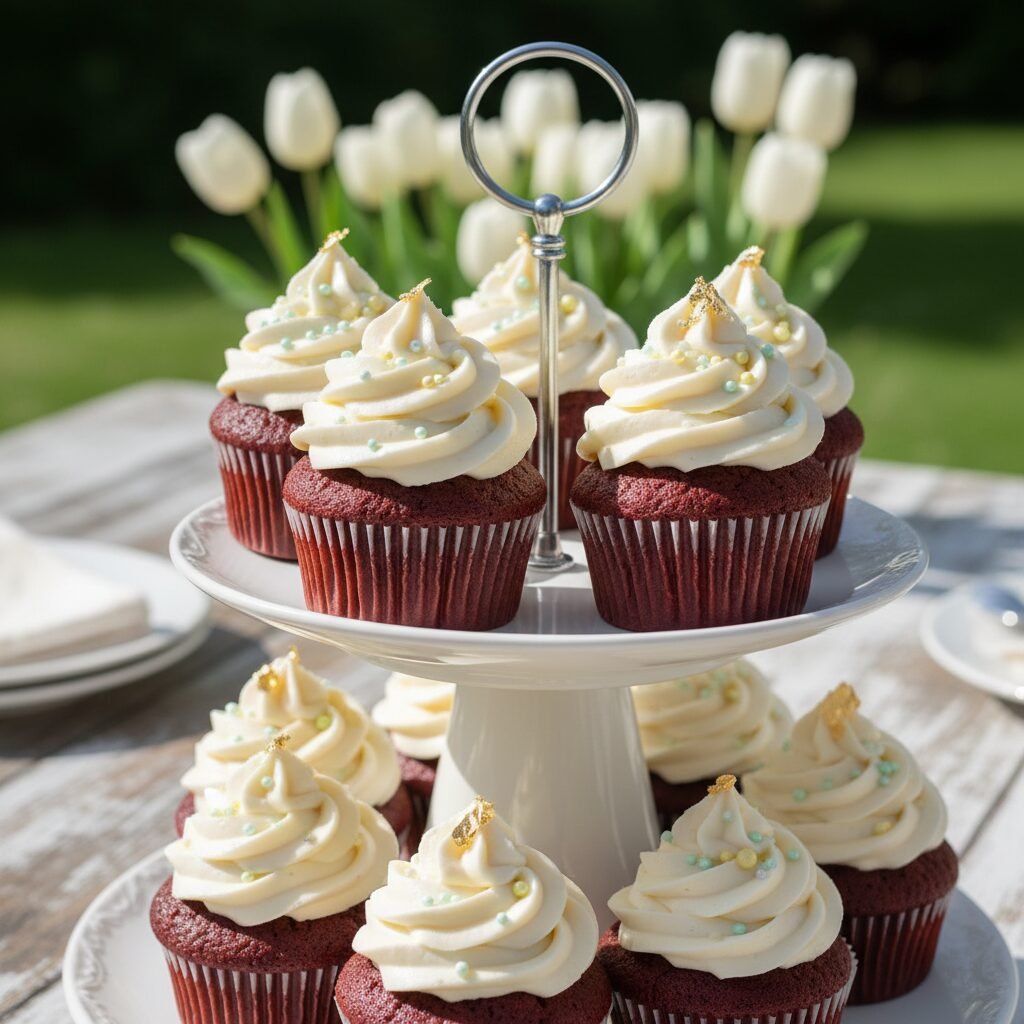
These ultra-moist red velvet cupcakes are the crown jewel of any baby shower dessert table, featuring a tender, velvety crumb and a classic tangy cream cheese frosting. Perfectly balanced between vanilla and mild cocoa, they offer a sophisticated flavor profile that is as stunning to look at as it is delicious to eat.
20 minutes
18 minutes
1 hour (includes cooling)
24 cupcakes
Dessert
Baking
American
Vegetarian
When planning a baby shower, the dessert table is often the centerpiece of the celebration, and few treats command attention quite like a perfectly executed red velvet cupcake. There is something undeniably elegant about the deep crimson hue contrasting against a cloud of snowy white cream cheese frosting. But looks aren’t everything; the texture and flavor must be impeccable to truly wow your guests. This recipe for Moist Red Velvet Cupcakes is specifically engineered to remain soft and tender for hours, making it the ideal choice for events where food might sit out on display while gifts are opened and games are played. Unlike many dry bakery versions, these cupcakes rely on a specific blend of oil and buttermilk to achieve a crumb that is literally ‘velvety’—hence the name. The flavor is a complex dance between the mild chocolate notes of cocoa powder, the tang of buttermilk, and the sweetness of vanilla, all elevated by that signature frosting. Whether you are celebrating a boy, a girl, or keeping it a surprise, these cupcakes can be dressed up with pastel sprinkles, themed toppers, or even a hidden color center to serve as a gender reveal. This guide will walk you through exactly how to achieve that bakery-style dome and the perfect swirl of frosting, ensuring your contribution to the baby shower is the one everyone talks about long after the party ends.
History & Origins
The history of red velvet cake is a fascinating journey through culinary chemistry and marketing genius. The concept of a ‘velvet’ cake dates back to the Victorian era, where the term was used to distinguish cakes with a soft, fine crumb from the coarser sponge cakes of the time. This texture was typically achieved by using almond flour, cornstarch, or cocoa. In the early 20th century, before Dutch-processed cocoa was widely available, raw cocoa powder contained high levels of anthocyanins. When this raw cocoa was mixed with acidic ingredients like buttermilk and vinegar, a chemical reaction occurred that turned the batter a reddish-brown mahogany color. This natural tint is the origin of the name ‘Red Velvet.’ However, the vibrant, bright red color we know today has a different origin story linked to the Great Depression. As food rationing made luxury ingredients scarce, the Adams Extract company in Texas sought to boost sales of their red food coloring and vanilla extract. They published a tear-off recipe card at grocery stores for ‘Adams Red Velvet Cake,’ which used a significant amount of red dye to create a striking, modern look. The cake became a sensation in the South and later gained national fame, partly due to a legendary (though likely apocryphal) story involving the Waldorf-Astoria Hotel in New York charging a guest a fortune for the recipe. In recent decades, the cake saw a massive resurgence in pop culture, solidified by its appearance in the film ‘Steel Magnolias’ and the cupcake boom of the early 2000s led by bakeries like Magnolia Bakery in NYC. Today, it remains a staple of American celebration, particularly favored for its romantic color and distinct flavor profile.
Why This Recipe Works
This recipe succeeds where others fail because it meticulously balances moisture retention with structural integrity. Many red velvet recipes use butter as the primary fat, which provides great flavor but can lead to a drier texture once the cupcakes cool, as butter solidifies at room temperature. This recipe utilizes vegetable oil, which remains liquid at room temperature, ensuring the cupcakes stay incredibly moist and soft for days. To compensate for the lack of butter flavor in the batter, we use a high-quality buttermilk and a generous amount of vanilla extract. The buttermilk is crucial; its acidity not only tenderizes the gluten in the flour for a soft crumb but also activates the baking soda for a superior rise. Furthermore, we use a specific ratio of vinegar and baking soda. This classic combination creates an immediate leavening reaction that aerates the batter right before baking, contributing to that light, fluffy texture. Finally, the amount of cocoa powder is carefully measured to provide just a hint of chocolate flavor without overpowering the vanilla or drying out the batter, staying true to the traditional ‘mild cocoa’ profile of authentic red velvet.
Why You’ll Love This Recipe
- ✓Stays moist for days thanks to the oil-based batter.
- ✓Perfect balance of tangy buttermilk and sweet vanilla.
- ✓Deep, vibrant red color ideal for festive photos.
- ✓Sturdy enough to hold high swirls of frosting.
- ✓Classic cream cheese frosting that isn’t too sweet.
- ✓Easy one-bowl method for the dry ingredients.
Equipment You’ll Need
- ✓Standard 12-cup muffin tins (2)
- ✓Cupcake liners
- ✓Stand mixer or electric hand mixer
- ✓Large mixing bowl
- ✓Medium mixing bowl
- ✓Whisk
- ✓Rubber spatula
- ✓Piping bag and large star tip (e.g., Wilton 1M)
- ✓Wire cooling rack
Ingredients
- ✓2 1/2 cups (300g) Cake flour (sifted)
- ✓1 1/2 cups (300g) Granulated sugar
- ✓1 tsp Baking soda
- ✓1 tsp Fine sea salt
- ✓2 tbsp Unsweetened cocoa powder (regular, not Dutch-process)
- ✓1 1/2 cups Vegetable oil (or canola oil)
- ✓1 cup Buttermilk, room temperature
- ✓2 Large eggs, room temperature
- ✓1 tsp White distilled vinegar
- ✓1 tbsp Red gel food coloring (adjust for desired intensity)
- ✓2 tsp Pure vanilla extract
- ✓16 oz Cream cheese, brick style, softened (for frosting)
- ✓1/2 cup Unsalted butter, softened (for frosting)
- ✓4 cups Powdered sugar, sifted (for frosting)
- ✓1 tsp Vanilla extract (for frosting)
- ✓Pinch of salt (for frosting)
Instructions
- Preheat your oven to 350°F (175°C). Line two 12-cup muffin tins with cupcake liners.
- In a medium bowl, sift together the cake flour, cocoa powder, baking soda, and salt. Whisk to ensure the cocoa is evenly distributed. Set aside.
- In a large bowl or the bowl of a stand mixer fitted with the paddle attachment, combine the granulated sugar and vegetable oil. Beat on medium speed until combined.
- Add the eggs one at a time, beating well after each addition. Scrape down the sides of the bowl.
- Add the red food coloring, vanilla extract, and vinegar. Mix until the batter is a vibrant, uniform red color.
- Reduce the mixer speed to low. Add the flour mixture in three parts, alternating with the buttermilk in two parts, starting and ending with the flour mixture (Flour -> Buttermilk -> Flour -> Buttermilk -> Flour). Mix only until just combined; do not overmix.
- Fill the cupcake liners about 2/3 full. Do not overfill, or they will spill over and sink in the middle.
- Bake for 16-18 minutes, or until a toothpick inserted into the center comes out clean or with just a few moist crumbs attached.
- Remove from the oven and let the cupcakes cool in the pan for 5 minutes, then transfer them to a wire rack to cool completely before frosting.
- To make the frosting: In a large bowl, beat the softened cream cheese and butter together until completely smooth and creamy (about 3 minutes).
- Gradually add the sifted powdered sugar, one cup at a time, beating on low speed until incorporated. Add the vanilla and a pinch of salt.
- Increase speed to high and whip for 2-3 minutes until the frosting is fluffy and holds its shape.
- Transfer frosting to a piping bag fitted with a star tip and pipe swirls onto the cooled cupcakes. Garnish with sprinkles if desired.
Expert Cooking Tips
- ✓Room temperature ingredients are non-negotiable; cold eggs or buttermilk can cause the batter to curdle.
- ✓Use gel food coloring instead of liquid drops for a more vibrant color without adding excess liquid.
- ✓Do not overmix the batter once the flour is added, or the cupcakes will become tough and dense.
- ✓Sift your cocoa powder and flour to prevent lumps of white or brown in your red batter.
- ✓If you don’t have buttermilk, make a substitute by adding 1 tablespoon of vinegar to a cup of milk and letting it sit for 5 minutes.
- ✓Cool the cupcakes completely before frosting; even a slightly warm cupcake will melt the butter in the frosting.
- ✓For a flatter top conducive to piping, bake at 325°F for slightly longer.
Substitutions and Variations
If you cannot find cake flour, you can use all-purpose flour, though the crumb will be slightly less tender; to mimic cake flour, remove 2 tablespoons of AP flour per cup and replace it with cornstarch. For the oil, melted coconut oil or grapeseed oil are excellent alternatives, but avoid olive oil due to its strong flavor. If you prefer a natural coloring, beet powder can be used, though it may alter the flavor slightly and result in a more brownish-red hue. For the frosting, mascarpone cheese can be substituted for half of the cream cheese for a richer, less tangy Italian-style topping. If you need to make this egg-free, a flax egg (1 tbsp ground flaxseed meal + 3 tbsp water per egg) works surprisingly well in this moist batter.
Common Mistakes to Avoid
The most common mistake with red velvet is overbaking. Because of the dark color, it is hard to see browning, so rely on the toothpick test. Overbaking leads to a dry, crumbly texture. Another error is using Dutch-process cocoa powder; while delicious, it is alkalized and won’t react as strongly with the buttermilk and vinegar, potentially affecting the rise and color. Stick to natural unsweetened cocoa. Finally, failing to sift the powdered sugar for the frosting will result in a gritty texture that can clog your piping tip.
Serving Suggestions
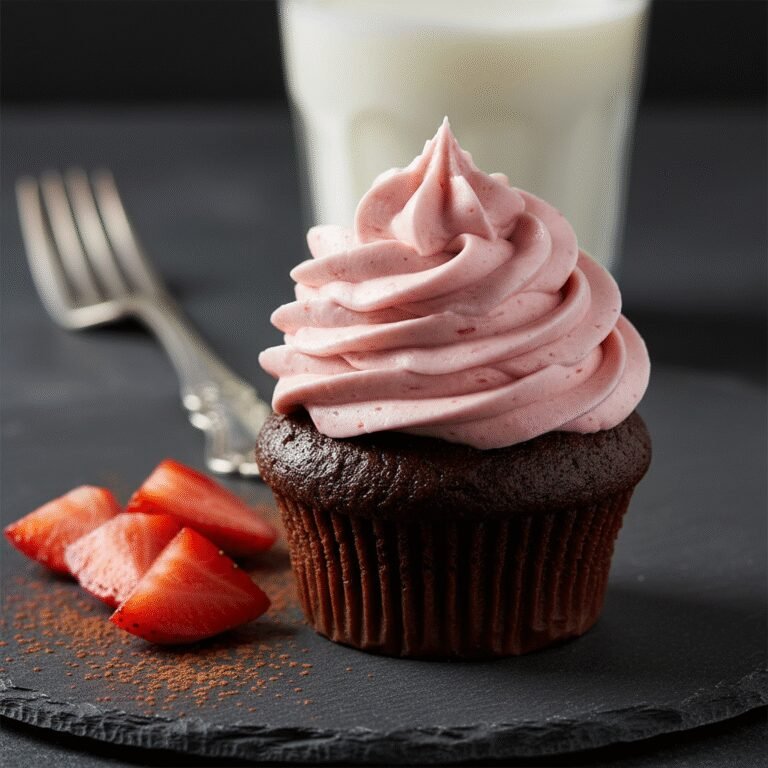
Serve these cupcakes on a tiered white porcelain stand to let the red color pop. For a baby shower, consider using liners that match the theme (polka dots, pastel stripes) and top the frosting with themed fondant decorations like rattles, onesies, or simple pastel pearls. If it is a gender reveal, you can hollow out the center of the baked cupcake and fill it with pink or blue sprinkles before frosting. Serve with coffee, cold milk, or a sparkling mocktail to cut through the richness of the cream cheese.
Storage and Reheating Tips
Because of the cream cheese frosting, these cupcakes must be stored in the refrigerator if not eaten within 2 hours. Place them in an airtight container to prevent the fridge air from drying out the cake. They will last up to 4 days in the fridge. Allow them to come to room temperature for 20-30 minutes before serving for the best texture and flavor. Unfrosted cupcakes can be frozen for up to 3 months; wrap them individually in plastic wrap and place in a freezer bag. Thaw on the counter before frosting.
Nutrition Facts (Estimated)
| Serving Size | 1 cupcake |
| Calories | 380 |
| Fat | 18g |
| Saturated Fat | 7g |
| Unsaturated Fat | 10g |
| Trans Fat | 0g |
| Cholesterol | 45mg |
| Sodium | 210mg |
| Carbohydrates | 48g |
| Fiber | 1g |
| Sugar | 28g |
| Protein | 4g |
Frequently Asked Questions
Can I make these cupcakes ahead of time?
Yes, you can bake the cupcakes 1-2 days in advance. Store them unfrosted in an airtight container at room temperature to keep them moist. Make the frosting the day of serving, or make it ahead and refrigerate, then rewhip it before piping.
Why did my cupcakes sink in the middle?
Sinking usually happens if the cupcakes were underbaked or if the oven door was opened too early, causing a sudden temperature drop. It can also happen if there was too much leavening (baking soda) or if the batter was over-mixed.
Can I use butter instead of oil?
You can, but the texture will change. Butter gives a tighter crumb that firms up when cold. Oil guarantees the classic soft, moist mouthfeel associated with superior red velvet cake.
Do I really need the vinegar?
Yes! The vinegar is essential for the chemical reaction with baking soda that helps the cupcakes rise and contributes to the preservation of the red color.
How do I transport them to the baby shower?
Use a dedicated cupcake carrier with individual slots. This prevents them from sliding into each other and ruining the frosting. If you don’t have one, use a shallow box and place non-slip shelf liner on the bottom.
Why is my frosting runny?
Runny frosting usually results from over-beating the cream cheese (which breaks down its structure) or using cream cheese that was too warm or the ‘tub’ variety (which has higher water content). Always use brick-style cream cheese.
Can I make mini cupcakes with this recipe?
Absolutely. This recipe yields about 48-50 mini cupcakes. Bake them for 10-12 minutes at the same temperature.
Is red velvet just chocolate cake with dye?
Not exactly. While it has cocoa, the amount is much less than a standard chocolate cake. The texture is also distinct due to the buttermilk and vinegar reaction, creating a unique flavor profile that is tangy and vanilla-forward.
Conclusion
These Moist Red Velvet Cupcakes are more than just a dessert; they are a gesture of love and celebration perfectly suited for welcoming a new life. The combination of the striking red crumb and the creamy, tangy frosting creates a sensory experience that guests will remember fondly. By following the tips on temperature and mixing, you ensure a bakery-quality result right from your home kitchen. Whether you are the host or a helpful friend bringing a dish, these cupcakes are a reliable, show-stopping addition to any baby shower menu. Enjoy the baking process and the smiles these treats will inevitably bring!