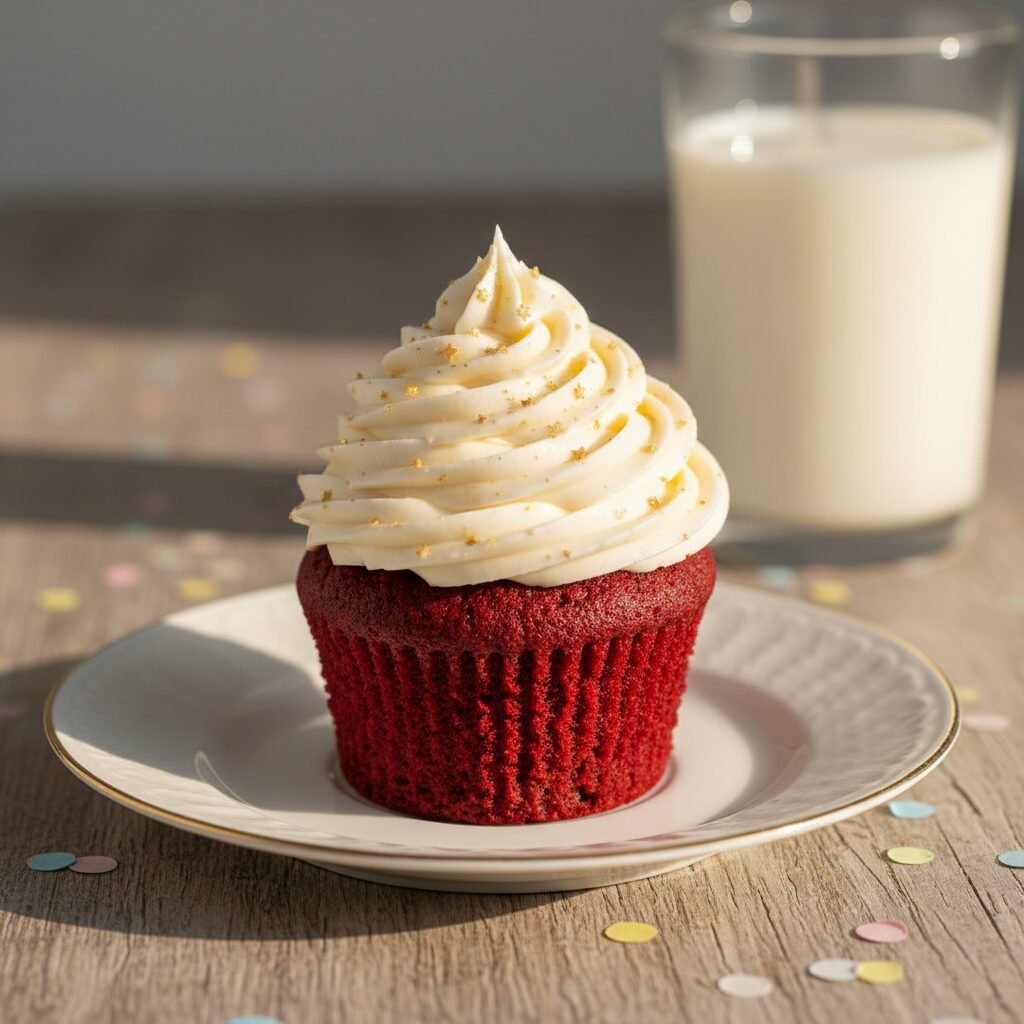
The Ultimate Moist Red Velvet Cupcakes for Birthday Parties
Moist Red Velvet Cupcake For Birthday Party Recipe
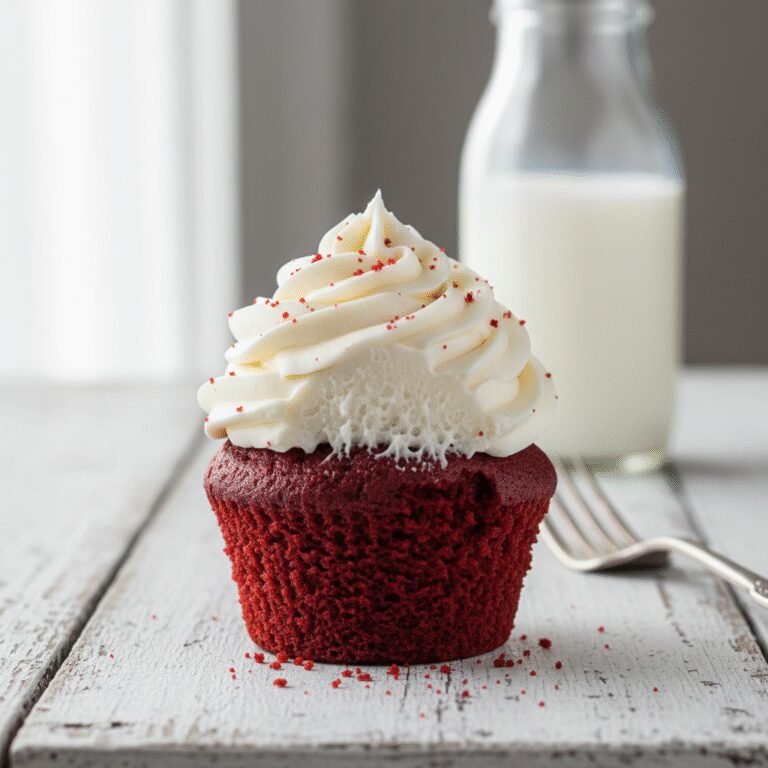
These ultra-moist red velvet cupcakes are the crown jewel of any birthday celebration, featuring a tender, velvety crumb and a tangy, whipped cream cheese frosting. Perfectly balanced between vanilla and chocolate, they stay soft for days and are guaranteed to be the hit of the party.
20 minutes
20 minutes
40 minutes
24 cupcakes
Dessert
Baking
American
Vegetarian
There is something undeniably magical about a red velvet cupcake. It isn’t just the striking crimson hue that demands attention on a dessert table; it is the enigmatic flavor profile that dances somewhere between a classic vanilla cake and a light chocolate sponge. For years, I searched for a recipe that didn’t result in a dry, crumbly disappointment. Too often, red velvet relies heavily on butter, which tastes delicious but can dry out quickly once the cupcakes cool. This recipe is the result of endless kitchen experiments to create the perfect ‘birthday party’ cupcake—one that can be baked the day before and still taste as fresh as the moment it was pulled from the oven.
The secret lies in the specific balance of acidity and fat. We aren’t just making a cake; we are engineering a texture. The ‘velvet’ in the name refers to the crumb structure, which should be tight yet incredibly soft, melting on your tongue. These cupcakes are specifically designed for celebrations. They hold up beautifully under a generous swirl of cream cheese frosting and provide that nostalgic, comforting bite that everyone craves at a birthday bash. Whether you are baking for a toddler’s first birthday or a sophisticated adult soirée, these cupcakes bridge the gap between fun and elegant. Prepare yourself for a baking experience that fills your kitchen with the scent of cocoa and vanilla, resulting in a treat that looks as spectacular as it tastes.
History & Origins
The history of red velvet cake is as rich and layered as the cake itself, often shrouded in culinary myths and marketing legends. The concept of a ‘velvet’ cake dates back to the Victorian era, where the term was used to distinguish soft, fine-crumbed cakes from the coarser sponge cakes of the time. However, the reddish hue originally wasn’t the result of food coloring. In the early 20th century, unprocessed cocoa powder contained anthocyanins, which would react with the acidic ingredients in the batter—specifically buttermilk and vinegar—to reveal a reddish-brown tint. This natural chemical reaction is the true ancestor of the modern red velvet.
During the Great Depression, as ingredients became scarce, some bakers used beet juice to keep their cakes moist and enhance the color, a practice that cemented the association between the cake and the color red. The cake gained massive commercial popularity in the United States thanks to the Adams Extract company in Texas. In an effort to sell more food dyes and extracts during the Depression era, they packaged red food coloring with tear-off recipe cards for ‘Adams Red Velvet Cake.’ This marketing genius brought the bright red version into American households. Later, the Waldorf-Astoria Hotel in New York City became famous for its version, claiming it as a signature dessert. In recent decades, the cake saw a massive resurgence in pop culture, largely due to its feature in the movie ‘Steel Magnolias’ and the rise of boutique bakeries like Magnolia Bakery in NYC, making it a staple for birthdays and weddings across the country.
Why This Recipe Works
This recipe triumphs where others fail because it prioritizes moisture retention without sacrificing structure. Many traditional recipes use butter as the primary fat. While butter provides flavor, it contains water that evaporates during baking and solidifies at room temperature, leading to a drier, denser crumb. This recipe utilizes flavorless vegetable oil as the main fat source. Oil remains liquid at room temperature, ensuring that the sensation of moisture is preserved from the first bite to the last, even days after baking.
Furthermore, the interaction between the acidic buttermilk, vinegar, and baking soda is critical. This trio creates a robust leavening reaction that aerates the batter instantly, giving the cupcakes a superior lift and a light, airy texture that contradicts their rich appearance. The addition of a small amount of boiling water (or hot coffee) at the end of the mixing process blooms the cocoa powder, intensifying the chocolate undertones and ensuring the batter is fluid enough to bake evenly. Finally, using cake flour instead of all-purpose flour lowers the protein content, inhibiting gluten formation and guaranteeing that signature ‘velvet’ tenderness that defines the genre.
Why You’ll Love This Recipe
- ✓Stays moist for up to 4 days thanks to the oil-based batter.
- ✓Perfect balance of acidity and sweetness.
- ✓Vibrant red color without altering the flavor.
- ✓Sturdy enough to hold high swirls of frosting.
- ✓Ideal for making ahead of busy party schedules.
- ✓Classic tangy cream cheese frosting pairs perfectly.
Equipment You’ll Need
- ✓2 Muffin tins (12-cup capacity each)
- ✓Cupcake liners
- ✓Large mixing bowl
- ✓Medium mixing bowl
- ✓Whisk
- ✓Electric hand mixer or Stand mixer
- ✓Rubber spatula
- ✓Cooling rack
- ✓Piping bag and star tip (e.g., Wilton 1M)
Ingredients
- ✓2 1/2 cups Cake flour, sifted
- ✓1 1/2 cups Granulated white sugar
- ✓1 tsp Baking soda
- ✓1 tsp Fine sea salt
- ✓2 tbsp Unsweetened cocoa powder (natural, not Dutch-processed)
- ✓1 1/2 cups Vegetable oil or Canola oil
- ✓1 cup Buttermilk, room temperature
- ✓2 Large eggs, room temperature
- ✓2 tbsp Red gel food coloring
- ✓1 tsp White distilled vinegar
- ✓1 tsp Pure vanilla extract
- ✓16 oz Full-fat cream cheese, softened (for frosting)
- ✓1/2 cup Unsalted butter, softened (for frosting)
- ✓4 cups Powdered sugar, sifted (for frosting)
- ✓1 tsp Vanilla extract (for frosting)
- ✓Pinch of salt (for frosting)
Instructions
- Preheat your oven to 350°F (175°C). Line two 12-cup muffin tins with paper cupcake liners.
- In a medium bowl, sift together the cake flour, cocoa powder, baking soda, and salt. Whisk to ensure the cocoa is evenly distributed. Set aside.
- In a large mixing bowl (or the bowl of a stand mixer), combine the granulated sugar and vegetable oil. Beat on medium speed until well combined.
- Add the eggs one at a time, beating well after each addition. Mix in the red food coloring and vanilla extract until the batter is a vibrant, uniform red.
- Reduce the mixer speed to low. Add the flour mixture in three parts, alternating with the buttermilk in two parts, starting and ending with the flour. Do not overmix.
- In a small bowl, combine the vinegar and baking soda. It will fizz immediately. Quickly fold this mixture into the batter with a rubber spatula just until incorporated.
- Fill the cupcake liners about 2/3 full. Do not overfill, or they will spill over the sides.
- Bake for 18-20 minutes, or until a toothpick inserted into the center comes out clean or with just a few moist crumbs attached.
- Remove from the oven and let the cupcakes cool in the pan for 5 minutes, then transfer them to a wire rack to cool completely before frosting.
- To make the frosting: Beat the softened cream cheese and butter together until smooth and creamy (about 3 minutes).
- Gradually add the powdered sugar, one cup at a time, beating on low speed until incorporated. Add the vanilla and a pinch of salt.
- Increase the speed to high and whip for 2-3 minutes until the frosting is fluffy and white.
- Pipe the frosting onto the cooled cupcakes and top with sprinkles if desired.
Expert Cooking Tips
- ✓Use gel food coloring instead of liquid drops for a more intense red color without watering down the batter.
- ✓Ensure all cold ingredients (eggs, buttermilk, cream cheese) are at room temperature to prevent curdling.
- ✓Do not skip the sifting step for the powdered sugar in the frosting; it prevents gritty lumps.
- ✓Be careful not to overmix the batter once the flour is added, as this can develop gluten and make the cupcakes tough.
- ✓If you don’t have buttermilk, make a substitute by adding 1 tablespoon of vinegar to 1 cup of whole milk and letting it sit for 5 minutes.
- ✓Fill liners only 2/3 full to ensure nice domes rather than flat, overflowing tops.
- ✓Wait until the cupcakes are completely cool before frosting, or the cream cheese icing will melt and slide off.
Substitutions and Variations
If you cannot find cake flour, you can make your own by removing 2 tablespoons of all-purpose flour from every cup and replacing it with cornstarch; sift together twice to aerate. For the oil, melted coconut oil works if you don’t mind a slight coconut flavor, but canola or vegetable oil is best for a neutral taste. If you prefer a natural coloring agent, roasted beet puree can be used, though it will alter the flavor slightly and result in a more earthy, rusty red rather than a bright crimson. For the buttermilk, a mixture of plain yogurt and milk (1:1 ratio) is an excellent substitute that maintains the acidity required for the baking soda reaction. In the frosting, mascarpone cheese can replace half of the cream cheese for a richer, less tangy Italian twist.
Common Mistakes to Avoid
The most common mistake with red velvet is overbaking. Because the cake is dark, it is hard to see when it browns. Always rely on the toothpick test or the ‘spring back’ method (lightly press the top; it should spring back). Another error is using Dutch-processed cocoa powder. This recipe relies on the acidity of natural cocoa to react with the baking soda; Dutch-processed is alkalized and won’t provide the same lift or flavor profile. Finally, using cold cream cheese for the frosting will almost always result in lumps that are impossible to beat out later. Patience is key—let your ingredients come to room temperature naturally.
Serving Suggestions
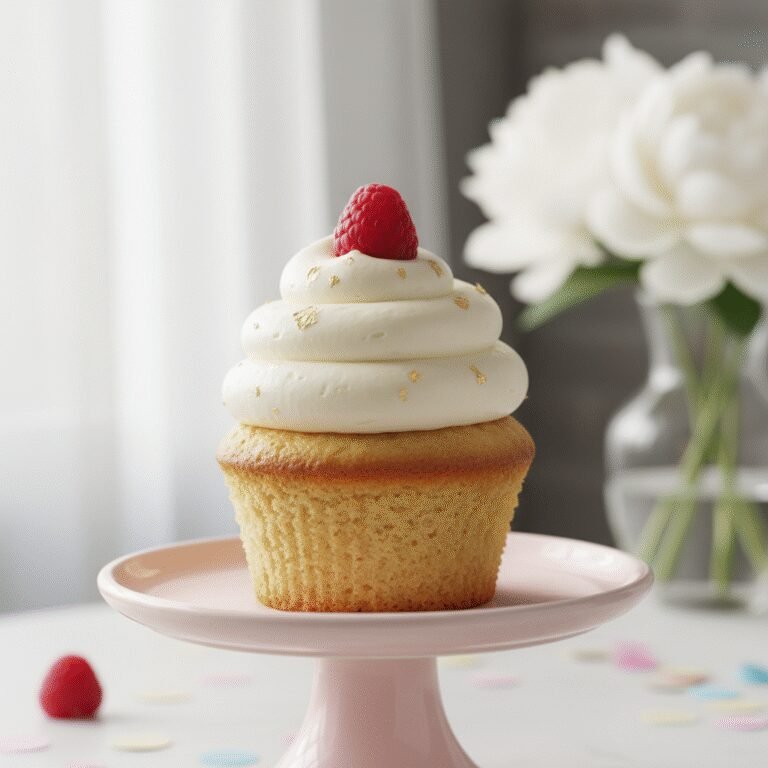
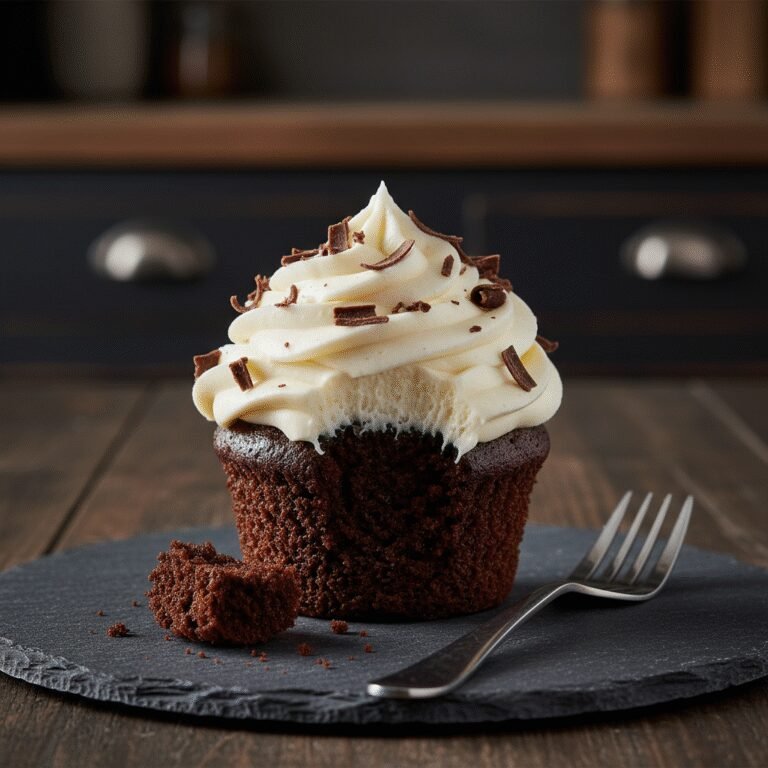
These cupcakes are a centerpiece on their own, but they look stunning when arranged on a tiered cupcake stand for a birthday party. For a sophisticated touch, garnish with chocolate shavings, red velvet cake crumbs (crumble one cupcake to use as garnish), or fresh raspberries. If serving for a kids’ party, rainbow sprinkles or themed edible toppers work wonders. Serve them with cold milk or hot coffee to cut through the richness of the cream cheese frosting. They are best served at room temperature, not cold from the fridge, to ensure the frosting is soft and creamy.
Storage and Reheating Tips
Because of the cream cheese frosting, these cupcakes must be stored in the refrigerator if they are not being eaten within 2 hours. Place them in an airtight container to prevent the fridge air from drying them out. They will last up to 5 days in the refrigerator. Before serving, let them sit on the counter for 30 minutes to return to room temperature. You can also freeze the unfrosted cupcakes for up to 3 months. Wrap each cupcake individually in plastic wrap and then place them in a freezer bag. Thaw on the counter before frosting.
Nutrition Facts (Estimated)
| Serving Size | 1 cupcake |
| Calories | 380 |
| Fat | 18g |
| Saturated Fat | 8g |
| Unsaturated Fat | 9g |
| Trans Fat | 0g |
| Cholesterol | 45mg |
| Sodium | 210mg |
| Carbohydrates | 48g |
| Fiber | 1g |
| Sugar | 28g |
| Protein | 4g |
Frequently Asked Questions
Can I make this recipe as a whole cake instead of cupcakes?
Yes, this batter works perfectly for two 8-inch or 9-inch round cake pans. You will need to increase the baking time to approximately 30-35 minutes. Check for doneness with a toothpick.
Why did my cupcakes sink in the middle?
Sinking usually happens if the oven door was opened too early, causing a drop in temperature, or if there was too much leavening (baking soda) used. Ensure you measure precisely and keep the oven door closed until the end.
Can I use butter instead of oil for the batter?
You can, but we highly recommend oil for this specific recipe. Oil coats the flour proteins better than butter, preventing gluten formation and keeping the cupcakes moist for much longer.
Do I really need the vinegar?
Yes! The vinegar is crucial for activating the baking soda and stabilizing the red color. You won’t taste the vinegar in the final product.
What brand of food coloring is best?
We recommend concentrated gel colors like Americolor or Wilton. Liquid grocery store dyes are often too watered down and require you to use too much liquid to get a deep red.
My frosting is too runny, how do I fix it?
If the frosting is runny, your butter or cream cheese might have been too warm, or you didn’t add enough sugar. Try chilling the frosting for 20 minutes and beating it again, or adding more sifted powdered sugar.
Can I reduce the sugar?
Sugar provides moisture and structure, not just sweetness. Reducing it significantly will affect the texture and shelf-life of the cupcakes. We recommend sticking to the recipe for the best results.
Why are my cupcakes brown instead of red?
This can happen if you use too much cocoa powder or if the cocoa powder is very dark. It can also happen if you bake them too long. Ensure you are using the correct amount of red food dye.
Conclusion
There you have it—the definitive guide to making the most memorable, moist red velvet cupcakes for your next birthday bash. By following these steps and understanding the science behind the ingredients, you are guaranteed a batch of cupcakes that are as delicious as they are beautiful. No more dry, flavorless red cakes; only tender, velvety perfection awaits. Whether you are a novice baker or a seasoned pro, this recipe is forgiving, fun, and fundamentally fantastic. So grab your mixer, put on your favorite apron, and get ready to be the hero of the party!