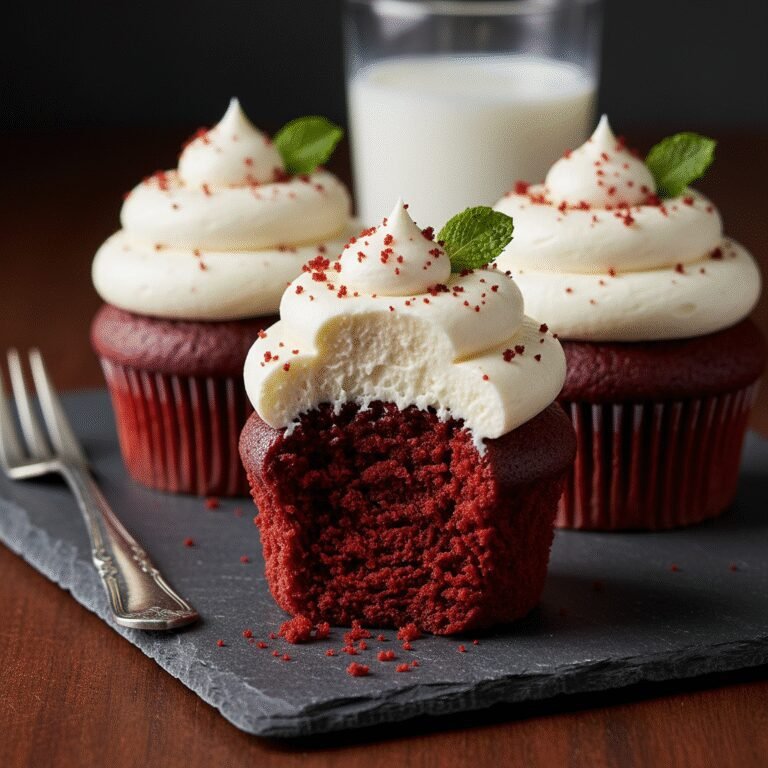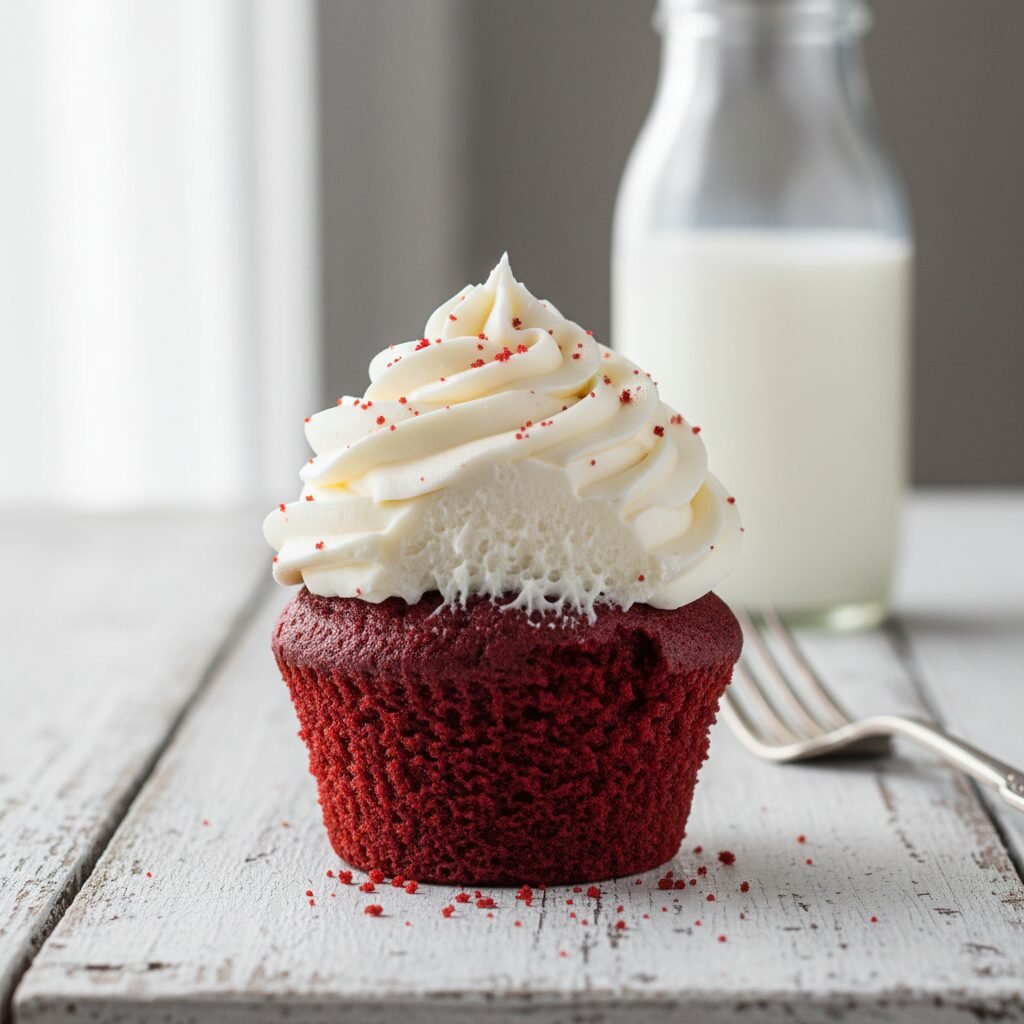
The Ultimate Moist Red Velvet Cupcakes With Creamy Vanilla Buttercream
Moist Red Velvet Cupcake With Vanilla Buttercream Recipe
Discover the secret to the most velvety, tender crumb you’ve ever tasted with these bakery-style Red Velvet Cupcakes. Topped with a cloud-like, whipped vanilla buttercream, this recipe strikes the perfect balance between mild cocoa flavor and buttery sweetness.
20 minutes
20 minutes
40 minutes
14 Cupcakes
Dessert
Baking
American
Vegetarian
There is something undeniably captivating about Red Velvet. It is the drama queen of the dessert world, demanding attention with its vibrant scarlet hue and contrasting stark white frosting. But beyond the visual appeal, a truly exceptional Red Velvet cupcake offers a texture and flavor profile that is entirely unique. It is not simply a chocolate cake disguised in red dye, nor is it merely a vanilla cake colored for effect. The magic lies in the ‘velvet’—a crumb so tender, soft, and moist that it practically melts on the tongue. This recipe has been meticulously tested to achieve that elusive texture, combining the richness of butter with the lasting moisture of vegetable oil, ensuring these cupcakes stay fresh for days.
The flavor profile is a sophisticated dance between mild chocolate notes and a subtle, tangy acidity derived from buttermilk and vinegar. This acidity is crucial; it breaks down the gluten strands for tenderness and activates the baking soda for a superior rise. While tradition often dictates a cream cheese pairing, we are elevating this classic with a luxurious, airy Vanilla Buttercream that allows the delicate cocoa notes to shine without being overpowered by the tang of cream cheese. Whether you are baking for a Valentine’s Day treat, a birthday celebration, or simply to satisfy a mid-week craving, these cupcakes promise a bakery-quality experience right from your home oven. Prepare to fall in love with the perfect crumb structure and the nostalgic, comforting taste of genuine Red Velvet.
History & Origins
The history of Red Velvet cake is as rich and layered as the cake itself, dating back to the Victorian era. During the 1800s, recipes for ‘Velvet’ cakes began to surface, distinguished by their smooth texture and fine crumb, achieved by using almond flour, cornstarch, or cocoa to break down the protein in flour. The ‘Red’ aspect, however, has a more chemically interesting origin story. Before the advent of Dutch-processed cocoa, raw cocoa powder contained high levels of anthocyanins. When this acidic cocoa was mixed with baking soda and buttermilk, a chemical reaction occurred that naturally turned the batter a reddish-brown mahogany hue. It wasn’t the vibrant fire-engine red we know today, but a subtle, earthy rouge.
The cake’s popularity surged during the Great Depression thanks to the Adams Extract company in Texas. In an effort to sell more food coloring and vanilla extract during tough economic times, John A. Adams created a recipe for ‘Red Velvet Cake’ that utilized a significant amount of red dye, giving the cake its shocking color and marketing it as a flashy, modern dessert. This move cemented the cake’s status in American culinary history. Later, the Waldorf-Astoria Hotel in New York City famously claimed the recipe as its own, serving it as a signature dessert to high-society guests. In recent decades, the cake experienced a massive renaissance in the late 1990s and early 2000s, largely due to its feature in the movie ‘Steel Magnolias’ (albeit as an armadillo) and the rise of gourmet cupcake bakeries like Magnolia Bakery in NYC. Today, it stands as an iconic symbol of Southern hospitality and American baking ingenuity.
Why This Recipe Works
This recipe succeeds where many others fail because it scientifically balances the fat and acid content to maximize moisture and tenderness. Many Red Velvet recipes result in dry, crumbly cakes because they rely solely on butter. While butter provides superior flavor, it contains water which evaporates during baking. Vegetable oil, on the other hand, is 100% fat and remains liquid at room temperature, coating the flour proteins and preventing gluten formation. By using a hybrid mix of unsalted butter (for that rich, creamy taste) and neutral oil (for lasting moistness), we get the best of both worlds.
Furthermore, the inclusion of both buttermilk and white vinegar is non-negotiable. This double dose of acid performs three critical functions. First, it tenderizes the flour proteins. Second, it reacts vigorously with the baking soda to create carbon dioxide bubbles, giving the cupcakes a lofty, airy rise. Third, the acid helps preserve the red color, preventing it from turning a muddy brown as the cocoa cooks. We also use cake flour instead of all-purpose flour; the lower protein content in cake flour ensures the ‘velvet’ texture is silky smooth rather than bready. Finally, the blooming of the cocoa powder in the liquid ingredients ensures that the chocolate flavor is fully awakened and evenly distributed.
Why You’ll Love This Recipe
- ✓Incredibly moist texture that stays soft for days due to the oil-butter blend.
- ✓Perfectly domed tops that are ideal for piping generous swirls of frosting.
- ✓A sophisticated mild chocolate flavor with the classic tangy undertone.
- ✓Vibrant red color without a chemical aftertaste.
- ✓Whipped Vanilla Buttercream is stable enough for piping but melts in your mouth.
Equipment You’ll Need
- ✓Standard 12-cup muffin tin
- ✓Cupcake liners
- ✓Stand mixer or electric hand mixer
- ✓Large mixing bowl
- ✓Medium mixing bowl
- ✓Whisk
- ✓Rubber spatula
- ✓Wire cooling rack
- ✓Piping bag and star tip (e.g., Wilton 1M)
Ingredients
- ✓1 1/4 cups Cake flour (sifted)
- ✓2 tablespoons Unsweetened cocoa powder (natural, not Dutch-processed)
- ✓1/2 teaspoon Baking soda
- ✓1/4 teaspoon Salt
- ✓1/4 cup Unsalted butter, softened to room temperature
- ✓1/2 cup Granulated white sugar
- ✓1/2 cup Vegetable oil (or canola oil)
- ✓1 large Egg, room temperature
- ✓1 teaspoon Pure vanilla extract
- ✓1/2 cup Buttermilk, room temperature
- ✓1/2 teaspoon Distilled white vinegar
- ✓1 tablespoon Red gel food coloring (or 2 tbsp liquid dye)
- ✓FOR THE BUTTERCREAM:
- ✓1 cup (2 sticks) Unsalted butter, slightly softened but cool
- ✓3-4 cups Powdered sugar, sifted
- ✓2 tablespoons Heavy cream or whole milk
- ✓1 1/2 teaspoons Pure vanilla extract
- ✓Pinch of fine sea salt
Instructions
- Preheat your oven to 350°F (175°C). Line a standard muffin tin with paper cupcake liners. If you have batter left over for 2 extra cupcakes, prepare a second pan or bake in batches.
- In a medium bowl, sift together the cake flour, cocoa powder, baking soda, and salt. Whisk efficiently to ensure the cocoa and leavening agents are evenly distributed. Set aside.
- In the bowl of a stand mixer fitted with the paddle attachment (or a large bowl using a hand mixer), beat the softened butter and granulated sugar on medium-high speed for about 3 minutes until the mixture is light, pale, and fluffy.
- With the mixer running on low, slowly drizzle in the vegetable oil. Once added, increase speed to medium and beat until fully incorporated.
- Add the egg and vanilla extract. Beat on medium speed until combined, scraping down the sides and bottom of the bowl with a rubber spatula to ensure everything is mixed.
- In a small separate cup or measuring jug, whisk the red food coloring into the buttermilk. This ensures the color is evenly distributed before hitting the batter.
- Reduce the mixer speed to low. Add the dry ingredients in three parts, alternating with the red buttermilk mixture in two parts, beginning and ending with the dry ingredients (Flour -> Milk -> Flour -> Milk -> Flour). Mix only until just combined and no streaks of flour remain.
- Stir in the white vinegar by hand using a spatula. Do not overmix at this stage, or the cupcakes will become tough.
- Divide the batter evenly among the cupcake liners, filling them about 2/3 full. Do not overfill, or they will spill over and sink in the middle.
- Bake for 18-21 minutes, or until a toothpick inserted into the center comes out clean or with just a few moist crumbs attached. The tops should spring back when gently pressed.
- Remove from the oven and let the cupcakes cool in the pan for 5 minutes, then transfer them to a wire rack to cool completely before frosting.
- While cupcakes cool, make the buttercream. Beat the butter on medium-high speed for 5-7 minutes until it is incredibly pale and creamy.
- Add the powdered sugar one cup at a time, mixing on low speed until incorporated. Add the vanilla, salt, and heavy cream.
- Increase speed to high and whip for another 3-4 minutes until the frosting is light, airy, and fluffy.
- Pipe the frosting onto the completely cooled cupcakes and garnish with red velvet crumbs or sprinkles if desired.
Expert Cooking Tips
- ✓Room Temperature is Key: Ensure your egg, buttermilk, and butter are at room temperature. This creates an emulsion that traps air, resulting in a fluffier cupcake.
- ✓Don’t Overmix: Once the flour is added, mix gently. Overworking the gluten will lead to dense, rubbery cupcakes instead of velvet-textured ones.
- ✓Use Gel Coloring: Gel food coloring is more concentrated than liquid. You get a vibrant red without adding too much excess liquid to the batter.
- ✓Measure Flour Correctly: Use a kitchen scale or the ‘spoon and level’ method. Scooping the cup directly into the flour bag compacts it, leading to dry cupcakes.
- ✓Cool Completely: Never frost a warm cupcake. The butter in the frosting will melt instantly, creating a greasy mess.
- ✓Check Your Baking Soda: Since this recipe relies on the reaction between acid and soda for lift, ensure your baking soda isn’t expired.
Substitutions and Variations
Baking is chemistry, so substitutions should be made with care. If you do not have cake flour, you can make a DIY version by measuring 1 cup of all-purpose flour, removing 2 tablespoons, and replacing them with 2 tablespoons of cornstarch. Sift this mixture twice before using. If you are out of buttermilk, you can make a ‘sour milk’ substitute by adding 1/2 tablespoon of lemon juice or white vinegar to 1/2 cup of whole milk and letting it sit for 5 minutes until curdled. For the oil, melted coconut oil or canola oil works perfectly well. If you prefer a natural approach to coloring, beet powder can be used, though it may alter the flavor slightly and result in a more brownish-red hue. For the frosting, if you find the vanilla buttercream too sweet, you can swap it for a traditional cream cheese frosting or a less sweet Swiss Meringue Buttercream.
Common Mistakes to Avoid
The most common mistake with Red Velvet is overbaking. Because the cake is dark, it is hard to see visual cues like browning. Rely on the toothpick test and the ‘spring back’ touch test. Another error is using Dutch-processed cocoa powder. Dutch-processed cocoa has been alkalized (neutralized), which reduces the acidity needed to react with the baking soda and buttermilk. Always use natural unsweetened cocoa powder for the best rise and color. Finally, do not skip the vinegar. It might seem like a small amount, but it is the catalyst for the chemical reaction that creates the signature velvety texture. Omitting it will result in a denser, flatter cake.
Serving Suggestions
These cupcakes are stunning on their own, but presentation is everything. Serve them on a white ceramic platter or a tiered cake stand to make the red color pop. For a professional finish, use a large star piping tip (like a Wilton 1M or 2D) to create a classic rose swirl. You can garnish them with red sprinkles, white chocolate shavings, or crumble one extra cupcake and sprinkle the red crumbs over the white frosting for a classic bakery look. They pair beautifully with a glass of cold milk or a hot cup of coffee to cut through the sweetness.
Storage and Reheating Tips
Store frosted cupcakes in an airtight container at room temperature for up to 2 days. If your kitchen is very warm, or if you need to keep them longer, store them in the refrigerator for up to 5 days. However, allow them to come to room temperature before eating, as cold buttercream is hard and waxy. Unfrosted cupcakes can be frozen for up to 3 months. Wrap each cupcake individually in plastic wrap and then place them in a freezer-safe bag. Thaw on the counter before frosting.
Nutrition Facts (Estimated)
| Serving Size | 1 cupcake |
| Calories | 380 |
| Fat | 18g |
| Saturated Fat | 8g |
| Unsaturated Fat | 9g |
| Trans Fat | 0g |
| Cholesterol | 45mg |
| Sodium | 180mg |
| Carbohydrates | 48g |
| Fiber | 1g |
| Sugar | 28g |
| Protein | 3g |
Frequently Asked Questions
Why did my cupcakes turn brown instead of red?
This usually happens if you use Dutch-processed cocoa powder or if you bake them too long. It can also happen if you don’t use enough food dye. Ensure you are using natural cocoa and a high-quality gel food coloring.
Can I make this recipe as a whole cake instead of cupcakes?
Yes! This batter will fit into two 6-inch round pans or one 8-inch round pan. You will need to increase the baking time to approximately 30-35 minutes. Monitor closely.
Why do I need both butter and oil?
Butter provides the delicious flavor that oil lacks, while oil provides the moisture that butter lacks. Using both gives you the best of both worlds: tasty and moist.
Can I use liquid food coloring instead of gel?
Yes, but you will need to use more of it to get the same vibrancy (about 2 tablespoons), which adds extra liquid to the batter. Gel is preferred for its concentration.
How do I make the frosting white and not yellow?
Whip the butter for a long time (5-7 minutes) before adding sugar; it will pale significantly. You can also add a tiny, tiny drop of purple food coloring to neutralize the yellow tones.
Can I skip the vinegar?
It is not recommended. The vinegar ensures the baking soda activates fully for the best rise and helps preserve the red color.
Why did my cupcakes sink in the middle?
This is often caused by overfilling the liners, opening the oven door too early (releasing heat), or underbaking them slightly.
Is this recipe gluten-free friendly?
You can substitute the cake flour with a high-quality 1:1 Gluten-Free Baking Flour blend. The texture may be slightly different, but it works well.
Conclusion
Mastering the perfect Red Velvet Cupcake is a feather in the cap of any home baker. With this recipe, you move beyond the realm of boxed mixes and dry, flavorless imitations into the world of gourmet baking. The combination of the tender, moist, cocoa-infused sponge and the sweet, creamy vanilla buttercream creates a bite that is truly unforgettable. Whether you are a seasoned pro or a novice in the kitchen, these cupcakes are approachable, fun to make, and guaranteed to impress anyone lucky enough to snag one. So preheat that oven, grab your red food coloring, and get ready to bake the best batch of cupcakes your kitchen has ever seen. Happy baking!