The Ultimate Easy No-Bake Strawberry Cheesecake in a 9×13 Pan
Easy No Bake Strawberry Cheesecake In 9×13 Pan Recipe
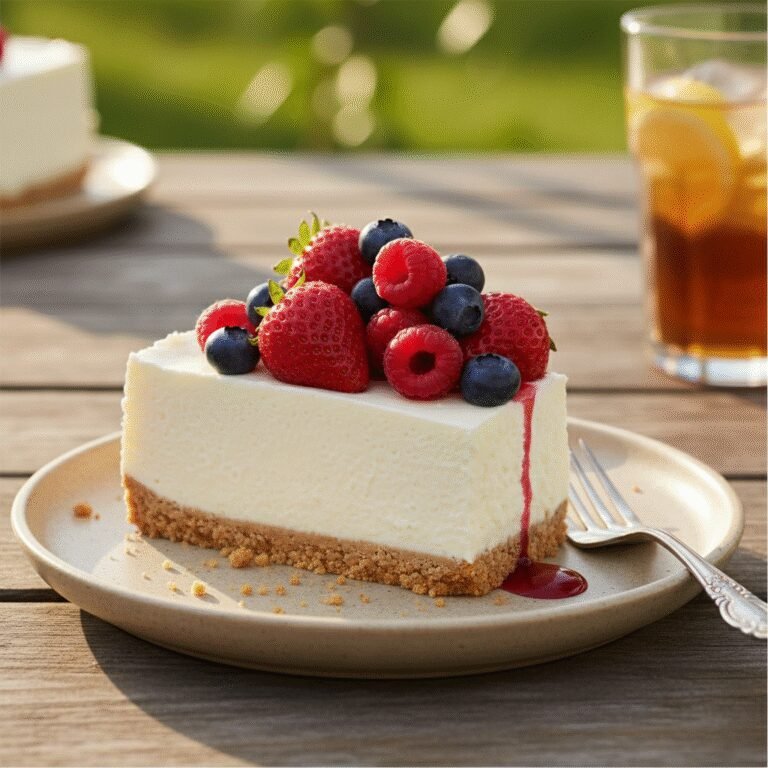
This crowd-pleasing No-Bake Strawberry Cheesecake is the ultimate summer dessert, featuring a buttery graham cracker crust, a velvety smooth cream cheese filling, and a luscious fresh strawberry topping. Made easily in a 9×13 pan, it requires absolutely no oven time, making it perfect for potlucks, picnics, and warm-weather gatherings.
30 minutes
0 minutes
4 hours 30 minutes (includes chilling)
15 servings
Dessert
No-Bake / Refrigeration
American
Vegetarian
There is something undeniably magical about a dessert that delivers gourmet flavor without requiring you to turn on the oven, especially during the sweltering heat of summer. This Easy No-Bake Strawberry Cheesecake in a 9×13 pan is the epitome of hassle-free indulgence. Imagine a dessert that combines the crunch of a golden, buttery graham cracker crust with a cloud-like, tangy cream cheese filling that melts in your mouth, all crowned with the vibrant sweetness of fresh, glazed strawberries. It is a symphony of textures and flavors that screams ‘summer celebration’ but is effortless enough for a Tuesday night treat. unlike traditional baked cheesecakes, which can be temperamental with their water baths and risks of cracking, this no-bake version is forgiving, reliable, and consistently delicious. The texture is lighter, almost mousse-like, yet stable enough to slice beautifully.
This recipe is specifically designed for a 9×13 pan, which is a game-changer for feeding a crowd. Whether you are hosting a backyard barbecue, attending a church potluck, or simply have a large family with a sweet tooth, this format ensures everyone gets a generous square. The visual appeal of the bright red strawberries against the creamy white filling is stunning, making it a centerpiece-worthy dish. Furthermore, the flavors are nostalgic yet sophisticated; the lemon juice adds a subtle zest that cuts through the richness of the cream cheese, while the vanilla extract rounds everything out with a warm aroma. In this detailed guide, we will walk through exactly how to achieve that perfect, firm-yet-fluffy consistency that separates a good no-bake cheesecake from a great one. Get ready to add your new favorite dessert to your repertoire.
History & Origins
The history of cheesecake is a fascinating journey that spans thousands of years and crosses multiple continents. While many associate the iconic dessert with the delis of New York City, its origins actually trace back to ancient Greece. Historians believe that cheesecake was served to athletes during the first Olympic Games in 776 B.C. to provide them with energy. These early versions were quite different from what we know today, typically consisting of a simple mixture of flour, wheat, honey, and cheese, baked in earthenware molds. As the Roman Empire expanded, they adopted the recipe, adding eggs and serving it warm. The concept eventually spread across Europe, evolving with local ingredients and culinary techniques.
However, the modern cream cheese-based cheesecake we adore today is an American innovation. In 1872, a New York dairyman named William Lawrence accidentally invented cream cheese while attempting to replicate French Neufchâtel. This creamy, tangy ingredient became the cornerstone of the classic New York Cheesecake. The concept of the ‘no-bake’ cheesecake is a more recent mid-20th-century evolution, born out of the desire for convenience and the availability of refrigeration and pre-made ingredients like gelatin and whipped topping. The no-bake method gained massive popularity in the 1960s and 70s, often appearing on the back of graham cracker boxes and condensed milk cans. It represented a shift towards easier home entertaining. This specific variation—prepared in a 9×13 pan rather than a springform pan—reflects the American tradition of ‘sheet cake’ desserts, prioritizing portion yield and ease of transport for community gatherings. It bridges the gap between the ancient love for cheese desserts and the modern need for practical, crowd-feeding solutions.
Why This Recipe Works
This recipe succeeds where many other no-bake cheesecakes fail because of the precise balance of fat, sugar, and acidity, alongside the mechanical aeration of the heavy cream. Many no-bake recipes rely heavily on gelatin or store-bought whipped topping (Cool Whip) to set the filling. While those methods are valid, they often result in a texture that is either too rubbery or artificially sweet. This recipe, however, relies on whipping real heavy cream to stiff peaks and gently folding it into a beaten cream cheese mixture. The heavy cream acts as the stabilizer, creating a structure that is firm enough to hold its shape when sliced but remains incredibly creamy and luxurious on the palate.
Furthermore, the use of a 9×13 pan is strategic. It increases the surface area of the crust relative to the filling, ensuring that every bite has that essential textural contrast between the crunchy base and the smooth top. The crust is thicker than average to support the slice. We also use a higher ratio of cream cheese to sugar than some recipes, allowing the natural tang of the cheese to shine through, which prevents the dessert from becoming cloyingly sweet. The addition of fresh lemon juice is not just for flavor; the acid actually helps to slightly thicken the cream cheese proteins, aiding in the setting process. Finally, the strawberry topping is prepared separately with a glaze made from cornstarch and strawberry puree or gelatin, ensuring the fruit stays glossy and doesn’t weep water into the cheesecake, keeping the layers distinct and beautiful.
Why You’ll Love This Recipe
- ✓Requires absolutely no baking—perfect for hot summer days.
- ✓Feeds a large crowd easily with 12-15 generous servings.
- ✓Features a light, mousse-like texture that isn’t too heavy.
- ✓Uses simple, accessible ingredients found in any grocery store.
- ✓Can be made ahead of time, reducing stress for party planning.
- ✓Versatile base that can be topped with any fruit of your choice.
Equipment You’ll Need
- ✓9×13 inch baking dish
- ✓Electric hand mixer or stand mixer
- ✓Large mixing bowls
- ✓Rubber spatula
- ✓Measuring cups and spoons
- ✓Food processor or ziplock bag (for crushing crumbs)
- ✓Saucepan (for the glaze)
- ✓Knife and cutting board
Ingredients
- ✓3 cups graham cracker crumbs (approx. 2 sleeves)
- ✓3/4 cup unsalted butter, melted
- ✓1/3 cup granulated sugar (for crust)
- ✓24 oz (3 blocks) cream cheese, softened to room temperature
- ✓1 1/2 cups powdered sugar, sifted
- ✓1 tbsp vanilla extract
- ✓1 tbsp fresh lemon juice
- ✓1 1/2 cups heavy whipping cream, cold
- ✓2 lbs fresh strawberries, hulled and sliced
- ✓1/2 cup granulated sugar (for topping)
- ✓2 tbsp cornstarch
- ✓1/2 cup water
Instructions
- Prepare the crust: In a medium bowl, combine the graham cracker crumbs, 1/3 cup granulated sugar, and melted butter. Stir until the mixture resembles wet sand.
- Press the crust: Pour the crumb mixture into a 9×13 inch pan. Press it down firmly and evenly into the bottom to form a solid base. You can use the bottom of a measuring cup to pack it tight. Place the pan in the freezer while you prepare the filling.
- Whip the cream: In a large bowl using a hand mixer (or stand mixer with whisk attachment), whip the cold heavy cream until stiff peaks form. Be careful not to overbeat it into butter. Set this aside.
- Beat cream cheese: In a separate large bowl, beat the softened cream cheese until it is completely smooth and creamy, about 2-3 minutes. There should be no lumps.
- Add flavors: Add the sifted powdered sugar, vanilla extract, and lemon juice to the cream cheese. Beat again until fully combined and fluffy.
- Fold in cream: Gently fold the whipped cream into the cream cheese mixture using a rubber spatula. Do this in two batches to preserve the airiness. Fold until no streaks of white cream remain.
- Fill the pan: Remove the crust from the freezer. Spread the cheesecake filling evenly over the crust, smoothing the top with an offset spatula. Cover with plastic wrap and refrigerate for at least 4 hours, preferably overnight.
- Make the glaze (Optional but recommended): In a small saucepan, whisk together 1/2 cup sugar and cornstarch. Stir in water and about 1/2 cup of mashed strawberries (extra from the 2 lbs). Cook over medium heat, stirring constantly until the mixture thickens and becomes translucent. Let it cool completely.
- Top and Serve: Just before serving, arrange the fresh sliced strawberries over the set cheesecake. If you made the glaze, toss the strawberries in the cooled glaze before arranging them on top, or drizzle the glaze over the fruit. Slice into squares and serve chilled.
Expert Cooking Tips
- ✓Ensure your cream cheese is truly at room temperature before mixing to avoid a lumpy filling.
- ✓Use cold heavy cream for whipping; warm cream will not whip to stiff peaks properly.
- ✓Press the crust very firmly; a loose crust will crumble when you try to serve slices.
- ✓Do not rush the chilling time; the filling needs cold to firm up so clean slices can be cut.
- ✓Sift the powdered sugar to prevent grainy textures in the smooth filling.
- ✓Wash and thoroughly dry strawberries before slicing so excess water doesn’t seep into the cheesecake.
Substitutions and Variations
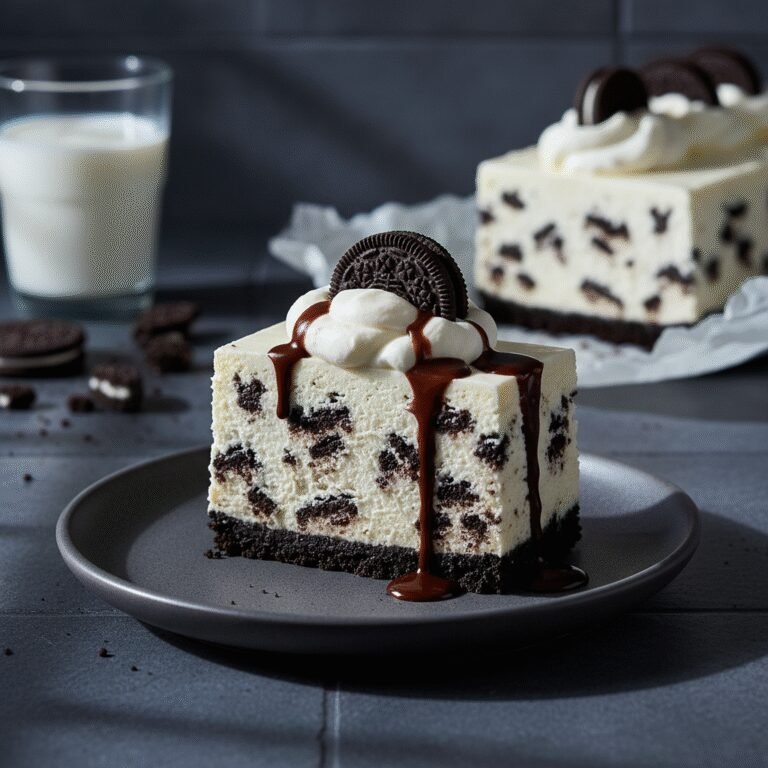
This recipe is highly adaptable to suit your pantry or dietary needs. For the crust, if you are out of graham crackers, you can use digestive biscuits, vanilla wafers, or even golden Oreos for a sweeter base. For a chocolate twist, use chocolate graham crackers or regular Oreos (filling included). If you need a gluten-free version, simply swap the graham crackers for a certified gluten-free brand.Regarding the filling, while full-fat cream cheese yields the best stability and flavor, you can use Neufchâtel cheese for a slightly lighter version, though it may be softer. Do not use tub cream cheese meant for bagels; it has a different water content. If you prefer not to use heavy cream, a tub of thawed whipped topping (like Cool Whip) can be folded in, though this will make the dessert sweeter and less rich. For the topping, this base works beautifully with blueberries, raspberries, peaches, or even canned cherry pie filling if fresh fruit isn’t in season. You can also skip the fruit entirely and drizzle with chocolate ganache or salted caramel.
Common Mistakes to Avoid
The most common mistake with no-bake cheesecake is not whipping the heavy cream to stiff enough peaks. If the cream is too soft, the cheesecake will not set properly and will be pudding-like rather than sliceable. Conversely, over-beating the cream cheese mixture after adding the whipped cream can deflate the air bubbles, resulting in a dense texture. Another frequent error is using cold cream cheese, which causes lumps that are impossible to beat out once ingredients are combined. Always plan ahead to let the cheese soften. Finally, rushing the chilling process is a recipe for disaster. While 4 hours is the minimum, overnight is always superior for the best structural integrity. Do not freeze the cheesecake to speed it up, as this can alter the texture of the cream cheese, making it grainy upon thawing.
Serving Suggestions
This cheesecake is a showstopper on its own, but you can elevate the presentation for special occasions. Serve each square with a dollop of extra whipped cream and a sprig of fresh mint for a pop of green color. A drizzle of chocolate sauce or white chocolate shavings adds a touch of decadence. For a summer party, serve it alongside a pitcher of iced tea or lemonade. If you are serving this for a patriotic holiday like the 4th of July, add blueberries alongside the strawberries for a festive red, white, and blue theme. Plating on white ceramic dishes makes the red strawberries pop visually.
Storage and Reheating Tips
This dessert must be kept refrigerated. Cover the pan tightly with plastic wrap or a lid to prevent it from absorbing fridge odors. It will stay fresh in the refrigerator for up to 4-5 days. If you anticipate leftovers, it is best to add the fresh fruit topping only to the slices you are serving, or just before the event, as the strawberries will start to release juices after 24 hours, potentially making the crust soggy. You can freeze the cheesecake (without the fruit topping) for up to 3 months. Wrap it tightly in plastic wrap and then aluminum foil. Thaw it in the refrigerator overnight before adding the topping and serving.
Nutrition Facts (Estimated)
| Serving Size | 1 slice |
| Calories | 380 |
| Fat | 26g |
| Saturated Fat | 15g |
| Unsaturated Fat | 9g |
| Trans Fat | 0g |
| Cholesterol | 75mg |
| Sodium | 210mg |
| Carbohydrates | 32g |
| Fiber | 1g |
| Sugar | 24g |
| Protein | 4g |
Frequently Asked Questions
Can I use frozen strawberries for the topping?
It is not recommended for the fresh topping layer because frozen berries become mushy and release a lot of water when thawed. However, you can use frozen berries to make the cooked glaze/sauce.
Why is my no-bake cheesecake runny?
This usually happens if the heavy cream wasn’t whipped to stiff peaks or if the mixture was over-mixed, deflating the air. It could also be that it hasn’t chilled long enough.
Can I make this recipe in a different pan size?
Yes, you can halve the recipe for an 8×8 or 9×9 square pan. You can also use two 9-inch pie plates, though the crust thickness may vary.
Do I need to use gelatin?
No, this specific recipe relies on the fat structure of the cream cheese and stiffly whipped cream for stability, so no gelatin is required.
Can I use granulated sugar instead of powdered sugar in the filling?
Powdered sugar is preferred because it contains cornstarch which helps stabilize the filling, and it dissolves instantly without leaving a grainy texture.
How do I get clean slices?
Wipe your knife with a warm, damp cloth between every single cut. This ensures the layers stay distinct and the edges look professional.
Is this cheesecake gluten-free?
The filling is naturally gluten-free, but standard graham crackers are not. Use gluten-free graham crackers for the crust to make the entire dish safe.
Can I prepare this 2 days in advance?
Yes, the cheesecake base (crust and filling) actually tastes better after settling for 24-48 hours. Just wait to add the fresh fruit topping until the day of serving.
Conclusion
The Easy No-Bake Strawberry Cheesecake in a 9×13 pan is truly the hero of stress-free dessert making. It combines the elegance of a classic cheesecake with the simplicity of a sheet pan dessert, all while keeping your kitchen cool. Its creamy, dreamy texture and bright berry flavor are guaranteed to win over any crowd, from picky toddlers to sophisticated foodies. Whether you are a seasoned baker looking for a quick fix or a novice in the kitchen, this recipe promises success with minimal effort. So, grab your mixer, pick up some fresh strawberries, and get ready to enjoy a slice of summer bliss that you will want to make again and again.