The Ultimate Easy No-Bake Oreo Cheesecake With Whipped Cream Topping
Easy No Bake Oreo Cheesecake With Whipped Cream Topping Recipe
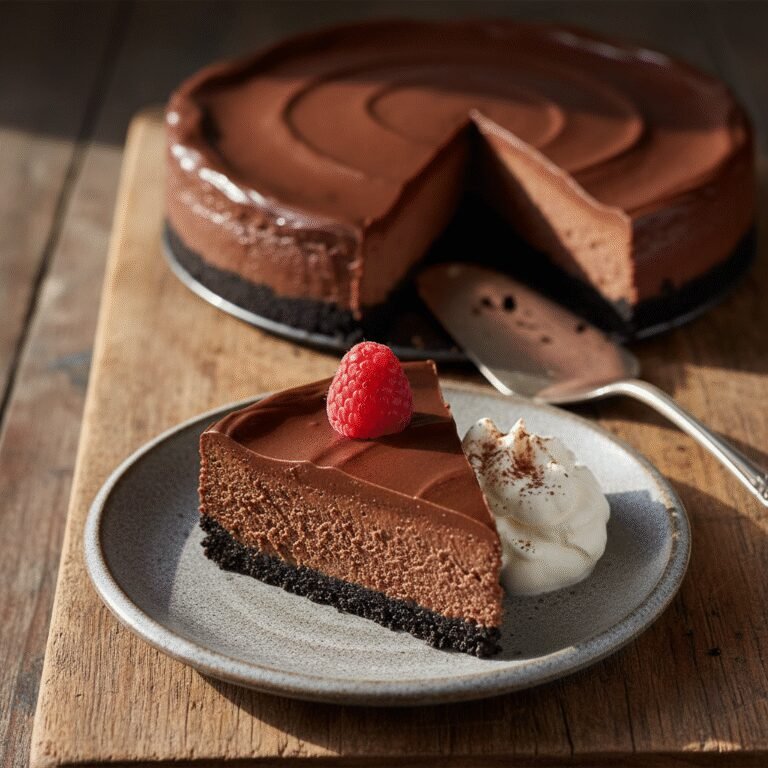
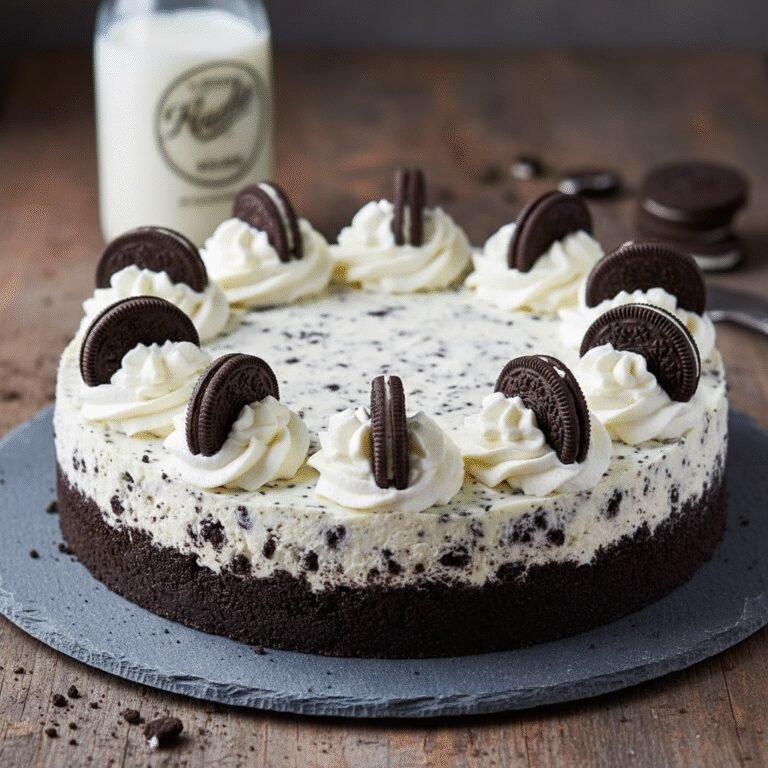
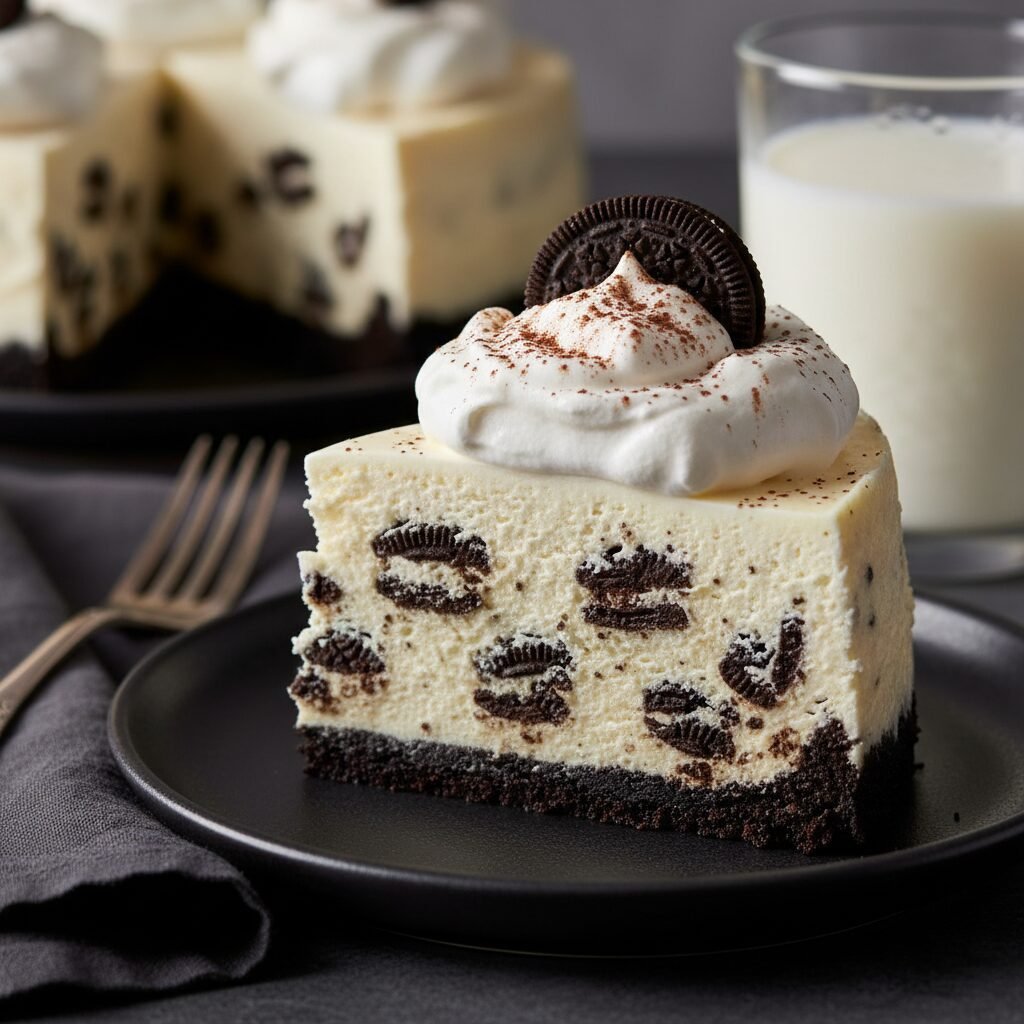
This decadent No-Bake Oreo Cheesecake features a buttery cookie crust and a velvety, cookies-and-cream filling that sets perfectly without an oven. Topped with fluffy homemade whipped cream and extra crushed Oreos, it is the ultimate crowd-pleasing dessert for any occasion.
20 minutes
0 minutes
6 hours 20 minutes (includes chilling)
12 servings
Dessert
Refrigeration
American
Vegetarian
There are few flavor combinations as iconic and universally beloved as cookies and cream. This Easy No-Bake Oreo Cheesecake takes that classic pairing and elevates it into a dessert that is as sophisticated in taste as it is simple to prepare. Imagine a dessert that requires absolutely zero oven time, keeping your kitchen cool during the sweltering summer months, yet delivers a texture so rich and creamy it rivals any baked New York-style cheesecake. The foundation of this masterpiece is a thick, buttery crust made from crushed Oreo cookies, providing a satisfying crunch and a deep cocoa flavor that anchors the sweetness of the filling. Above this lies the star of the show: a luscious, mousse-like cheesecake layer packed with chunks of soft cookies. Unlike baked versions that rely on eggs and flour for structure, this recipe utilizes the natural thickening power of full-fat cream cheese combined with stiffly beaten heavy cream. The result is a filling that is airy yet stable, melting in your mouth with every bite. To finish, we crown the cheesecake with a cloud of sweetened whipped cream and a generous dusting of cookie crumbs. Whether you are hosting a dinner party, celebrating a birthday, or simply craving a midnight treat, this recipe promises high-impact flavor with minimal effort. It is a testament to the magic of no-bake desserts—proving that you do not need heat to create something truly spectacular.
History & Origins
The history of cheesecake is a journey that spans millennia, evolving from ancient energy bars to the creamy, sweet dessert we adore today. Anthropologists have found cheese molds dating back to 2,000 B.C., and it is believed that the first ‘cheesecakes’ were served to athletes during the first Olympic Games in Greece in 776 B.C. These early versions were simple mixtures of flour, wheat, honey, and cheese, baked to provide sustenance. As the Romans conquered Greece, they adopted the recipe, adding eggs and serving it warm. The concept spread across Europe, morphing into various regional tarts and curd-based dishes. However, the modern cheesecake as we know it—smooth, dense, and rich—began to take shape in the United States in the late 19th century. In 1872, a New York dairyman named William Lawrence accidentally invented cream cheese while trying to replicate French Neufchâtel. This creamy, tangy product became the base for the iconic New York Style cheesecake. The ‘No-Bake’ evolution came later, driven by the mid-20th-century demand for convenience and the availability of refrigeration. Home cooks sought desserts that were less temperamental than custard-based baked cheesecakes, which often cracked or fell. By stabilizing the mixture with gelatin or whipped cream, the no-bake method was born. The Oreo cookie, introduced by the National Biscuit Company (Nabisco) in 1912, eventually found its way into this lineage. Originally sold as part of a trio of biscuits, the Oreo quickly became the best-selling cookie in the United States. Its integration into cheesecake was inevitable, marrying the convenience of the no-bake method with America’s favorite cookie to create a modern classic.
Why This Recipe Works
This recipe succeeds where many others fail because of the precise balance of fat, sugar, and aeration. Many no-bake cheesecakes turn out runny or fail to set because they rely too heavily on milk or insufficient fat content. This recipe strictly uses full-fat block cream cheese and heavy whipping cream. The high fat content is crucial; when the cream cheese is beaten, it coats the sugar crystals and traps air, creating a dense but spreadable base. The heavy whipping cream is whipped to stiff peaks before being folded in, acting as a structural scaffolding that holds the cheesecake up without the need for gelatin, which can sometimes give a rubbery texture. Furthermore, the Oreo crust works better than a traditional graham cracker crust here because the cream filling inside the Oreos (used in the crust) helps bind the crumbs together more effectively when chilled with melted butter, creating a shell that doesn’t crumble apart when sliced. The chilling time allows the cocoa butter in the chocolate cookies and the milk fat in the dairy to solidify, resulting in a slice that is clean, firm, and visually stunning. It is a triumph of food chemistry designed for the home cook.
Why You’ll Love This Recipe
- ✓Requires absolutely no baking, keeping your kitchen cool.
- ✓Uses simple, accessible ingredients found in any grocery store.
- ✓Features a stable, mousse-like texture without using gelatin.
- ✓Perfect for making ahead of time for parties or events.
- ✓Highly customizable with different Oreo flavors or toppings.
- ✓Delivers a professional bakery-style presentation with minimal effort.
Equipment You’ll Need
- ✓9-inch springform pan
- ✓Electric hand mixer or stand mixer
- ✓Large mixing bowls
- ✓Food processor or zip-top bag and rolling pin
- ✓Rubber spatula
- ✓Measuring cups and spoons
- ✓Offset spatula
Ingredients
- ✓24 whole Oreo cookies (for crust)
- ✓4 tbsp unsalted butter, melted (for crust)
- ✓16 oz (2 blocks) full-fat cream cheese, softened to room temperature
- ✓1/2 cup powdered sugar
- ✓1 tsp pure vanilla extract
- ✓1 1/2 cups heavy whipping cream, cold
- ✓12 whole Oreo cookies, roughly chopped (for filling)
- ✓1 cup heavy whipping cream (for topping)
- ✓2 tbsp powdered sugar (for topping)
- ✓Extra Oreos or crumbs for garnish
Instructions
- Begin by preparing the crust. Place 24 whole Oreos (filling included) into a food processor and pulse until they are fine crumbs. If you do not have a food processor, place cookies in a zip-top bag and crush with a rolling pin.
- Transfer the crumbs to a medium bowl and pour over the melted butter. Mix with a fork until the crumbs resemble wet sand.
- Press the crumb mixture firmly into the bottom and slightly up the sides of a 9-inch springform pan. Use the bottom of a measuring cup to pack it down tightly. Place the pan in the freezer for 10-15 minutes to set while you make the filling.
- In a large mixing bowl, beat the softened cream cheese, 1/2 cup powdered sugar, and vanilla extract with an electric mixer on medium speed until the mixture is completely smooth and creamy. Scrape down the sides of the bowl to ensure no lumps remain.
- In a separate cold bowl, whip the 1.5 cups of cold heavy whipping cream until stiff peaks form. Be careful not to overbeat into butter.
- Gently fold the whipped cream into the cream cheese mixture using a rubber spatula. Use a slow, sweeping motion to keep the air in the mixture. Fold until just combined.
- Add the chopped Oreos to the filling and gently fold them in to distribute evenly.
- Remove the crust from the freezer. Pour the cheesecake filling over the crust and smooth the top with an offset spatula.
- Cover the pan tightly with plastic wrap and refrigerate for at least 6 hours, or preferably overnight, to allow the filling to set completely.
- Before serving, prepare the topping. Whip the remaining 1 cup of heavy cream with 2 tbsp powdered sugar until soft-to-stiff peaks form.
- Remove the cheesecake from the springform pan by running a thin knife around the edge before unlatching the ring.
- Pipe or dollop the whipped cream over the cheesecake and garnish with extra Oreo crumbs or whole cookies.
- Slice with a warm knife and serve chilled.
Expert Cooking Tips
- ✓Ensure your cream cheese is truly at room temperature before mixing; otherwise, you will end up with a lumpy batter.
- ✓Use full-fat ingredients. Low-fat cream cheese or milk will not set properly and may result in a soupy cheesecake.
- ✓Chill your mixing bowl and beaters before whipping the cream to achieve volume faster.
- ✓Do not rush the chilling time. Six hours is the minimum, but overnight is best for clean slices.
- ✓Crush the Oreos for the filling by hand rather than a food processor to maintain nice, visible chunks in the cheesecake.
Substitutions and Variations
If you cannot find standard Oreos, any sandwich cookie will work, including generic brands or different flavors like Golden Oreos or Mint Oreos for a fun twist. For the butter in the crust, salted butter can be used if you enjoy a sweet-salty contrast, though unsalted is traditional. If you prefer a lighter sweetness, you can reduce the powdered sugar in the filling slightly, as the cookies provide significant sugar. For a gluten-free version, simply swap the standard Oreos for Gluten-Free Oreos, which are readily available in most supermarkets. You can substitute the heavy whipping cream in the filling with a thawed tub of whipped topping (like Cool Whip) for an even faster preparation, though the texture will be slightly less rich and more airy.
Common Mistakes to Avoid
The most common mistake is under-beating the heavy cream. It must reach stiff peaks to support the weight of the cream cheese. Conversely, over-beating the cream cheese mixture after adding the whipped cream can deflate the air, leading to a dense, heavy texture. Another frequent error is not packing the crust down firmly enough, causing it to crumble when served. Finally, attempting to slice the cheesecake before it has fully set (less than 6 hours) will result in a messy presentation. Always use a hot knife (dipped in hot water and wiped dry) to get clean, professional-looking slices.
Serving Suggestions
Serve this cheesecake chilled, straight from the refrigerator. It pairs beautifully with a hot cup of dark roast coffee or an espresso, which cuts through the richness of the cream and chocolate. For a summer twist, serve alongside fresh berries like strawberries or raspberries; their tartness provides a wonderful contrast to the sweet, creamy filling. You can also drizzle chocolate ganache or salted caramel sauce over the top for an extra decadent finish. If serving for a birthday, stick candles directly into the whipped cream mounds for a festive look.
Storage and Reheating Tips
This cheesecake must be kept refrigerated. Store leftovers in the springform pan covered with plastic wrap or transfer to an airtight container. It will stay fresh in the fridge for up to 5 days. Do not leave it out at room temperature for more than an hour, as the dairy will begin to soften and spoil. This cheesecake also freezes exceptionally well. To freeze, wrap the entire cheesecake (without the whipped cream topping if possible) in a layer of plastic wrap followed by a layer of aluminum foil. It can be frozen for up to 3 months. Thaw in the refrigerator overnight before serving and add fresh whipped cream just before eating.
Nutrition Facts (Estimated)
| Serving Size | 1 slice |
| Calories | 480 |
| Fat | 34g |
| Saturated Fat | 18g |
| Unsaturated Fat | 14g |
| Trans Fat | 0g |
| Cholesterol | 85mg |
| Sodium | 290mg |
| Carbohydrates | 42g |
| Fiber | 1g |
| Sugar | 32g |
| Protein | 5g |
Frequently Asked Questions
Can I use low-fat cream cheese?
It is not recommended. The stabilizers and fat content in full-fat block cream cheese are essential for the cheesecake to set firmly without baking. Low-fat versions (tub style) often have higher water content, leading to a runny filling.
Why is my cheesecake filling runny?
This usually happens if the heavy cream wasn’t whipped to stiff peaks or if the mixture was over-mixed after combining. Ensure you fold gently and chill for the full recommended time.
Can I make this ahead of time?
Yes, absolutely! In fact, it tastes better the next day after the flavors have melded and the texture has fully set. It can be made up to 2 days in advance.
Do I need to remove the cream filling from the Oreos for the crust?
No, keep the filling in! The cream filling helps bind the crust together along with the butter, making it sturdier and tastier.
Can I use a store-bought crust?
Yes, you can use a pre-made Oreo or chocolate pie crust. However, since this recipe yields a large amount of filling, you might have enough filling for two standard store-bought pie crusts.
How do I get clean slices?
Fill a tall pitcher with hot water. Dip a sharp chef’s knife into the water, wipe it dry with a paper towel, and make a cut. Repeat this process for every single slice.
Can I add gelatin for extra stability?
While this recipe is designed to set without it, if you are serving this outdoors in warm weather, you can dissolve 1 teaspoon of unflavored gelatin in 1 tablespoon of cold water, warm it until liquid, and beat it into the cream cheese mixture for extra hold.
Is this recipe gluten-free?
Not as written, but it is very easily adapted. Simply use Gluten-Free Oreos for both the crust and the filling. All other ingredients are naturally gluten-free.
Conclusion
The Easy No-Bake Oreo Cheesecake with Whipped Cream Topping is more than just a dessert; it is a celebration of texture, flavor, and simplicity. By combining the nostalgic crunch of America’s favorite cookie with a sophisticated, airy cheesecake mousse, you create a dish that appeals to both children and adults alike. Its versatility makes it perfect for summer BBQs where you want to avoid the oven, yet its elegance suits the finest holiday dinner tables. With just a few ingredients and a bit of patience during the chilling process, you can master a dessert that looks like it came from a high-end bakery. We hope this recipe becomes a staple in your home, bringing joy and sweetness to your gatherings for years to come.