The Ultimate Creamy Lemon Mini Cheesecake Recipe with Buttery Graham Crust
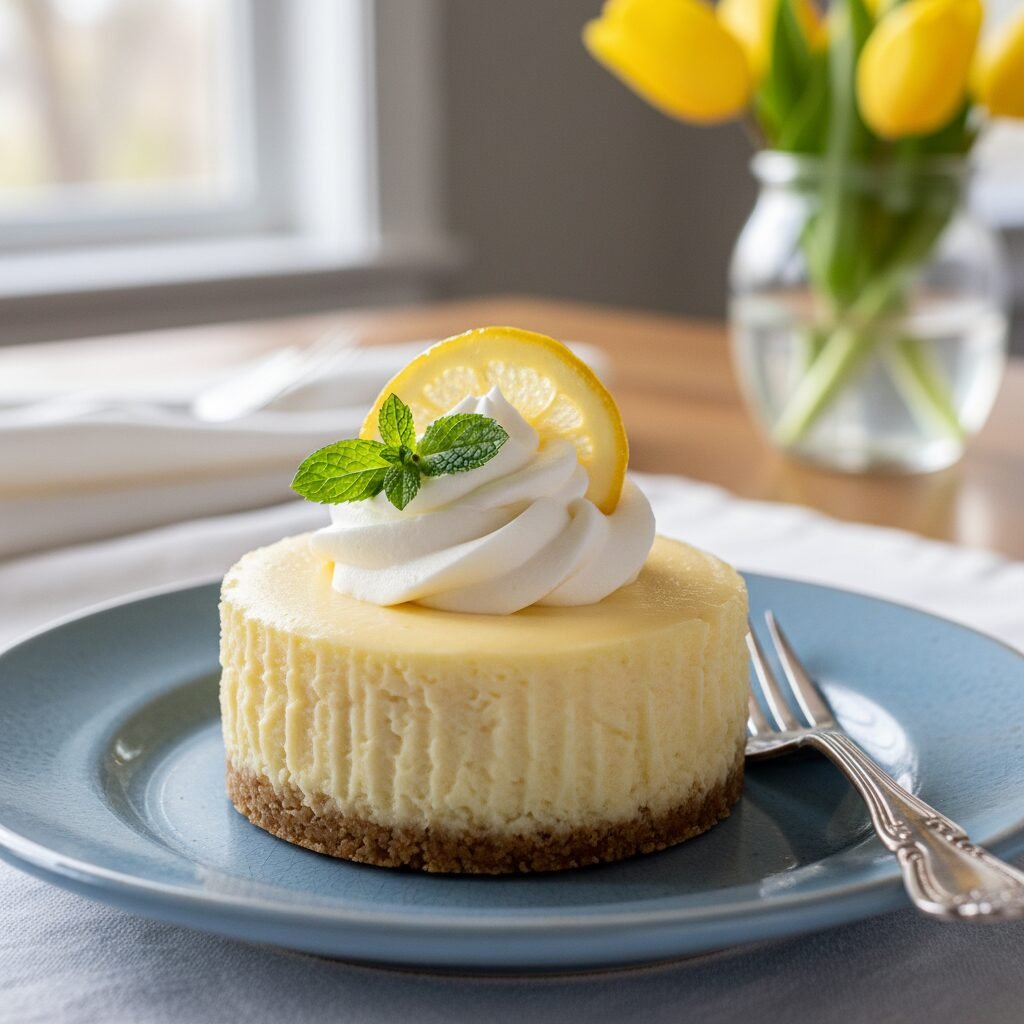
Creamy Lemon Cheesecake Mini Cheesecake Recipe
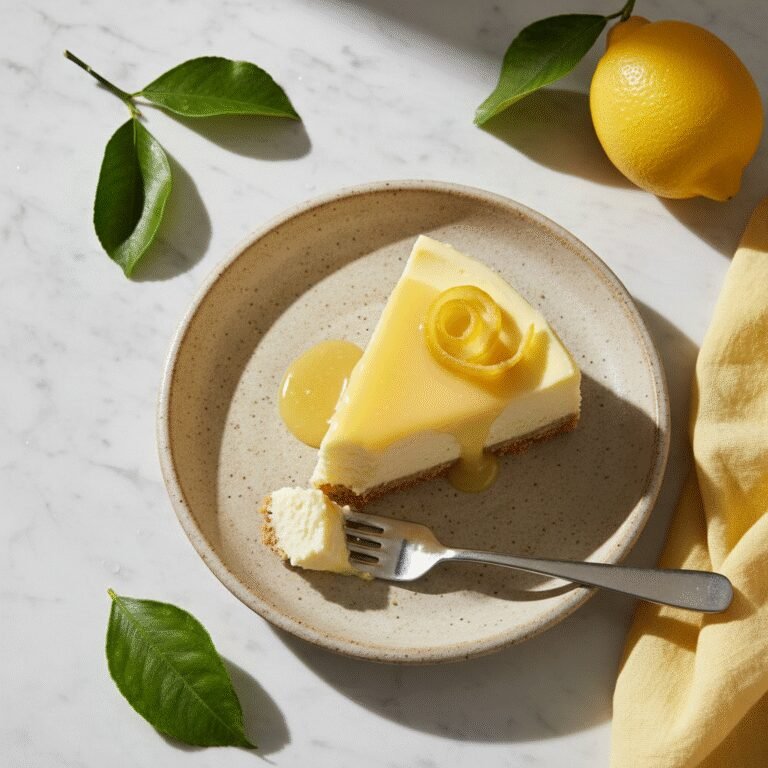
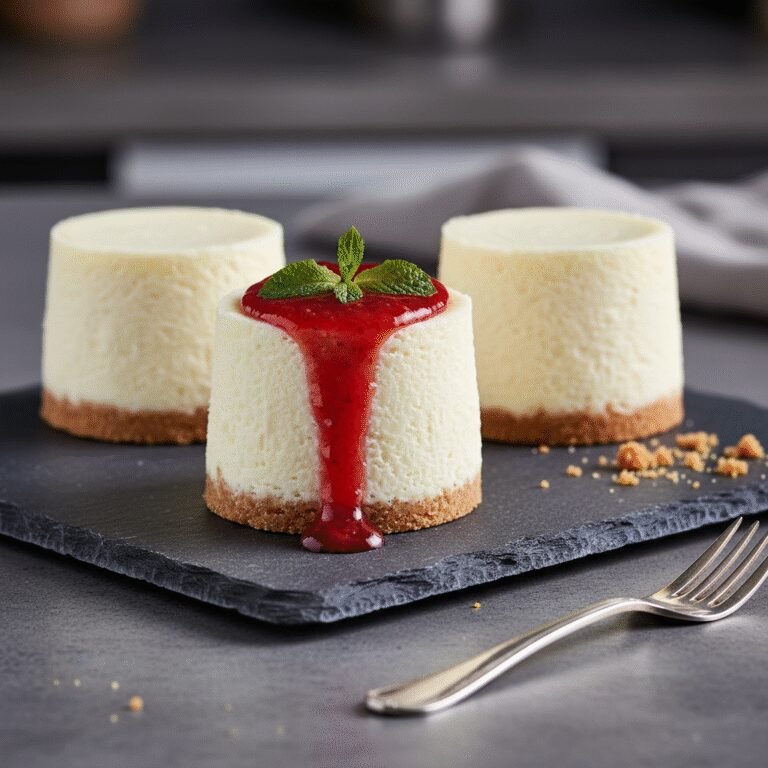
Bursting with bright citrus flavor and resting on a buttery graham cracker crust, these Creamy Lemon Mini Cheesecakes are the perfect bite-sized dessert. They are incredibly easy to make, require no water bath, and offer a luscious texture that melts in your mouth—ideal for spring gatherings or a sweet indulgence.
20 minutes
20 minutes
3 hours (includes cooling)
12 mini cheesecakes
Dessert
Baking
American
Vegetarian
There is something undeniably cheerful about lemon desserts. They bridge the gap between the cozy comfort of baked goods and the refreshing zing of fresh fruit. This Creamy Lemon Mini Cheesecake recipe is my absolute love letter to spring, though honestly, I bake them year-round whenever I need a little sunshine in my kitchen. If you have ever been intimidated by the prospect of baking a full-sized cheesecake—with the terrifying water baths, the risk of surface cracks, and the sheer time commitment—then these mini cheesecakes are going to be your new best friend. By shrinking the dessert down into individual portions using a standard muffin tin, we eliminate almost all the stress while amplifying the flavor.
The magic of this recipe lies in the balance. We start with a classic, golden graham cracker crust that provides a crunchy, buttery foundation. But the star, of course, is the filling. It is luxuriously smooth, dense yet fluffy, and infused with both fresh lemon juice and plenty of zest to ensure the citrus notes pop against the rich cream cheese. Because they are small, they bake evenly and cool down relatively quickly, meaning you are never too far away from dessert time. These are perfect for passing around at Easter brunch, baby showers, or just keeping in the fridge for a guilt-free (or guilt-low) midnight snack. The texture is velvety and rich, not chalky or dry, and the lemon cuts through the heaviness of the dairy to create a sophisticated flavor profile that appeals to both kids and adults alike.
History & Origins
The history of cheesecake is a fascinating journey that dates back much further than the famous New York delis of the 20th century. Anthropologists have found cheese molds dating back to 2,000 B.C., but the first credited ‘cheesecake’ is believed to have originated in ancient Greece on the island of Samos. In fact, it was served to athletes during the first Olympic Games in 776 B.C. to provide them with energy. These early versions were simple mixtures of flour, wheat, honey, and cheese, baked in earthenware molds—a far cry from the smooth, sugar-laden dessert we know today, but the concept was born.
When the Romans conquered Greece, they adopted the recipe (as they did with much of Greek culture), adding eggs and serving it warm under the name ‘libum’. As the Roman Empire expanded, the recipe traveled across Europe, evolving with local ingredients. However, the modern cheesecake as we know and love it didn’t truly take shape until the 1870s in New York, thanks to a happy accident by dairyman William Lawrence. While trying to replicate French Neufchâtel cheese, he accidentally created a richer, creamier product: cream cheese. This paved the way for the dense, rich New York Style cheesecake.
The concept of ‘mini’ cheesecakes is a much more modern evolution, born out of the mid-century American desire for convenience and the rise of the cupcake trend in the early 2000s. Home bakers realized that muffin tins offered a way to bypass the finicky nature of springform pans, allowing for faster baking times and built-in portion control. Today, the mini cheesecake represents the perfect marriage of ancient culinary tradition and modern convenience cooking.
Why This Recipe Works
This recipe succeeds where many others fail because of the specific ratio of fat, acid, and sugar, combined with a gentle baking method. First, we use full-fat block cream cheese and sour cream. The sour cream is the secret weapon here; it softens the texture of the heavy cream cheese, adding a tangible tang that complements the lemon while preventing the cheesecake from becoming too dense or cloying. It essentially relaxes the protein structure of the cheese, resulting in that ‘melt-in-your-mouth’ sensation.
Secondly, the addition of lemon juice does more than just add flavor. The acid in the lemon juice reacts with the proteins in the dairy and eggs, helping the mixture to thicken and set without requiring an excessive amount of flour or cornstarch, which can often make cheesecakes taste chalky. We also rely on room-temperature ingredients. This is scientifically crucial. If your cream cheese or eggs are cold, they won’t emulsify properly, leading to a lumpy batter. By beating them at room temperature, we trap just enough air to make them light, but not so much that they puff up and crack.
Finally, the ‘mini’ format works because it allows for even heat distribution. A large cheesecake often cooks faster on the edges than in the center, leading to overbaked rims and underbaked middles. In a muffin tin, heat penetrates the small surface area evenly, ensuring a perfect, creamy consistency from edge to center every single time.
Why You’ll Love This Recipe
- ✓No water bath required – hassle-free baking.
- ✓Perfect portion control with individual servings.
- ✓Bursting with double-lemon flavor from zest and juice.
- ✓Creamy, crack-free texture every time.
- ✓Freezer-friendly for easy meal prepping.
- ✓Ready in under 45 minutes (excluding cooling time).
Equipment You’ll Need
- ✓Standard 12-cup muffin tin
- ✓Paper cupcake liners
- ✓Electric hand mixer or stand mixer
- ✓Large mixing bowl
- ✓Medium mixing bowl
- ✓Rubber spatula
- ✓Citrus zester/microplane
- ✓Measuring cups and spoons
Ingredients
- ✓1 cup graham cracker crumbs (about 8-9 full sheets)
- ✓4 tablespoons unsalted butter, melted
- ✓1 tablespoon granulated sugar (for crust)
- ✓16 oz (2 blocks) full-fat cream cheese, softened to room temperature
- ✓1/2 cup granulated sugar (for filling)
- ✓1/4 cup sour cream, room temperature
- ✓1 teaspoon vanilla extract
- ✓2 large eggs, room temperature
- ✓1 tablespoon fresh lemon zest (approx. 1 lemon)
- ✓2 tablespoons fresh lemon juice
Instructions
- Preheat your oven to 325°F (163°C). Line a standard 12-cup muffin tin with paper liners.
- In a medium bowl, combine the graham cracker crumbs, melted butter, and 1 tablespoon of sugar. Mix until the texture resembles wet sand.
- Distribute the crumb mixture evenly among the 12 muffin cups (about 1 generous tablespoon per cup). Use the bottom of a shot glass or a spoon to press the crumbs down firmly to create a compact crust. Bake for 5 minutes, then remove and let cool slightly while you prepare the filling.
- In a large bowl using a handheld or stand mixer fitted with the paddle attachment, beat the softened cream cheese and 1/2 cup sugar on medium speed until completely smooth and creamy (about 2-3 minutes). Scrape down the sides of the bowl.
- Add the sour cream, vanilla extract, lemon zest, and lemon juice. Beat on low speed until just combined. Do not overmix.
- Add the eggs one at a time, mixing on low speed just until the yolk disappears. It is crucial not to overbeat at this stage to prevent air bubbles that cause cracks.
- Divide the batter evenly over the pre-baked crusts, filling each liner almost to the top.
- Bake for 18-22 minutes. The centers should still be slightly jiggly like Jell-O, but the tops should look set. They will firm up as they cool.
- Turn off the oven and crack the door open slightly. Let the cheesecakes sit in the cooling oven for 10 minutes to cool gradually.
- Remove the tin from the oven and let the cheesecakes cool completely at room temperature (about 1 hour).
- Transfer the cheesecakes (still in the tin or on a tray) to the refrigerator and chill for at least 2 hours before serving to allow the texture to fully set.
Expert Cooking Tips
- ✓Room Temperature is Non-Negotiable: Ensure your cream cheese, eggs, and sour cream are truly at room temperature to avoid lumps.
- ✓Don’t Overmix the Eggs: Once you add the eggs, mix on the lowest speed. Overmixing introduces air, which leads to rising, falling, and cracking.
- ✓Zest First, Juice Later: It is much easier to zest a firm, whole lemon than one that has already been cut and squeezed.
- ✓The Jiggle Test: Don’t wait for the center to be hard. If it jiggles slightly when you shake the pan, it is done. It will set in the fridge.
- ✓Press the Crust Firmly: A loose crust will crumble when you unwrap the liner. Pack it down tight.
- ✓Cool Gradually: Sudden temperature changes cause cracks. The step of leaving them in the turned-off oven helps mitigate this.
Substitutions and Variations
This recipe is quite versatile if you need to make adjustments based on dietary needs or pantry availability. For the crust, if you don’t have graham crackers, you can substitute vanilla wafers, digestive biscuits, or even Biscoff cookies for a spiced twist. For a gluten-free version, simply use gluten-free graham cracker crumbs; the rest of the filling is naturally gluten-free (ensure your baking powder/extracts are certified if highly sensitive, though this recipe uses neither). If you don’t have sour cream, full-fat Greek yogurt is an excellent 1:1 substitution that maintains the tanginess and texture. You can also swap the citrus: lime juice and zest make fantastic Key Lime mini cheesecakes, or use orange for a ‘creamsicle’ vibe. Avoid using low-fat or fat-free cream cheese, as the stabilizers in those products can ruin the texture, resulting in a watery or rubbery cheesecake.
Common Mistakes to Avoid
The most common mistake home bakers make with cheesecake is using cold ingredients. If you try to beat cold cream cheese, it will break into tiny lumps that will never smooth out, no matter how long you mix. Another major error is opening the oven door repeatedly to check on them. This releases heat and causes the temperature to fluctuate, which can lead to sinking centers. Also, be careful not to overbake. Many people see the jiggly center and think it’s raw, leaving it in until it’s firm. By the time it’s firm in the oven, it will be dry and grainy once cooled. Finally, skipping the chilling time is a mistake; the flavor needs time to meld and the texture needs cold to firm up into that classic cheesecake consistency.
Serving Suggestions
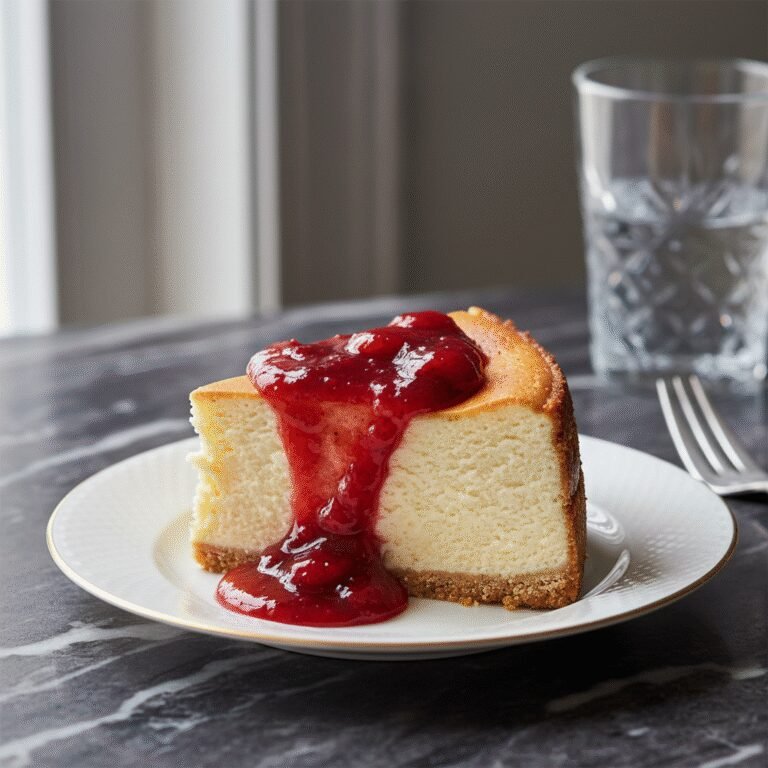
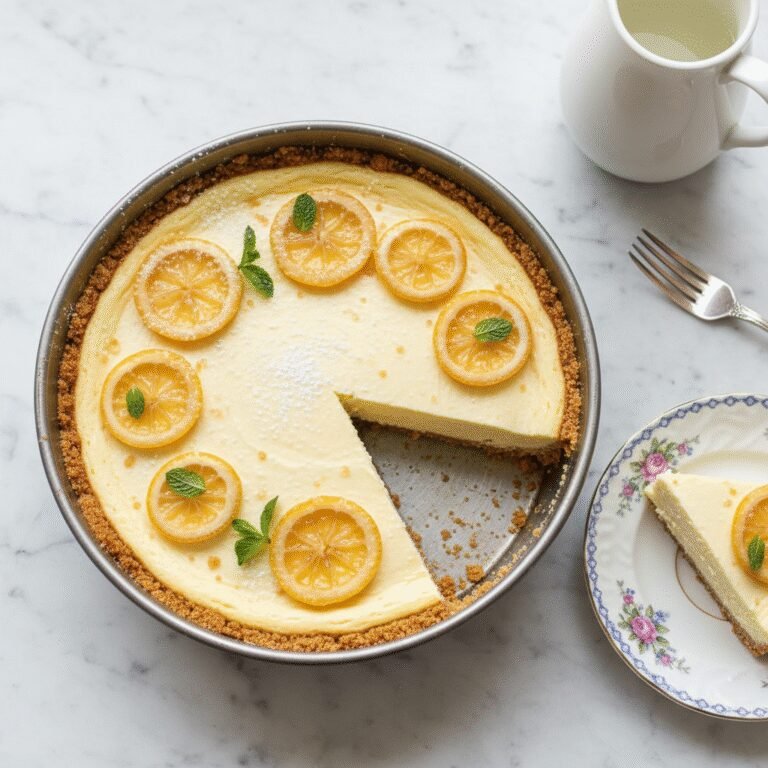
These mini cheesecakes are beautiful on their own, but they really shine with a garnish. A simple dollop of homemade whipped cream and a small slice of fresh lemon or a curl of lemon zest makes them look bakery-quality. For a pop of color, top with fresh raspberries, blueberries, or a strawberry slice; the berry tartness pairs perfectly with the lemon. If you want to get fancy, a drizzle of lemon curd or a fruit coulis on the plate adds moisture and intense flavor. For spring parties, edible flowers like pansies or violets make for a stunning presentation. Serve them chilled, straight from the fridge.
Storage and Reheating Tips
Storage is simple, making these a great make-ahead dessert. Store leftover cheesecakes in an airtight container in the refrigerator for up to 5 days. The flavor actually often improves after the first day. For longer storage, these freeze beautifully. Allow them to cool completely and chill in the fridge first. Then, remove the paper liners (optional, but easier to eat later) and place them on a baking sheet to freeze solid. Once frozen, transfer them to a freezer-safe bag or container. They will keep for up to 3 months. Thaw them in the refrigerator overnight before serving. Do not microwave to thaw, or the cheese will melt.
Nutrition Facts (Estimated)
| Serving Size | 1 mini cheesecake |
| Calories | 210 |
| Fat | 15g |
| Saturated Fat | 9g |
| Unsaturated Fat | 5g |
| Trans Fat | 0g |
| Cholesterol | 55mg |
| Sodium | 160mg |
| Carbohydrates | 18g |
| Fiber | 0.5g |
| Sugar | 14g |
| Protein | 3g |
Frequently Asked Questions
Why did my mini cheesecakes crack on top?
Cracks usually happen for two reasons: overmixing the batter (especially after adding eggs) or cooling them too quickly. To prevent this, mix on low speed and let them cool in the oven with the door cracked for 10 minutes before moving to room temperature.
Can I make these without a muffin tin?
It is difficult to make ‘mini’ cheesecakes without a mold. However, you could use silicone baking cups placed on a flat baking sheet, or small ramekins, though baking time may need to be adjusted slightly for ramekins.
How do I know when they are done?
Look for the edges to be set and slightly puffy, while the center (about the size of a dime) still jiggles like gelatin when you gently shake the pan. They should not be brown on top.
Can I use bottled lemon juice instead of fresh?
Technically yes, but I highly recommend fresh lemon juice. Bottled juice often has preservatives that give it a slightly metallic or artificial taste, which is noticeable in a delicate dessert like cheesecake.
Why did my liners stick to the cheesecake?
This happens if the cheesecake is too warm when you try to peel them. Ensure they have been chilled in the fridge for at least 2 hours; the cold cheesecake will release from the paper much more easily.
Can I double this recipe?
Absolutely! This recipe doubles easily. You will just need two muffin tins. Rotate the tins halfway through baking to ensure even cooking if they are on different racks.
Can I use mascarpone instead of cream cheese?
Mascarpone is richer and creamier but lacks the tang of cream cheese. You can use a 50/50 split, but using 100% mascarpone might result in a dessert that is too soft and lacks the structural integrity of a standard cheesecake.
Do I need to grease the paper liners?
Generally, no. There is enough fat in the crust and the filling that they should release cleanly once chilled. However, a very light spray of non-stick cooking spray inside the liners doesn’t hurt if you are worried.
Conclusion
These Creamy Lemon Mini Cheesecakes are truly the little black dress of the dessert world: elegant, timeless, and suitable for any occasion. Whether you are a seasoned baker looking for a quick fix or a novice wanting to impress guests without the stress of a water bath, this recipe delivers on all fronts. The bright, sunny flavor of the lemon combined with the rich, creamy texture creates a bite that is impossible to resist. I hope you enjoy making (and eating!) these as much as I do. Don’t forget to pin this recipe to your dessert board so you have it ready for your next gathering!