The Ultimate Creamy Lemon Cheesecake with Graham Cracker Crust
Creamy Lemon Cheesecake With Graham Cracker Crust Recipe
Experience the perfect balance of zesty citrus and velvety richness with this fail-proof Lemon Cheesecake. Featuring a buttery, homemade graham cracker crust and a luscious, smooth filling, this dessert is the ultimate showstopper for any occasion.
30 minutes
1 hour 15 minutes
8 hours (includes cooling)
12 servings
Dessert
Baking
American
Vegetarian
There are few desserts as universally adored as a perfectly executed cheesecake, but finding that elusive balance between dense richness and airy creaminess can be a culinary journey in itself. This Creamy Lemon Cheesecake with Graham Cracker Crust is the destination of that journey. It is a celebration of texture and flavor, where the sharp, bright notes of fresh lemon juice and zest cut through the decadent fat of the cream cheese, creating a harmonious bite that feels heavy on the tongue yet light on the palate. Unlike the heavy, cloying New York-style blocks that sit like a brick in your stomach, this recipe utilizes sour cream and a specific baking method to ensure a texture that is akin to silk.
The magic begins with the crust. We don’t just settle for store-bought crumbs; we enhance the graham cracker base with a touch of brown sugar and a generous amount of melted butter, baking it briefly before adding the filling to ensure it remains crisp and creates a sturdy foundation. The filling itself is a labor of love, requiring patience and room-temperature ingredients to emulsify perfectly without incorporating too much air, which leads to cracks. As you take your first bite, the initial crunch of the golden crust gives way to the cool, melting embrace of the lemon-infused custard. It’s a dessert that evokes the brightness of spring and the comfort of home baking all at once. Whether you are hosting a sophisticated dinner party or simply satisfying a Tuesday night craving, this cheesecake promises to deliver a bakery-quality experience right from your own oven. It demands time—both to bake and to chill—but the result is a slice of sunshine that is unequivocally worth every minute.
History & Origins
The origins of cheesecake are as layered as the dessert itself, stretching back thousands of years, long before the invention of the modern cream cheese we know today. Historians trace the earliest iterations of cheesecake to ancient Greece, specifically the island of Samos, around 2000 B.C. Excavations have unearthed cheese molds dating back to this era. In ancient Greece, cheesecake was considered a powerful source of energy and was famously served to athletes during the first Olympic Games in 776 B.C. Known then as ‘plakous’ (meaning flat mass), these early cakes were a simple mixture of flour, wheat, honey, and cheese, pounded together and baked in earthenware molds.
When the Romans conquered Greece, they adopted the recipe, modifying it with crushed cheese and eggs, and called it ‘libum’. It was often served on special occasions or offered to the gods in temples. As the Roman Empire expanded, the recipe traveled across Europe, evolving with local ingredients and culinary traditions. By the medieval period, cheesecake had morphed into a tart-like pastry.
The modern cheesecake we recognize in America, particularly the ‘New York Style’, has a serendipitous origin story rooted in the late 19th century. In 1872, a New York dairyman named William Lawrence was attempting to replicate the French cheese Neufchâtel. In the process, he accidentally added too much cream, creating a richer, spreadable cheese that would eventually be branded as ‘Philadelphia Cream Cheese’. This invention revolutionized the dessert, replacing the traditional curd cheese used in Europe. By the 1900s, iconic New York delis and restaurants like Junior’s and Reuben’s began developing their signature versions, cementing the cheesecake’s status as an American culinary icon. This lemon variation pays homage to that rich history while adding a refreshing citrus twist popular in modern patisserie.
Why This Recipe Works
This recipe succeeds where many others fail due to a precise understanding of food chemistry and thermal dynamics. The primary challenge with cheesecake is achieving a texture that is fully set but not rubbery, and devoid of the dreaded surface cracks. This recipe addresses these issues through three main pillars: ingredient temperature, the addition of sour cream, and the water bath method.
First, ensuring all ingredients—specifically the cream cheese, eggs, and sour cream—are at room temperature is non-negotiable. When cold ingredients are beaten, they remain lumpy, forcing the baker to over-mix the batter to smooth it out. Over-mixing incorporates excess air, which expands in the oven and causes the cake to rise rapidly and then collapse, leading to cracks. By using room temperature ingredients, we achieve a smooth emulsion with minimal mixing.
Secondly, the inclusion of sour cream is pivotal. While heavy cream adds fat, sour cream adds both fat and acidity. This acidity tenderizes the protein network in the eggs and cheese, preventing the texture from becoming too firm or granular. It ensures that ‘melt-in-your-mouth’ quality that distinguishes a gourmet cheesecake from a mediocre one.
Finally, the water bath (bain-marie) regulates the baking temperature. Cheesecake is essentially a custard; it needs to be baked gently. Direct oven heat can be harsh, cooking the edges faster than the center. The water bath surrounds the pan with moisture and consistent heat, ensuring the cheesecake cooks evenly from the outside in, maintaining a silky consistency throughout.
Why You’ll Love This Recipe
- ✓Ultra-creamy texture without being heavy
- ✓Bright, natural lemon flavor from fresh juice and zest
- ✓Buttery, crisp homemade graham cracker crust
- ✓Foolproof water bath method prevents cracks
- ✓Perfect make-ahead dessert for entertaining
Equipment You’ll Need
- ✓9-inch Springform Pan
- ✓Electric Stand Mixer or Hand Mixer
- ✓Large Roasting Pan (for water bath)
- ✓Aluminum Foil (heavy duty)
- ✓Rubber Spatula
- ✓Microplane or Zester
- ✓Measuring Cups and Spoons
Ingredients
- ✓2 cups graham cracker crumbs (approx. 14 sheets)
- ✓1/3 cup granulated sugar (for crust)
- ✓1/2 cup unsalted butter, melted
- ✓32 oz (4 blocks) full-fat cream cheese, room temperature
- ✓1 1/4 cups granulated sugar (for filling)
- ✓1/2 cup full-fat sour cream, room temperature
- ✓2 tsp vanilla extract
- ✓2 tbsp fresh lemon zest
- ✓1/4 cup fresh lemon juice
- ✓4 large eggs, room temperature
Instructions
- Preheat your oven to 350°F (175°C). Prepare a 9-inch springform pan by lightly greasing the bottom and sides.
- In a medium bowl, combine the graham cracker crumbs, 1/3 cup sugar, and melted butter. Stir until the mixture resembles wet sand.
- Press the crumb mixture firmly into the bottom and slightly up the sides of the prepared pan. You can use the bottom of a measuring cup to pack it down tightly. Bake for 10 minutes, then remove and let cool. Reduce oven temperature to 325°F (160°C).
- While the crust cools, prepare the filling. In a large mixing bowl or stand mixer fitted with the paddle attachment, beat the room temperature cream cheese and 1 1/4 cups sugar on medium-low speed until completely smooth and creamy. Scrape down the sides of the bowl often.
- Add the sour cream, vanilla extract, lemon zest, and lemon juice. Mix on low speed until well combined.
- Add the eggs one at a time, mixing on low speed just until blended after each addition. Do not over-mix. Scrape the bowl to ensure no lumps remain at the bottom.
- Prepare the water bath: Wrap the bottom and sides of the springform pan with 2-3 layers of heavy-duty aluminum foil to prevent water from seeping in. Place the springform pan inside a large roasting pan.
- Pour the cheesecake batter over the cooled crust, smoothing the top with a spatula.
- Place the roasting pan in the oven. Carefully pour boiling water into the roasting pan until it reaches halfway up the sides of the springform pan.
- Bake at 325°F (160°C) for 60-75 minutes. The edges should be set, but the center should still have a slight jiggle (like Jell-O) when the pan is gently shaken.
- Turn off the oven and crack the door open slightly (you can prop it with a wooden spoon). Let the cheesecake cool in the oven for 1 hour. This gradual cooling prevents cracks.
- Remove the cheesecake from the water bath and foil. Run a thin knife around the edge to loosen it from the pan. Let it cool completely on a wire rack.
- Refrigerate the cheesecake for at least 6 hours, preferably overnight, to fully set before slicing and serving.
Expert Cooking Tips
- ✓Ensure all dairy and eggs are at room temperature to avoid lumps.
- ✓Do not over-beat the batter once the eggs are added to prevent air bubbles.
- ✓Use heavy-duty foil or a silicone slow cooker liner to ensure the water bath doesn’t leak.
- ✓Don’t open the oven door during the first 45 minutes of baking to maintain humidity.
- ✓Chill thoroughly; the flavor and texture improve significantly after 24 hours.
Substitutions and Variations
If you find yourself missing an ingredient or need to adapt for dietary restrictions, there are several substitutions you can make. For the crust, digestive biscuits or vanilla wafers work excellently as a 1:1 replacement for graham crackers. If you need a gluten-free option, simply use gluten-free graham style crackers or a nut-based crust made from almond flour and pecans. For the filling, full-fat Greek yogurt can be substituted for sour cream if you prefer a slightly tangier profile with more protein, though the texture may be slightly less velvety. Do not substitute low-fat or fat-free cream cheese, as the stabilizers in these products will ruin the texture of the cake. If you don’t have lemons, this base recipe works beautifully with limes or oranges, though you may need to adjust the sugar slightly depending on the tartness of the citrus fruit used.
Common Mistakes to Avoid
The most common mistake in cheesecake baking is over-mixing the batter, particularly after the eggs have been added. This incorporates air which leads to the cake puffing up in the oven and then collapsing and cracking as it cools. Another frequent error is baking at too high a temperature or for too long. Cheesecake should still be wobbly in the center when you turn the oven off; it will finish setting as it cools. Over-baking results in a dry, chalky texture. Skipping the water bath is another shortcut that often leads to regret; the gentle, moist heat is essential for that creamy consistency. Finally, rushing the cooling process by placing a hot cheesecake directly into the fridge will almost guarantee condensation on the surface and deep structural cracks.
Serving Suggestions
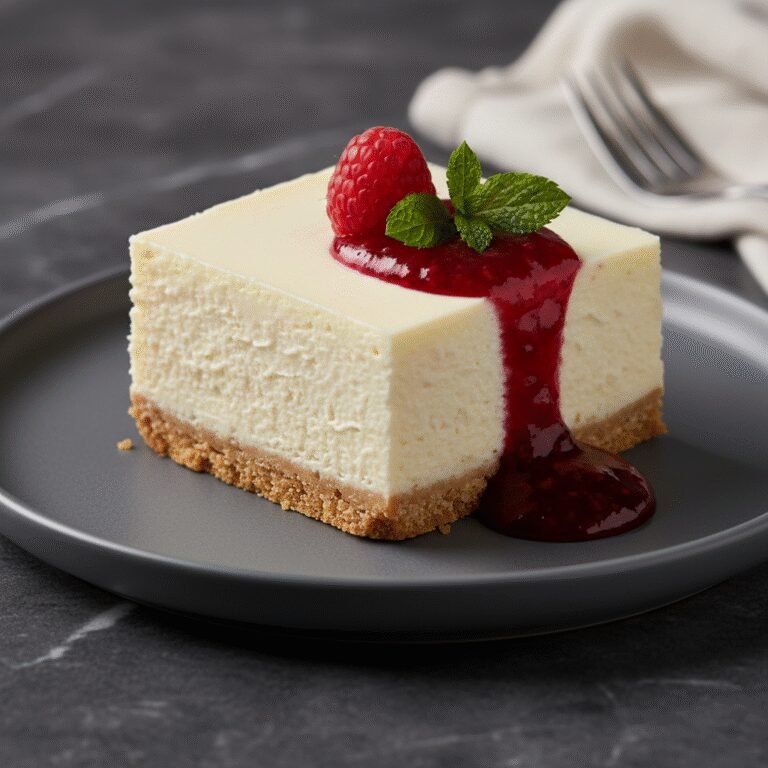
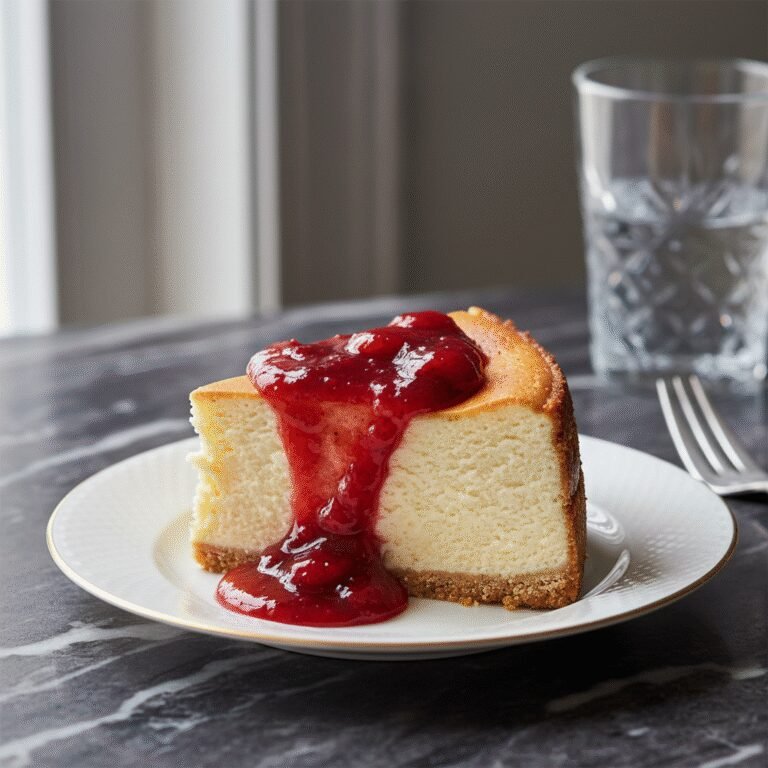
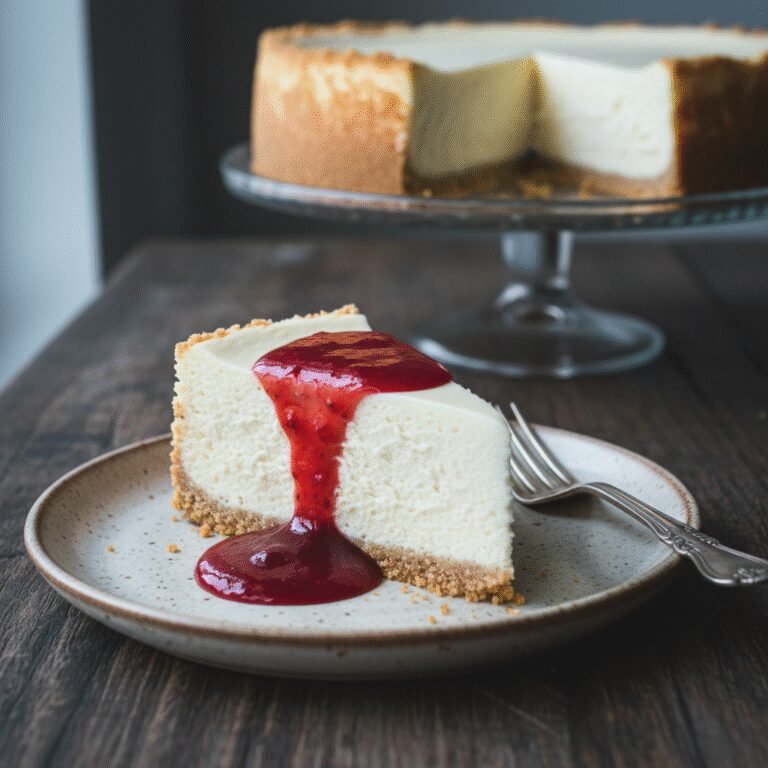
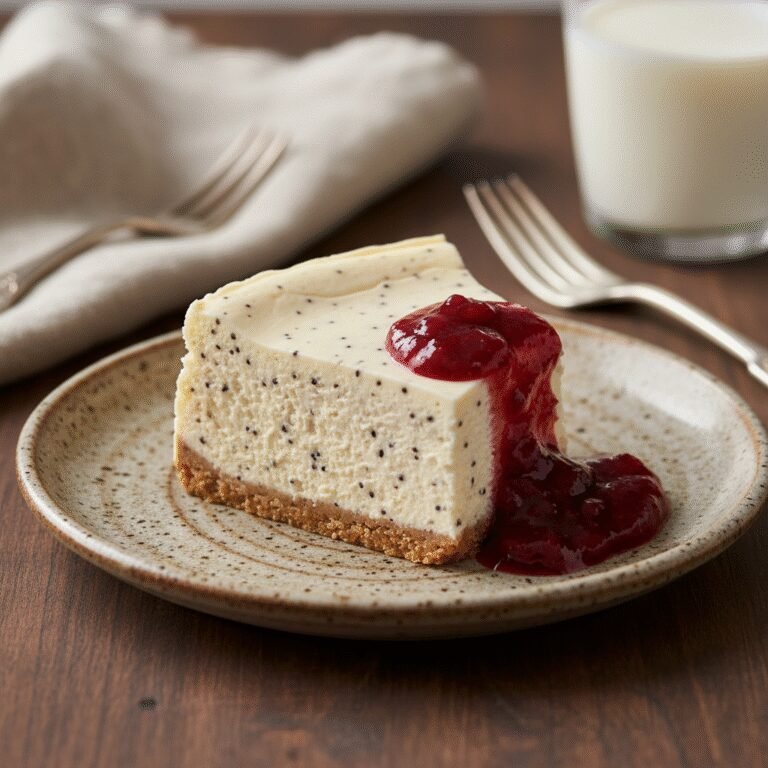
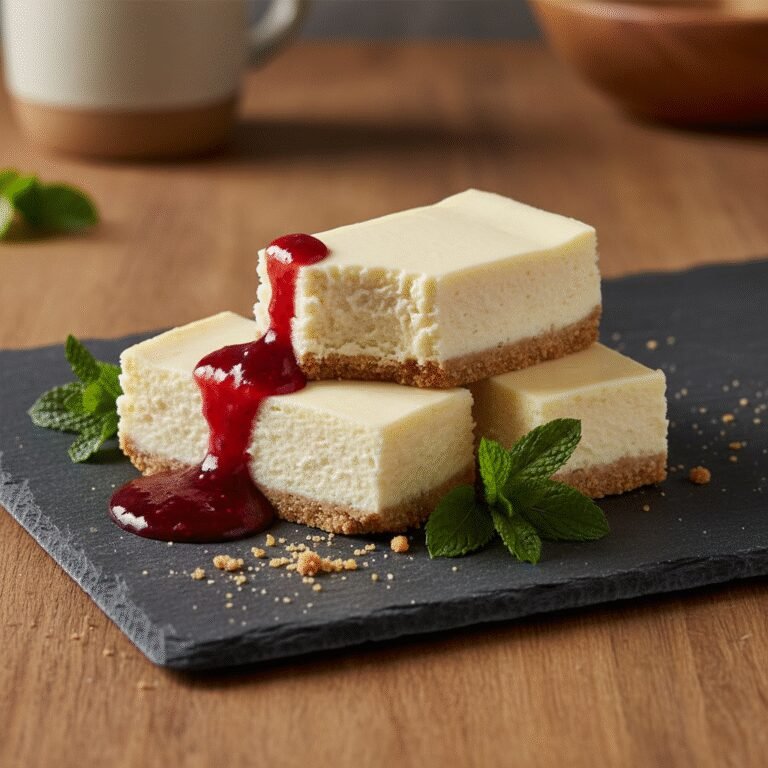
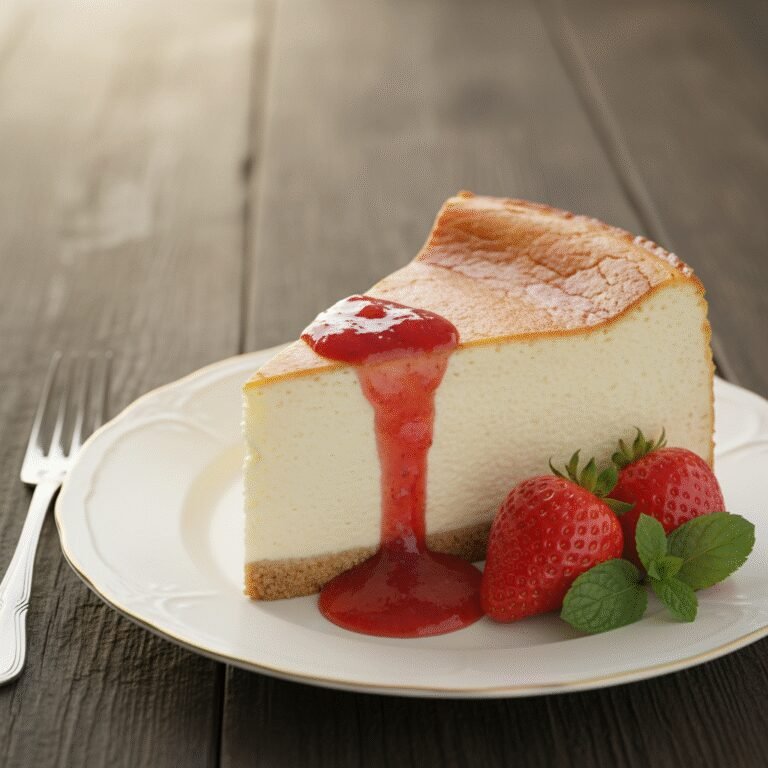
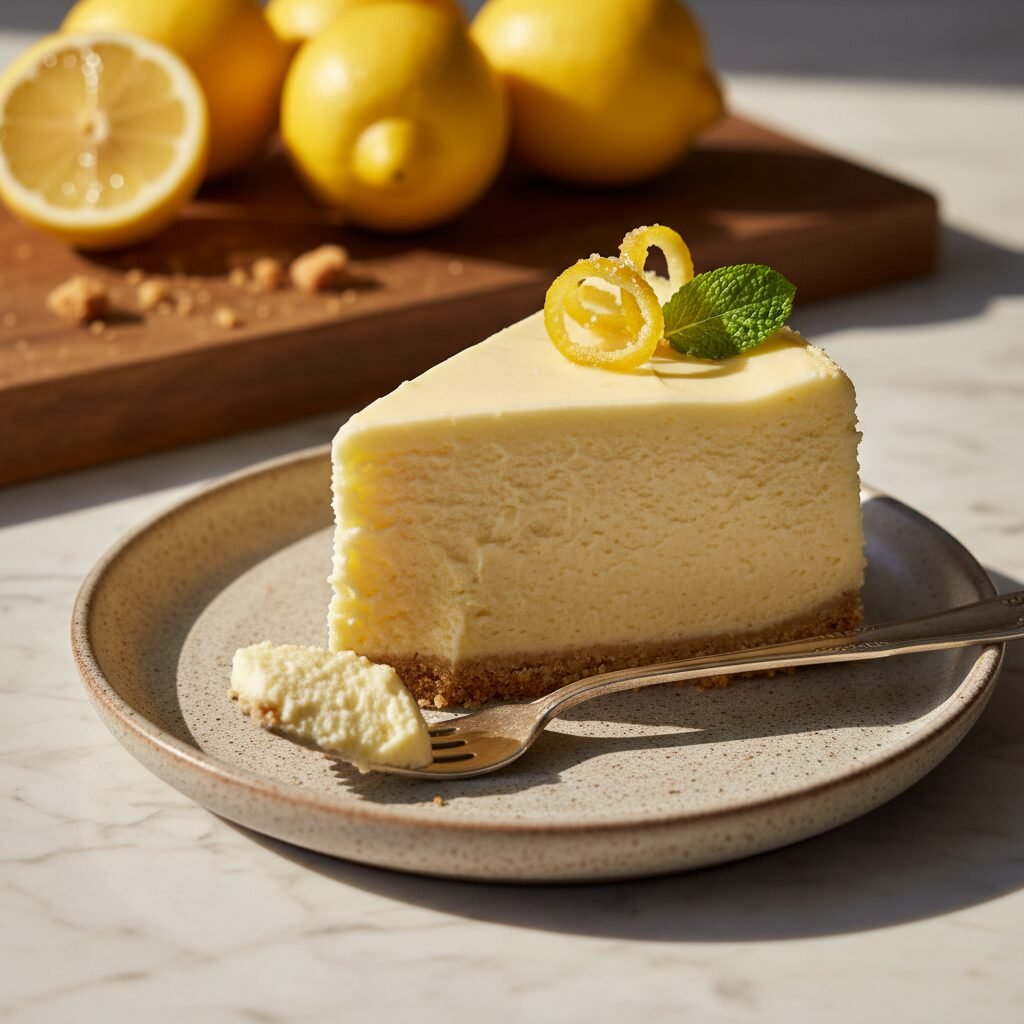
This Creamy Lemon Cheesecake is a stunner on its own, but can be elevated with a few simple garnishes. Serve chilled slices topped with a dollop of freshly whipped cream and a twist of candied lemon peel for an elegant presentation. A fresh berry coulis, particularly raspberry or blueberry, offers a beautiful color contrast and a tartness that complements the lemon perfectly. For a textural element, sprinkle some toasted almond slices or extra graham cracker crumbs over the top just before serving. Pair this dessert with a hot espresso or a Earl Grey tea to cut through the richness.
Storage and Reheating Tips
Cheesecake stores exceptionally well, making it a perfect make-ahead dessert. Once fully cooled and set, it can be stored in the refrigerator, tightly covered with plastic wrap or in an airtight cake carrier, for up to 5 days. For longer storage, you can freeze the cheesecake. To freeze, wrap individual slices or the whole cake tightly in plastic wrap, followed by a layer of aluminum foil to prevent freezer burn. It will keep well in the freezer for up to 2 months. Thaw overnight in the refrigerator before serving. Do not refreeze previously frozen cheesecake as the texture will deteriorate.
Nutrition Facts (Estimated)
| Serving Size | 1 slice |
| Calories | 480 |
| Fat | 34g |
| Saturated Fat | 19g |
| Unsaturated Fat | 12g |
| Trans Fat | 0g |
| Cholesterol | 145mg |
| Sodium | 310mg |
| Carbohydrates | 38g |
| Fiber | 1g |
| Sugar | 32g |
| Protein | 8g |
Frequently Asked Questions
Why did my cheesecake crack?
Cracks are usually caused by over-mixing the batter (incorporating too much air), over-baking, or cooling the cheesecake too quickly. Using a water bath and letting the cake cool in the turned-off oven helps prevent this.
Do I really need a water bath?
Technically no, but highly recommended. Without it, the texture tends to be rubbery near the edges and dry. The water bath ensures the silky, creamy texture that makes cheesecake delicious.
Can I use bottled lemon juice?
It is not recommended. Bottled lemon juice often has preservatives that alter the flavor. For a recipe where lemon is the star, fresh juice and zest provide a much superior, brighter flavor.
How do I know when the cheesecake is done?
The sides should be slightly puffed and set, but the center 2-3 inches should still jiggle like gelatin when you gently shake the pan. It will firm up as it cools.
Can I make this ahead of time?
Yes, cheesecake actually tastes better the next day. You can make it 1-2 days in advance and keep it refrigerated until you are ready to serve.
My ingredients are cold, can I microwave them?
You can microwave the cream cheese in 10-second intervals to soften it, but be careful not to melt it. Ideally, let them sit on the counter for 1-2 hours.
Can I use a different size pan?
Yes, but baking times will vary. A 10-inch pan will yield a thinner cake and bake faster; an 8-inch pan will be thicker and take longer. Adjust accordingly.
How do I slice it cleanly?
Dip a sharp, thin-bladed knife into hot water, wipe it dry, and make a cut. Repeat this process for every single slice to get clean, professional-looking edges.
Conclusion
Mastering the art of the lemon cheesecake is a rewarding endeavor that yields one of the most satisfying desserts imaginable. The interplay of the buttery crunch, the creamy, tangy filling, and the bright citrus notes makes every bite a moment to savor. By following the tips on temperature and the water bath method, you can bypass the common pitfalls and produce a confection that looks and tastes like it came from a high-end patisserie. We hope this recipe becomes a staple in your kitchen, bringing a zest of joy to your family gatherings and celebrations. Happy baking!