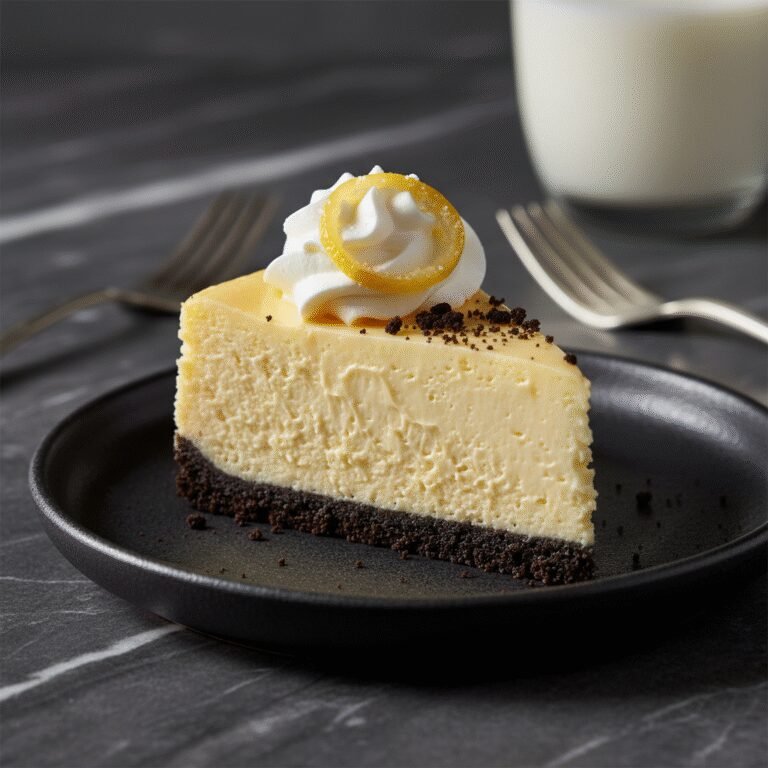
The Ultimate Creamy Lemon Cheesecake Recipe: A Zesty Slice of Heaven
Creamy Lemon Cheesecake Recipe
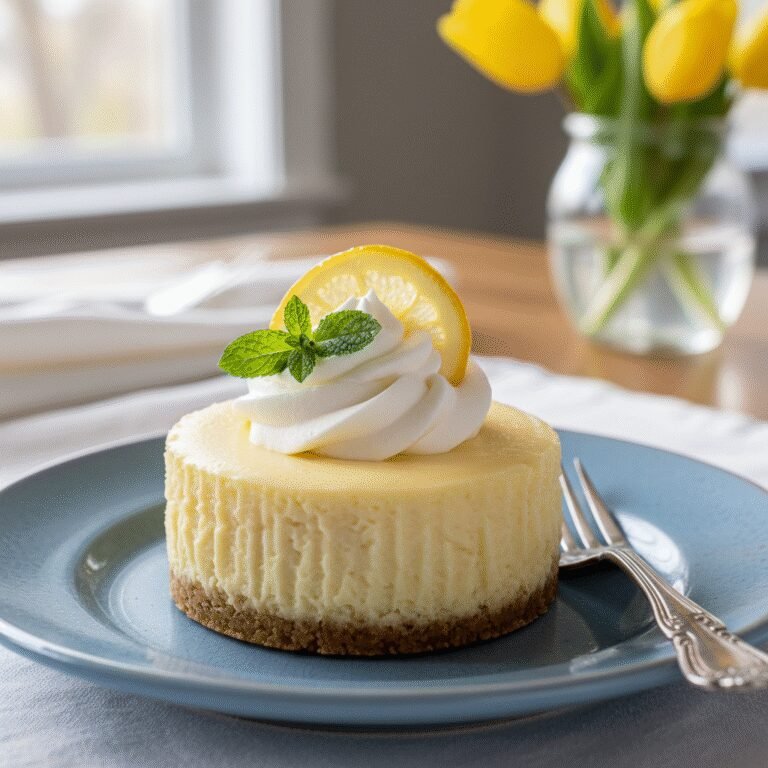
Experience the perfect balance of tangy and sweet with this ultra-creamy lemon cheesecake. Featuring a buttery graham cracker crust and a luscious, velvety filling, this dessert is a refreshing showstopper guaranteed to impress at any gathering.
30 minutes
1 hour 15 minutes
8 hours (includes cooling)
12 servings
Dessert
Baking
American
Vegetarian
There is something undeniably magical about a perfectly executed cheesecake. It is the kind of dessert that commands attention, sitting regally on the dessert table, promising a texture that is both dense and impossibly light. This Creamy Lemon Cheesecake is the epitome of that promise, but with a vibrant twist that wakes up the palate. Imagine the rich, velvety embrace of traditional New York-style cheesecake, but infused with the bright, sunshine-filled zest of fresh lemons. It is a dessert that bridges the gap between the cozy indulgence of winter comfort food and the fresh, awakening flavors of spring. The secret to this recipe lies in the meticulous balance of ingredients. We are not just adding lemon juice; we are layering flavor with zest and creating a textural masterpiece that melts in your mouth. Whether you are hosting a sophisticated dinner party, looking for the perfect birthday cake substitute, or simply craving a slice of luxury on a Tuesday night, this recipe delivers. It is designed to be foolproof, tackling the common fears of cracking and sinking, ensuring that even novice bakers can produce a bakery-quality result. The interplay between the crunchy, buttery graham cracker crust and the smooth, tart filling creates a symphony of textures that makes every bite an experience to savor. Get ready to fall in love with your new favorite dessert.
History & Origins
The history of cheesecake is a fascinating journey that spans thousands of years, predating the founding of Rome. While we often associate it with the bustling delis of New York City, its origins can be traced back to Ancient Greece, specifically the island of Samos, where anthropologists have excavated cheese molds dating back to 2,000 B.C. In those times, cheesecake was considered a potent source of energy, and there is evidence that it was served to athletes during the first Olympic Games in 776 B.C. The Greeks called it ‘plakous’ and made it with layers of dough and cheese, sweetened with honey. When the Romans conquered Greece, they adopted the recipe, adding eggs and serving it warm as ‘libum’ for special occasions. As the Roman Empire expanded, so did the cheesecake recipe, reaching Great Britain and Eastern Europe, where each culture added its own local spin, using native ingredients like curd cheese or cottage cheese. However, the creamy, dense cheesecake we know and love today is a distinctly American innovation. In 1872, a New York dairyman named William Lawrence accidentally invented cream cheese while trying to replicate a French cheese called Neufchâtel. This richer, creamier cheese became the base for the modern New York cheesecake. The addition of lemon is a natural evolution, utilizing the citrus fruit’s acidity to cut through the richness of the cream cheese, a technique that has been refined over decades to create the perfect lemon cheesecake we enjoy today.
Why This Recipe Works
This recipe succeeds where others fail because it is scientifically engineered to prevent the two biggest cheesecake pitfalls: a cracked surface and a grainy texture. First, the inclusion of both heavy cream (or sour cream) and cream cheese ensures a high fat content, which lubricates the proteins in the egg and cheese, preventing them from bonding too tightly. This is what gives the cheesecake its signature creamy, melt-in-your-mouth mouthfeel rather than a rubbery consistency. Second, the recipe emphasizes the importance of room-temperature ingredients. When the cream cheese, eggs, and sour cream are all at the same temperature, they emulsify seamlessly without the need for over-mixing. Over-mixing introduces air bubbles, which expand in the oven and then collapse, causing cracks. Furthermore, the use of fresh lemon juice and zest provides a dual-layered citrus profile; the juice offers immediate acidity to balance the sugar, while the oils in the zest provide a lingering, aromatic lemon flavor that does not bake out. Finally, the water bath method described in the instructions acts as a thermal buffer, ensuring the eggs cook gently and evenly, preventing the edges from drying out before the center is set.
Why You’ll Love This Recipe
- ✓Ultra-smooth, crack-free texture every time
- ✓Bright, natural lemon flavor using fresh juice and zest
- ✓Buttery, homemade graham cracker crust
- ✓Perfect balance of tangy and sweet
- ✓Freezes beautifully for make-ahead convenience
- ✓Detailed instructions suitable for beginners
Equipment You’ll Need
- ✓9-inch Springform pan
- ✓Large roasting pan (for water bath)
- ✓Electric stand mixer or hand mixer
- ✓Rubber spatula
- ✓Microplane or zester
- ✓Aluminum foil (heavy duty)
- ✓Measuring cups and spoons
- ✓Mixing bowls
Ingredients
- ✓1 1/2 cups graham cracker crumbs
- ✓1/3 cup granulated sugar (for crust)
- ✓6 tablespoons unsalted butter, melted
- ✓32 oz (4 blocks) full-fat cream cheese, softened to room temperature
- ✓1 1/4 cups granulated sugar (for filling)
- ✓1/2 cup sour cream, room temperature
- ✓2 tablespoons fresh lemon zest (approx. 2 lemons)
- ✓1/2 cup fresh lemon juice
- ✓1 teaspoon pure vanilla extract
- ✓4 large eggs, room temperature
Instructions
- Preheat your oven to 325°F (163°C). Prepare your 9-inch springform pan by wrapping the bottom and sides securely with multiple layers of heavy-duty aluminum foil to prevent water from seeping in during the water bath.
- In a medium bowl, combine the graham cracker crumbs, 1/3 cup sugar, and melted butter. Mix until the texture resembles wet sand.
- Press the crumb mixture firmly into the bottom and slightly up the sides of the prepared springform pan. Use the bottom of a measuring cup to pack it down tightly. Bake for 10 minutes, then set aside to cool.
- In the bowl of a stand mixer fitted with the paddle attachment (or a large bowl with a hand mixer), beat the softened cream cheese and 1 1/4 cups sugar on medium-low speed until completely smooth and creamy. Scrape down the sides of the bowl frequently.
- Add the sour cream, fresh lemon zest, lemon juice, and vanilla extract. Beat on low speed until just combined. Do not over-mix.
- Add the eggs one at a time, beating on low speed just until the yellow disappears after each addition. Scrape the bowl again to ensure no lumps remain at the bottom.
- Pour the filling over the cooled crust and smooth the top with a spatula.
- Place the springform pan inside the large roasting pan. Place the roasting pan in the oven, and carefully pour boiling water into the roasting pan until it reaches halfway up the sides of the springform pan.
- Bake for 60-75 minutes. The cheesecake is done when the edges are set but the center still jiggles slightly like Jell-O.
- Turn off the oven and crack the door open slightly. Let the cheesecake cool in the water bath inside the turned-off oven for 1 hour. This gentle cooling prevents cracks.
- Remove from the oven and water bath. Run a thin knife around the edge to loosen it from the pan. Let it cool completely at room temperature, then refrigerate for at least 6 hours or overnight before serving.
Expert Cooking Tips
- ✓Ensure all dairy ingredients are at room temperature to avoid lumps.
- ✓Do not skip the water bath; it ensures gentle, even cooking.
- ✓Avoid over-mixing the batter once the eggs are added to prevent air bubbles.
- ✓Use heavy-duty foil to wrap the pan to prevent a soggy crust.
- ✓Let the cheesecake cool gradually in the oven to prevent thermal shock.
- ✓Zest the lemons before juicing them for easier handling.
- ✓Use a flat-bottomed glass to press the crust firmly and evenly.
Substitutions and Variations
If you are unable to find graham crackers, digestive biscuits or vanilla wafers make an excellent substitute for the crust. For a gluten-free version, simply use gluten-free graham style crumbs. If you prefer a lighter texture, you can substitute the sour cream with heavy whipping cream, though sour cream adds a nice tang that complements the lemon. In a pinch, bottled lemon juice can work, but fresh lemon juice is highly recommended for the brightest flavor profile. You can also swap the sugar for a granulated sweetener like monk fruit or erythritol for a lower-sugar version, though this may slightly alter the texture and cooling process.
Common Mistakes to Avoid
The most common mistake is using cold ingredients. If your cream cheese is cold, it will not blend smoothly, leading to a lumpy batter. Another frequent error is over-beating the eggs. Incorporating too much air into the batter causes the cheesecake to puff up in the oven and then collapse and crack as it cools. Opening the oven door too often during baking releases heat and moisture, which can lead to uneven baking or sinking. Finally, rushing the chilling process is a mistake; the cheesecake needs time to set properly in the fridge to achieve that perfect, sliceable consistency.
Serving Suggestions
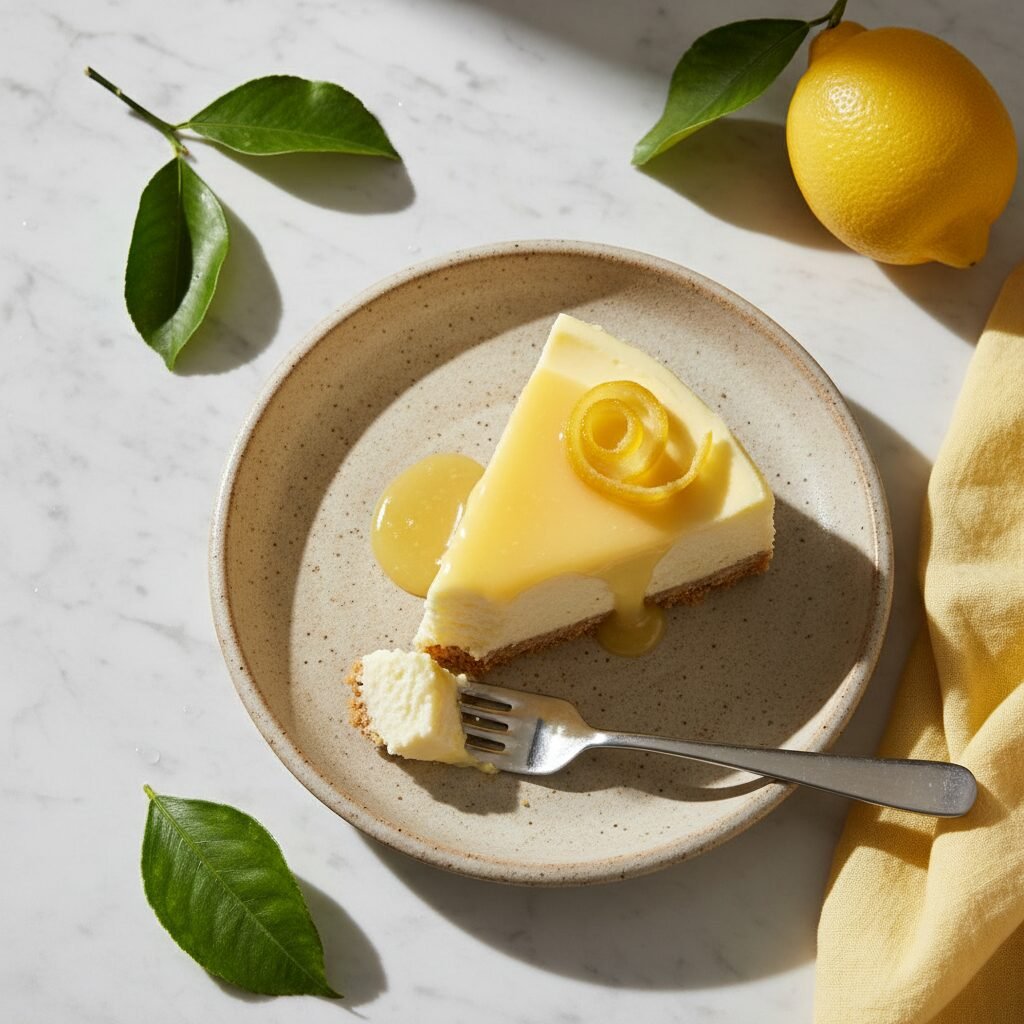
This Creamy Lemon Cheesecake is stunning on its own, but it can be elevated with a few simple garnishes. Serve chilled slices topped with a dollop of homemade whipped cream and a twist of candied lemon peel for an elegant look. Fresh berries, such as raspberries or blueberries, offer a beautiful color contrast and a tart sweetness that pairs well with the lemon. For a more decadent treat, drizzle a warm white chocolate ganache or a tart lemon curd over the top just before serving. A sprig of fresh mint adds a pop of green that makes the yellow cheesecake pop on the plate.
Storage and Reheating Tips
Store the cheesecake in the refrigerator, loosely covered with plastic wrap or in a cake keeper, for up to 5 days. For longer storage, this cheesecake freezes exceptionally well. To freeze, wrap the cooled cheesecake (whole or sliced) tightly in plastic wrap, followed by a layer of aluminum foil. It can be frozen for up to 3 months. Thaw overnight in the refrigerator before serving. Do not refreeze thawed cheesecake as the texture will suffer.
Nutrition Facts (Estimated)
| Serving Size | 1 slice |
| Calories | 450 |
| Fat | 32g |
| Saturated Fat | 19g |
| Unsaturated Fat | 11g |
| Trans Fat | 0g |
| Cholesterol | 115mg |
| Sodium | 340mg |
| Carbohydrates | 36g |
| Fiber | 1g |
| Sugar | 28g |
| Protein | 7g |
Frequently Asked Questions
Why did my cheesecake crack?
Cracks are usually caused by over-mixing the batter (adding too much air), over-baking (drying it out), or cooling it too quickly (thermal shock). The water bath and the ‘oven door crack’ cooling method help prevent this.
Can I make this ahead of time?
Yes, cheesecake is actually better when made ahead of time! It needs at least 6 hours to set in the fridge, so making it the day before you plan to serve it is ideal.
Do I really need a water bath?
While you can bake it without one, the texture will likely be denser and more like a casserole, with browned edges and a higher risk of cracking. The water bath is key for that silky, creamy texture.
How do I know when it is done?
The ‘jiggle test’ is the best way. Gently shake the pan; the outer 2 inches should be firm, but the center should still wobble slightly, similar to set gelatin. It will firm up as it cools.
Can I use Meyer lemons?
Absolutely! Meyer lemons are sweeter and more floral than standard lemons. If you use them, you might want to slightly reduce the sugar in the filling to maintain the tart-sweet balance.
My springform pan leaks. What can I do?
Wrap the outside of the pan in at least 2-3 layers of heavy-duty aluminum foil. Alternatively, you can place the springform pan inside a slightly larger cake pan, and place that cake pan in the water bath.
Can I use low-fat cream cheese?
It is not recommended. Low-fat cream cheese has a higher water content and different stabilizers that can prevent the cheesecake from setting properly or result in a grainy texture.
How do I get clean slices?
Dip a sharp chef’s knife into hot water, wipe it dry, and make a cut. Repeat this process of dipping and wiping for every single slice to ensure smooth, clean edges.
Conclusion
Mastering this Creamy Lemon Cheesecake recipe is a culinary achievement that yields incredibly delicious rewards. The process, from the meditative preparation of the crust to the careful monitoring of the bake, is a labor of love that results in a dessert truly worthy of any celebration. The bright, zesty flavor profile combined with the rich, luxurious texture makes it a standout dish that your friends and family will request time and time again. So, gather your ingredients, preheat your oven, and get ready to bake a slice of sunshine that tastes just as good as it looks. Happy baking!