The Ultimate Creamy Chocolate Cheesecake with Silky Ganache
Creamy Chocolate Cheesecake Recipe
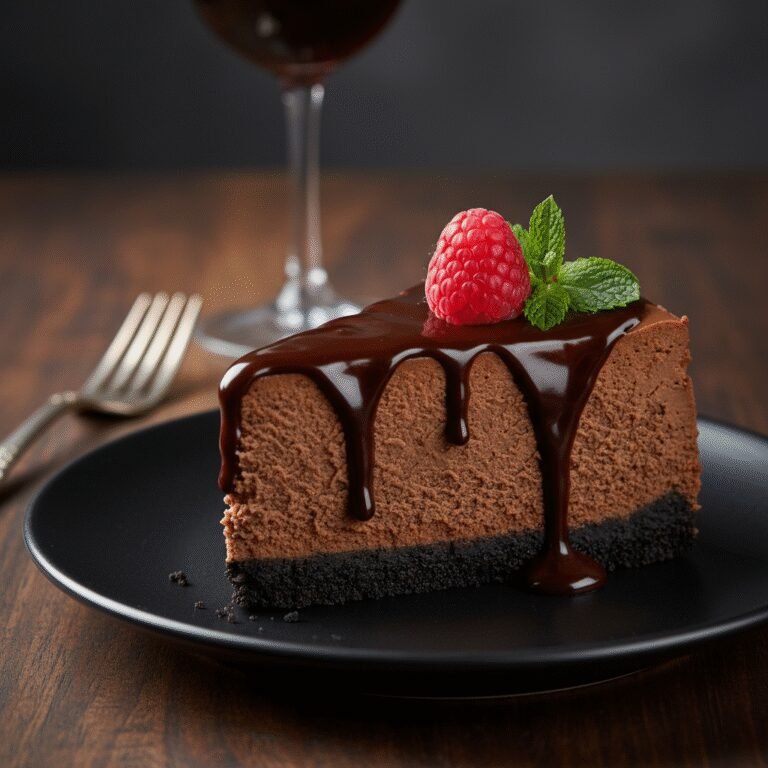
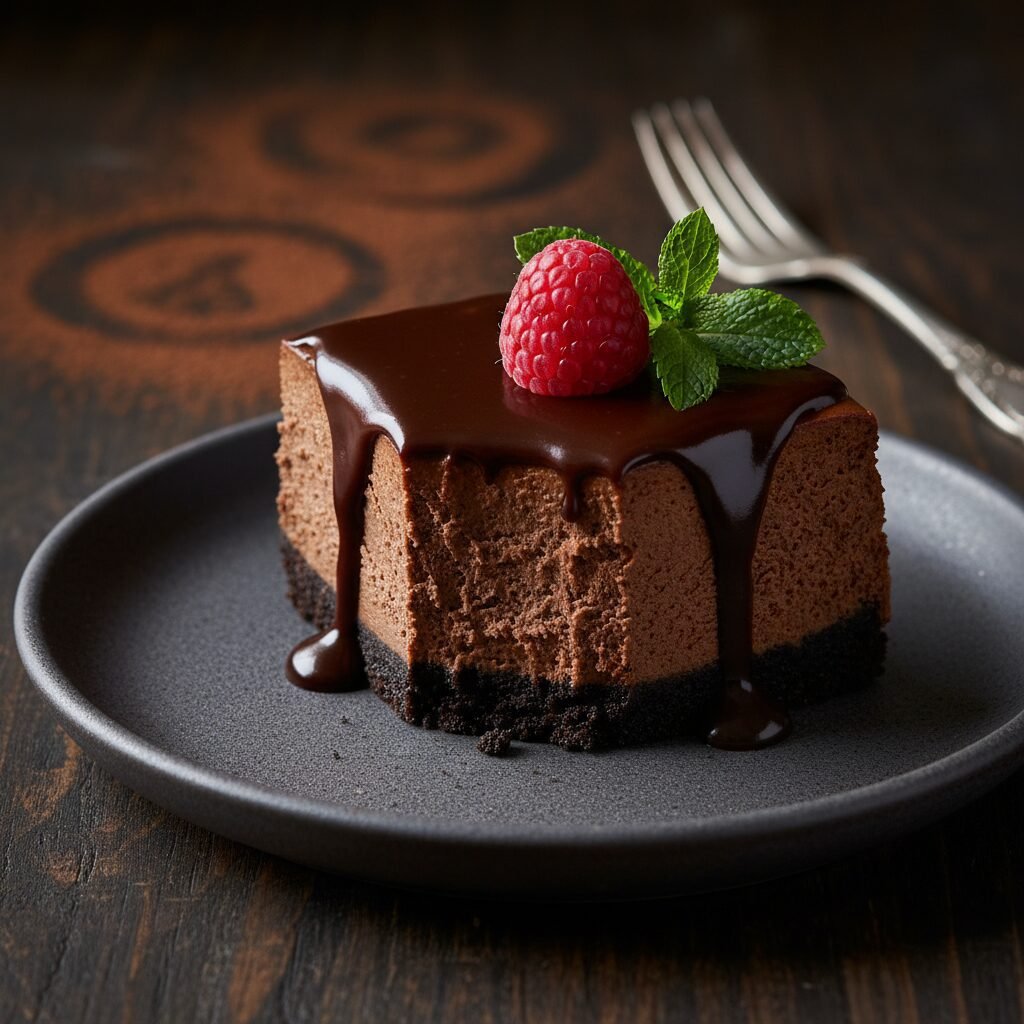
Indulge in the velvety perfection of this triple-chocolate masterpiece. Featuring a buttery Oreo crust, a rich and dense chocolate cheesecake filling, and a glossy ganache glaze, this recipe is the showstopper dessert you have been searching for.
30 minutes
1 hour 15 minutes
8 hours (includes cooling)
12 servings
Dessert
Baking
American
Vegetarian
There are desserts, and then there is Chocolate Cheesecake. We aren’t talking about a flimsy, airy cake that merely whispers of cocoa; we are talking about a dense, fudge-like, unapologetically rich creation that demands to be savored slowly. This Ultimate Creamy Chocolate Cheesecake is the kind of dessert that stops conversation at a dinner party. It starts with a deep, dark crust made from crushed chocolate sandwich cookies, providing a crunchy foundation that contrasts beautifully with the filling. The heart of this dessert is the cheesecake layer itself—a luxurious blend of full-fat cream cheese, tangy sour cream, and high-quality semi-sweet chocolate melted to perfection. Unlike some recipes that rely solely on cocoa powder, which can dry out the batter, this recipe uses real melted chocolate to ensure a texture that is smooth, creamy, and devoid of any graininess.
But we didn’t stop there. To truly elevate this dish to bakery-quality status, the entire cake is enrobed in a shiny, decadent chocolate ganache. The bitterness of the dark chocolate balances the sweetness of the sugar, while the sour cream adds that classic cheesecake tang that cuts through the richness. Whether you are baking for a romantic Valentine’s Day dinner, a festive holiday gathering, or simply because you need a slice of chocolate therapy, this recipe delivers every single time. It is a labor of love, requiring patience and precision, but the result is a slice of heaven that tastes like it came from a high-end patisserie in New York City.
History & Origins
The history of cheesecake is a journey that spans millennia, evolving from simple ancient energy bars to the decadent dessert we know today. While many associate cheesecake with New York, its origins can actually be traced back to ancient Greece on the island of Samos, around 2000 B.C. Anthropologists have excavated cheese molds from this period, and it is believed that cheesecakes were served to athletes at the first Olympic Games in 776 B.C. as a source of energy. These early versions were simple mixtures of flour, wheat, honey, and cheese, baked in wood-fired ovens. When the Romans conquered Greece, they adopted the recipe, adding crushed cheese and eggs, and spread it across Europe as their empire expanded.
However, the creamy, smooth cheesecake we recognize today is a relatively modern invention, largely due to an accidental discovery in America. In 1872, a New York dairyman named William Lawrence was attempting to replicate the French cheese Neufchâtel. Instead, he accidentally created a heavier, creamier ‘unripened cheese’ that we now know as cream cheese. This discovery revolutionized the dessert. By the early 1900s, New York delis and restaurants, most notably Arnold Reuben’s (of sandwich fame), began experimenting with this new ingredient, creating the dense ‘New York Style’ cheesecake. The chocolate variation gained popularity later in the 20th century as chocolate became more accessible and affordable. Bakers began swirling melted chocolate into the batter, eventually developing fully chocolate versions that bridged the gap between a classic torte and a cheese custard. Today, the chocolate cheesecake stands as a testament to centuries of culinary evolution, combining the ancient tradition of cheese pies with the modern love affair with chocolate.
Why This Recipe Works
This recipe succeeds where many others fail because it meticulously balances moisture, fat content, and temperature control. First, the decision to use melted semi-sweet baking bars rather than cocoa powder is crucial. Cocoa powder contains starch and can dry out the batter, leading to a chalky texture. Melted chocolate, on the other hand, introduces cocoa butter, which solidifies as the cheesecake cools, contributing to a firm yet creamy mouthfeel that mimics a truffle. Secondly, the inclusion of sour cream is scientifically significant. The acidity in the sour cream tenderizes the protein strands in the eggs and cheese, preventing the texture from becoming rubbery or tough. It also adds a necessary fluid content that lightens the density just enough to make it palatable without losing richness.
Furthermore, the baking method is designed to ensure a crack-free surface. We utilize a water bath (bain-marie), which generates gentle, moist heat around the springform pan. Cheesecake loves humidity; dry oven heat causes the proteins to tighten too quickly, leading to surface cracks. The water bath moderates the temperature, ensuring the eggs cook slowly and evenly. Finally, the cooling process is just as important as the baking. By turning the oven off and letting the cheesecake cool gradually inside with the door cracked, we prevent the thermal shock that causes the structure to collapse or fissure. This recipe is a masterclass in patience, but the science behind it guarantees a flawless result.
Why You’ll Love This Recipe
- ✓Triple Chocolate Threat: Oreo crust, chocolate filling, and ganache topping.
- ✓No-Crack Guarantee: Detailed water bath instructions ensure a smooth surface.
- ✓Make-Ahead Friendly: Tastes even better after resting in the fridge for 24 hours.
- ✓Velvety Texture: Uses sour cream and heavy cream for the ultimate mouthfeel.
- ✓Customizable: Easy to top with berries, whipped cream, or caramel.
Equipment You’ll Need
- ✓9-inch Springform Pan
- ✓Large Roasting Pan (for water bath)
- ✓Electric Stand Mixer or Hand Mixer
- ✓Rubber Spatula
- ✓Heavy-duty Aluminum Foil
- ✓Food Processor (for crust)
- ✓Saucepan
- ✓Wire Cooling Rack
Ingredients
- ✓24 Chocolate Sandwich Cookies (like Oreos), whole with filling
- ✓5 tbsp Unsalted Butter, melted
- ✓32 oz (4 blocks) Full-Fat Cream Cheese, room temperature
- ✓1 1/4 cups Granulated Sugar
- ✓1/4 cup Unsweetened Cocoa Powder
- ✓4 Large Eggs, room temperature
- ✓10 oz Semi-Sweet Chocolate Quality Baking Bar, chopped and melted
- ✓3/4 cup Sour Cream, room temperature
- ✓2 tsp Vanilla Extract
- ✓1/2 cup Heavy Cream (for ganache)
- ✓1 cup Semi-Sweet Chocolate Chips (for ganache)
Instructions
- Preheat your oven to 350°F (175°C). Grease a 9-inch springform pan lightly with butter or cooking spray.
- Make the crust: Pulse the chocolate cookies in a food processor until they are fine crumbs. Pour in the melted butter and pulse until combined. Press the mixture firmly into the bottom of the prepared springform pan. Bake for 8-10 minutes. Remove and let cool. Reduce oven temperature to 325°F (160°C).
- Prepare the pan: Wrap the outside of the springform pan securely in 2-3 layers of heavy-duty aluminum foil to prevent water from seeping in during the water bath.
- Make the filling: In a large bowl or stand mixer fitted with the paddle attachment, beat the cream cheese and sugar on medium speed until completely smooth and creamy (about 3 minutes). Scrape down the sides.
- Add the cocoa powder and beat on low until combined. Add the melted (and slightly cooled) chocolate, sour cream, and vanilla extract. Mix until smooth.
- Add the eggs one at a time, mixing on low speed just until blended after each addition. Do not overmix, as this adds air which causes cracks.
- Pour the batter over the cooled crust and smooth the top with a spatula.
- Prepare the water bath: Place the foil-wrapped springform pan inside a large roasting pan. Pour boiling water into the roasting pan until it comes about halfway up the sides of the springform pan.
- Bake: Carefully place the roasting pan in the oven. Bake at 325°F for 60-75 minutes. The edges should be set, but the center should still jiggle slightly like Jell-O.
- Cool: Turn off the oven and crack the door open slightly. Let the cheesecake cool in the oven for 1 hour. Then, remove from the water bath and cool completely on a wire rack.
- Chill: Cover loosely with plastic wrap and refrigerate for at least 6 hours, preferably overnight.
- Make the ganache: Place chocolate chips in a heatproof bowl. Heat heavy cream in a small saucepan until it just begins to simmer. Pour hot cream over chocolate chips. Let sit for 5 minutes, then whisk until smooth and glossy.
- Serve: Pour the ganache over the chilled cheesecake, letting it drip down the sides. Slice and enjoy!
Expert Cooking Tips
- ✓Room Temperature is Key: Ensure your cream cheese, eggs, and sour cream are at room temperature to avoid a lumpy batter.
- ✓Don’t Overmix: Once you add the eggs, mix on the lowest speed possible. Too much air leads to cracks and sinking.
- ✓Use Quality Chocolate: Since chocolate is the main flavor, use high-quality baking bars (like Ghirardelli or Lindt) rather than cheap chips for the filling.
- ✓The Jiggle Test: Don’t wait for the center to be firm before taking it out of the oven. It will firm up as it cools.
- ✓Clean Slices: Dip your knife in hot water and wipe it dry between every single cut for professional-looking slices.
Substitutions and Variations
If you need to make adjustments, there are several substitutions that work well. For the crust, if you don’t have Oreos, you can use chocolate graham crackers mixed with a tablespoon of sugar and the melted butter. If you are gluten-free, simply swap the cookies for a gluten-free chocolate sandwich cookie brand. For the filling, full-fat ingredients are non-negotiable for the texture, but you can substitute the sour cream with full-fat Greek yogurt in a pinch. While we recommend semi-sweet chocolate (around 60% cocoa) for the best balance, you can use bittersweet chocolate for a darker, less sweet cake, or milk chocolate for a milder flavor, though milk chocolate may make the texture slightly softer. Do not substitute the heavy cream in the ganache with milk, as it won’t thicken properly.
Common Mistakes to Avoid
The most common mistake is rushing the cooling process. Putting a hot cheesecake directly into the fridge will cause ‘cheesecake sweating’ (condensation) and major cracking due to thermal shock. Another frequent error is over-beating the batter after adding the eggs. This incorporates air bubbles that expand in the heat and then collapse, causing the surface to crack. Also, failing to wrap the springform pan properly is a disaster waiting to happen; if water seeps into your crust, it will become a soggy mess. Always use heavy-duty foil or a slow-cooker liner bag around the pan. Finally, avoid opening the oven door frequently during baking, as the fluctuation in temperature can interfere with the even cooking process.
Serving Suggestions
This cheesecake is incredibly rich, so thin slices are usually sufficient. It is best served chilled, but letting it sit at room temperature for 15-20 minutes before eating allows the flavors to bloom and the texture to soften slightly. To cut the richness, serve with a dollop of unsweetened whipped cream and fresh raspberries or strawberries. The tartness of the berries complements the deep chocolate flavor perfectly. For a coffee lover’s twist, serve with an espresso or a dusting of espresso powder on top. A glass of red wine, such as a Cabernet Sauvignon or Merlot, also pairs wonderfully with the dark chocolate notes.
Storage and Reheating Tips
Cheesecake stores beautifully and actually tastes better the next day. Store the cake in the springform pan or an airtight cake carrier in the refrigerator for up to 5 days. To freeze, cool the cake completely and chill overnight. Remove the ring side of the pan. Place the cheesecake (on the bottom pan) on a baking sheet in the freezer for an hour until hard. Then, wrap the entire cake (or individual slices) tightly in two layers of plastic wrap followed by a layer of aluminum foil. It can be frozen for up to 3 months. Thaw overnight in the refrigerator before serving.
Nutrition Facts (Estimated)
| Serving Size | 1 slice |
| Calories | 680 |
| Fat | 48g |
| Saturated Fat | 28g |
| Unsaturated Fat | 18g |
| Trans Fat | 0.5g |
| Cholesterol | 145mg |
| Sodium | 320mg |
| Carbohydrates | 54g |
| Fiber | 3g |
| Sugar | 42g |
| Protein | 9g |
Frequently Asked Questions
Why did my cheesecake crack?
Cracks are usually caused by overmixing the batter, overbaking, or cooling too quickly. Using a water bath and letting the cake cool in the oven helps prevent this.
Can I make this without a water bath?
You can, but the texture will be different—denser and more like a tart—and it will likely crack. The water bath is highly recommended for that creamy consistency.
How do I know when it is done?
Gently shake the pan. The outer 2 inches should look set and puffy, while the center should still wobble slightly, like set gelatin. It will firm up as it cools.
Can I use low-fat cream cheese?
It is not recommended. Low-fat cream cheese has a higher water content and stabilizers that can prevent the cheesecake from setting properly and affect the creamy texture.
My ganache is too runny, what happened?
The cream might have been too hot, or the ratio of chocolate to cream was off. Let it sit at room temperature for a while; it thickens as it cools.
Can I use chocolate chips for the filling?
Baking bars are better because they contain cocoa butter and melt smoother. Chocolate chips have stabilizers to help them keep their shape, which can result in a grainier cheesecake.
How long does the cheesecake need to chill?
A minimum of 6 hours is required, but overnight (12-24 hours) is absolute best to allow the structure to set and flavors to meld.
Why are my ingredients required to be room temperature?
Cold cream cheese is hard to mix and results in lumps. If you beat it too hard to get the lumps out, you add air, which ruins the texture.
Conclusion
Creating this Creamy Chocolate Cheesecake is more than just following a recipe; it is an act of culinary devotion that pays off in the most delicious way possible. From the first crunch of the chocolate cookie crust to the smooth, melting sensation of the truffle-like filling, every bite is a celebration of chocolate in its finest form. While the water bath and cooling times might seem daunting, they are the secrets to achieving that professional, bakery-style result right in your own kitchen. So, clear your schedule, gather your ingredients, and prepare to impress your friends, family, and most importantly, your own taste buds with this ultimate chocolate indulgence. Happy baking!