The Ultimate Tall Unicorn Birthday Cake With Buttercream Flowers
Tall Unicorn Birthday Cake With Buttercream Flowers Recipe
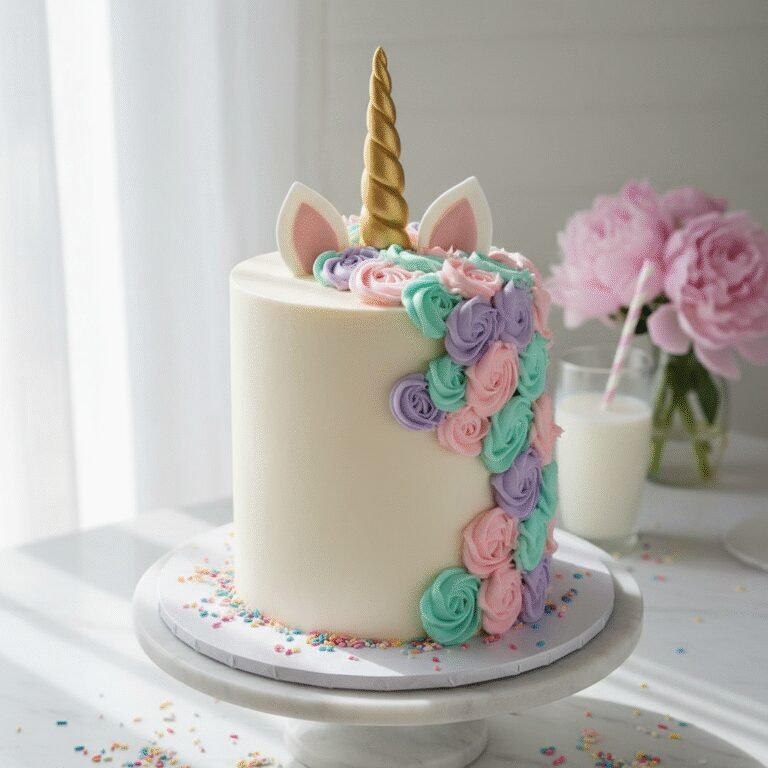
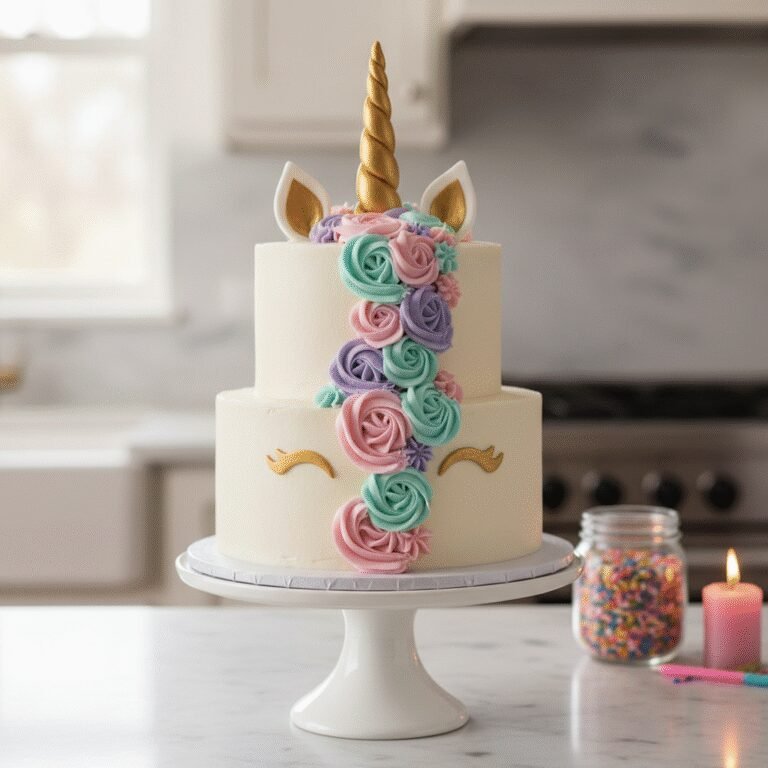
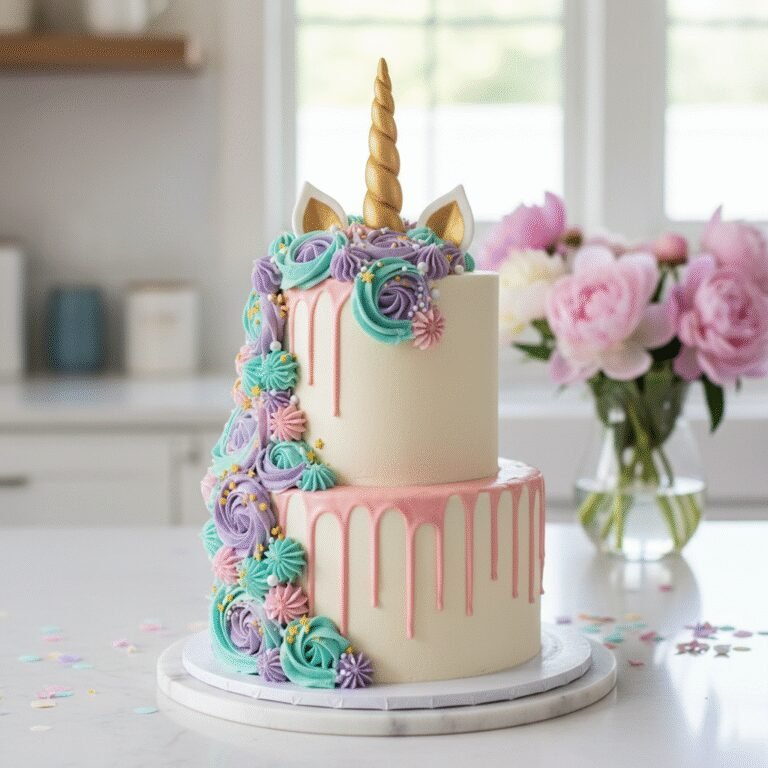
Bring a touch of magic to your next celebration with this stunning Tall Unicorn Birthday Cake! Featuring four layers of tender vanilla bean sponge, a silky Swiss meringue buttercream mane in dreamy pastel hues, and a shimmering gold horn, this showstopper is as delicious as it is enchanting.
2 hours
45 minutes
4 hours (includes cooling)
12-15 servings
Dessert
Baking
American
Vegetarian
There is something undeniably magical about a unicorn cake. It is not just a dessert; it is a centerpiece that elicits gasps of delight from children and adults alike. In the world of baking, few designs have captured the collective imagination quite like the tall unicorn cake, with its sleepy, lashed eyes and cascading mane of buttercream flowers. This recipe is my love letter to that whimsy, designed to guide you through creating a bakery-quality masterpiece right in your own kitchen. While it may look intimidatingly professional, the secret lies in breaking it down into manageable steps: a sturdy, moist cake base, a stable buttercream, and a bit of artistic piping. We are moving away from the overly sweet American buttercream often found in grocery store cakes and opting for a luxurious Swiss Meringue Buttercream. This frosting is silky smooth, not gritty, and holds the definition of the piped flowers perfectly without crusting over too quickly. The cake itself is a dense yet tender vanilla bean sponge, specifically engineered to be stacked high without bulging or sliding. The flavor is pure nostalgia—rich butter, fragrant vanilla, and a hint of almond—making it the perfect canvas for the colorful explosion of the exterior. Whether you are an experienced baker looking to refine your piping skills or a brave beginner ready to tackle a challenge, this guide covers everything from achieving sharp edges to painting that fondant horn with edible gold. Get ready to create a memory that will last long after the last crumb is eaten.
History & Origins
The history of the birthday cake is a journey through time, evolving from the honey-sweetened cakes of ancient Greece to the elaborate confections we know today. The tradition of putting candles on a cake is often attributed to the Germans in the 18th century with ‘Kinderfest,’ a birthday celebration for children. However, the specific phenomenon of the ‘Unicorn Cake’ is a much more recent chapter in culinary history, born from the visual-first culture of the internet age. While unicorns have been mythical symbols of purity and grace since antiquity—appearing in Mesopotamian artwork and European medieval tapestries—their translation into cake form took a specific turn around 2016. The now-iconic design, featuring a round cake with ‘sleepy eyes’ drawn on the side and a piped buttercream mane, is widely credited to cake designers like Jenna Rae Cakes and other pioneering food stylists on Instagram. This design marked a shift away from fondant-heavy novelty cakes toward buttercream artistry. It democratized cake decorating; you didn’t need to be a sculptor to make a unicorn, you just needed a piping bag and some tips. This trend exploded globally, becoming a staple for birthday parties, baby showers, and even weddings. It represents a cultural moment where food became fashion, and the ‘Instagrammability’ of a dish became as important as its taste. This recipe honors that modern tradition while rooting it in the classic techniques of European patisserie, merging the viral aesthetic with timeless flavor.
Why This Recipe Works
This recipe is meticulously tested to solve the two biggest problems with tall, decorated cakes: structural instability and overly sweet frosting. First, the cake layers utilize the ‘reverse creaming’ method. By mixing the butter into the dry ingredients before adding the liquids, we coat the flour proteins in fat, inhibiting gluten formation. This results in a crumb that is incredibly velvety and flat-topped—essential for stacking four layers high—while remaining sturdy enough to support the weight of the decorations. We avoid the ‘doming’ effect common in standard creaming methods, meaning less waste from trimming. Second, the choice of Swiss Meringue Buttercream (SMBC) over American Buttercream is crucial. American buttercream is often gritty and can be cloyingly sweet, which becomes overwhelming when there is a high frosting-to-cake ratio like in this design. SMBC uses cooked egg whites and sugar whipped into a meringue, to which butter is added. The result is a stable emulsion that pipes like a dream. It holds the intricate sharp edges of the rosette and star tips for the unicorn’s mane without melting or drooping as easily as softer frostings. Furthermore, the inclusion of a central dowel in the assembly ensures that your tall creation survives the transport from the kitchen to the party table without toppling.
Why You’ll Love This Recipe
- ✓Tall, four-layer presentation creates a dramatic ‘wow’ factor.
- ✓Swiss Meringue Buttercream provides a silky, not-too-sweet finish.
- ✓Reverse creaming method guarantees flat, moist cake layers.
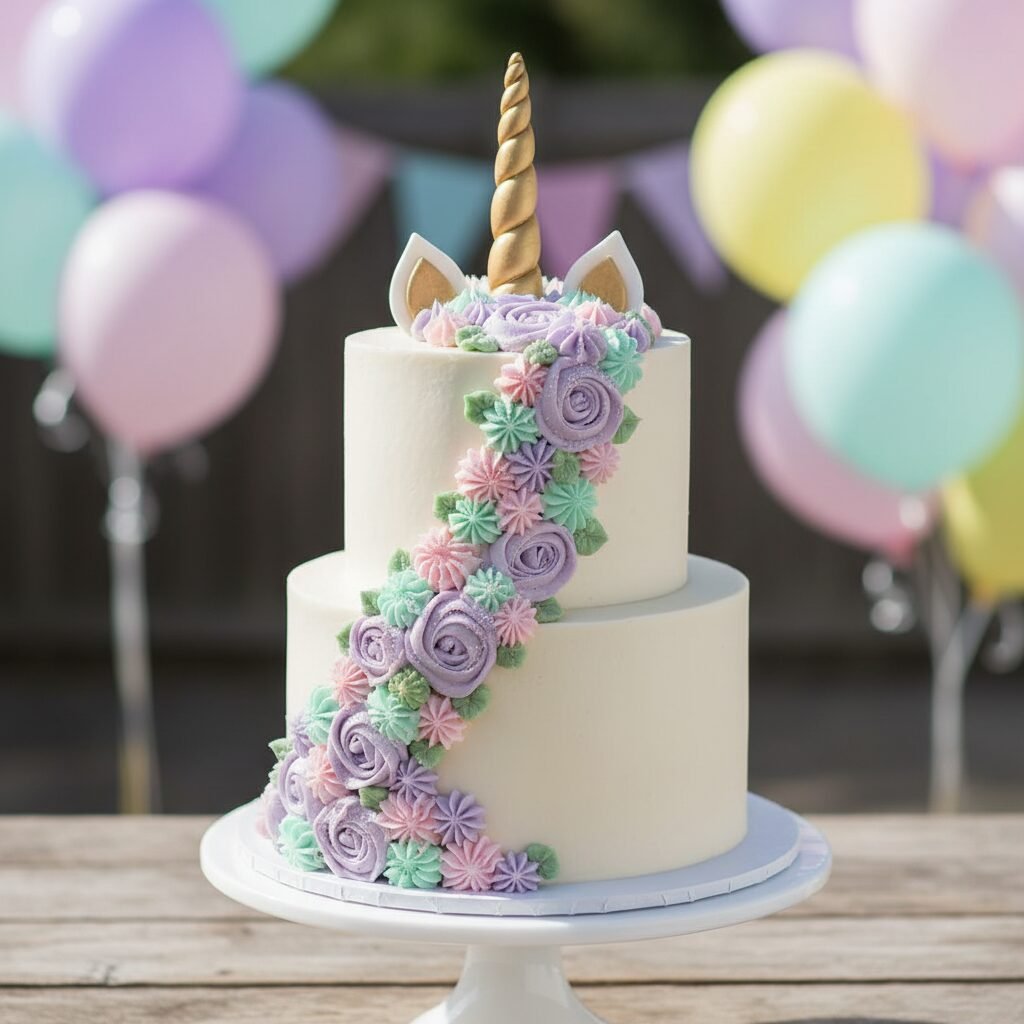
- ✓Step-by-step guide to piping a professional-looking flower mane.
- ✓Includes instructions for a food-safe, shimmering gold fondant horn.
- ✓Sturdy structure suitable for transport and warm indoor parties.
Equipment You’ll Need
- ✓Three 6-inch round cake pans
- ✓Stand mixer with paddle and whisk attachments
- ✓Digital kitchen scale
- ✓Turntable (lazy Susan)
- ✓Offset spatula and bench scraper
- ✓Piping bags and couplers
- ✓Piping tips (Wilton 1M, 2D, 4B, and a leaf tip)
- ✓Wooden skewer and bubble tea straw (for doweling)
- ✓Small food-safe paint brush
Ingredients
- ✓3 cups (345g) cake flour, sifted
- ✓1 3/4 cups (350g) granulated sugar
- ✓1 tbsp baking powder
- ✓1/2 tsp salt
- ✓1 cup (226g) unsalted butter, room temperature, cubed
- ✓1 cup (240ml) whole milk, room temperature
- ✓5 large egg whites, room temperature
- ✓2 tsp vanilla bean paste
- ✓For the Buttercream: 6 large egg whites
- ✓2 cups (400g) granulated sugar
- ✓3 cups (678g) unsalted butter, cubed and cool
- ✓Gel food coloring (Pink, Purple, Teal)
- ✓For Decorations: 4oz White fondant
- ✓Gold luster dust
- ✓Vodka or lemon extract (for painting)
- ✓Black fondant or edible marker (for eyes)
Instructions
- 1. Preheat oven to 350°F (175°C). Grease three 6-inch cake pans, line bottoms with parchment paper, and grease the paper.
- 2. In the bowl of a stand mixer fitted with the paddle attachment, mix cake flour, sugar, baking powder, and salt on low speed for 30 seconds to combine.
- 3. Add the cubed butter and mix on low speed until the mixture resembles coarse sand (about 2 minutes).
- 4. In a separate jug, whisk together the milk, egg whites, and vanilla bean paste. With the mixer on low, slowly pour in half of the milk mixture. Increase speed to medium-high and beat for 2 minutes to build structure.
- 5. Scrape down the bowl. Add the remaining milk mixture in two batches, beating for 30 seconds after each addition. Do not overmix.
- 6. Divide batter evenly among the three pans (use a scale for accuracy). Bake for 30-35 minutes, or until a toothpick inserted into the center comes out clean.
- 7. Cool cakes in pans for 10 minutes, then turn out onto a wire rack to cool completely. Wrap in plastic wrap and chill for 1 hour to make handling easier.
- 8. Make the Buttercream: Whisk egg whites and sugar in a heatproof bowl over a pot of simmering water. Whisk constantly until sugar is dissolved and temp reaches 160°F.
- 9. Transfer to stand mixer with whisk attachment. Whip on high until stiff peaks form and the bowl feels cool to the touch (about 10-15 mins).
- 10. Switch to paddle attachment. Add butter one cube at a time on medium speed. Once all butter is incorporated, beat on high for 2 minutes until creamy. Add vanilla.
- 11. Assembly: Level the cake tops. Place the first layer on a cake board. Spread a layer of buttercream. Repeat with remaining layers. Insert a bubble tea straw down the center for stability if desired.
- 12. Crumb coat the entire cake with a thin layer of frosting. Chill for 20 minutes.
- 13. Apply the final coat of white buttercream and smooth with a bench scraper. Chill again.
- 14. Divide remaining buttercream into 3 bowls. Tint with gel colors. Load into piping bags with different tips.
- 15. Roll out fondant into a tapered snake and twist around a skewer to form a horn. Let dry/harden. Paint with gold luster dust mixed with vodka. Cut out ears from fondant.
- 16. Place the horn and ears on top of the cake. Pipe rosettes and stars around the horn and cascading down one side to create the mane. Roll thin black fondant ropes for eyes and apply to the front.
Expert Cooking Tips
- ✓Ensure your butter is at the correct temperature; too soft and the cake will be greasy, too hard and it won’t emulsify.
- ✓Weigh your ingredients for the most consistent results, especially the flour.
- ✓When making Swiss Meringue Buttercream, if it looks curdled after adding butter, keep whipping! It will come back together.
- ✓Chill the cake layers before stacking; cold cake is much easier to handle and crumbs less.
- ✓Use gel food coloring rather than liquid drops to avoid altering the consistency of the buttercream.
- ✓Make the fondant horn and ears at least 24 hours in advance so they have time to dry and stand up straight.
- ✓Wipe your bench scraper with a hot towel to get that super smooth, glass-like finish on the final coat.
Substitutions and Variations
If you do not have cake flour, you can make a substitute by removing 2 tablespoons of all-purpose flour from every cup and replacing it with cornstarch, though the texture will be slightly less tender. For a dairy-free version, use high-quality plant-based butter sticks (not tub margarine) and full-fat oat milk or soy milk; note that vegan butter may soften faster at room temperature. If you are intimidated by Swiss Meringue Buttercream, you can use a standard American Buttercream (butter and powdered sugar), but reduce the sugar slightly to balance the sweetness. For the egg whites in the frosting, you can use carton egg whites, but ensure they are 100% egg whites and not a mix with gums. The vanilla bean paste can be swapped for pure vanilla extract, but the paste adds lovely visible specks. If you don’t want to use fondant, you can use a sugar cone covered in gold sprinkles for the horn and stiff paper for the ears.
Common Mistakes to Avoid
The most common mistake with this recipe is rushing the cooling process. If you try to frost a cake that is even slightly warm, the butter in the buttercream will melt, causing the layers to slide and the frosting to look greasy. Another pitfall is overmixing the batter after adding the wet ingredients; this develops too much gluten and results in a tough, rubbery cake rather than a tender one. Regarding the buttercream, many people panic when the meringue looks soupy or curdled during the mixing process. This is a normal stage of the emulsion; never throw it away, just keep whipping or pop the bowl in the fridge for 10 minutes if it’s too warm. Finally, when piping the mane, avoid placing the flowers too close to the edge of the cake board if you plan to move it, as they can get smudged during transport.
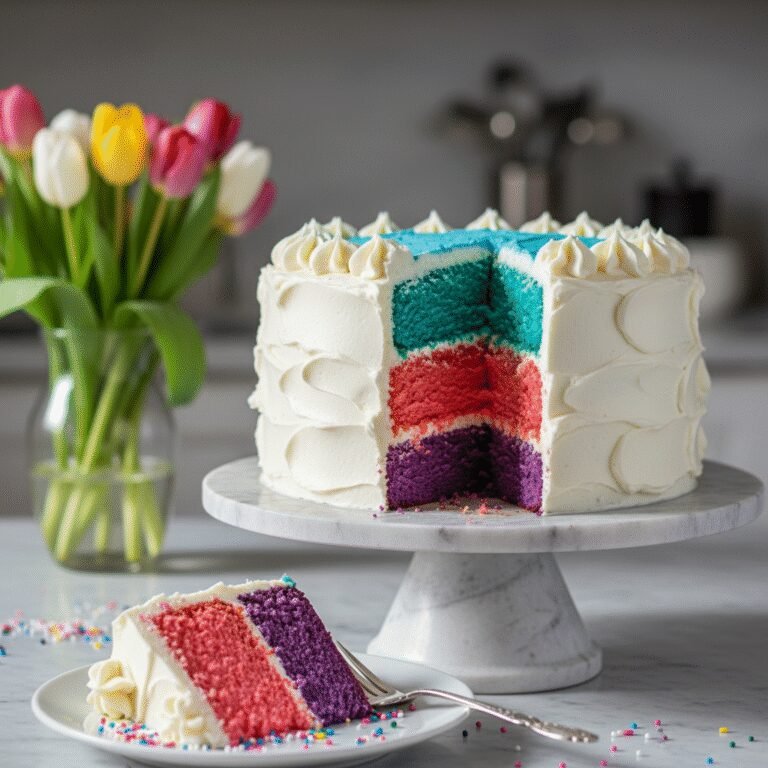
Serving Suggestions
This cake is a showstopper that deserves to be the center of attention. Serve it on a pedestal cake stand to give it even more height. Since the cake is quite tall (four layers), slice it using the ‘cutting board method’: cut a slab entirely off the cake, lay it flat on a cutting board, and then cut that slab into rectangular strips. This yields more servings and prevents the tall slice from toppling over on the plate. Pair this rich vanilla cake with fresh berries on the side to cut through the sweetness of the buttercream, or a scoop of tart raspberry sorbet. For a beverage pairing, pink lemonade or a sparkling elderflower spritzer complements the floral and vanilla notes beautifully.
Storage and Reheating Tips
Store the fully decorated cake in the refrigerator if you are not serving it within 2 hours, as the buttercream is butter-based and can melt in warm environments. However, Swiss Meringue Buttercream tastes best at room temperature, so remove the cake from the fridge 1-2 hours before serving to allow the frosting to soften and the cake to relax. Leftovers can be stored in an airtight container in the fridge for up to 4 days. To freeze, cut the cake into individual slices, wrap each tightly in plastic wrap, then foil, and freeze for up to 3 months. Thaw wrapped slices in the fridge overnight before eating. The fondant horn should be removed before storage if possible, as fondant can become sticky in the fridge due to humidity.
Nutrition Facts (Estimated)
| Serving Size | 1 slice |
| Calories | 650 |
| Fat | 35g |
| Saturated Fat | 22g |
| Unsaturated Fat | 10g |
| Trans Fat | 0.5g |
| Cholesterol | 110mg |
| Sodium | 320mg |
| Carbohydrates | 78g |
| Fiber | 1g |
| Sugar | 45g |
| Protein | 6g |
Frequently Asked Questions
Can I bake the cake layers ahead of time?
Yes, absolutely. You can bake the layers up to 2 days in advance, wrap them tightly in plastic wrap, and store them in the fridge. Alternatively, freeze the wrapped layers for up to a month.
My buttercream is too soft to pipe flowers, what do I do?
If your kitchen is warm, the butter may be softening too much. Place your piping bag in the refrigerator for 5-10 minutes to firm up, then try again.
Do I have to use a 6-inch pan?
No, you can use 8-inch pans, but the cake will be shorter (2 layers or 3 thinner layers) and you may need to increase the baking time slightly. The tall unicorn look works best with smaller, taller dimensions.
How do I get the gold color on the horn?
Mix edible gold luster dust (available at craft stores or online) with a few drops of high-proof alcohol like vodka or lemon extract to create a paint. The alcohol evaporates, leaving just the shiny gold pigment.
Can I make this gluten-free?
Yes, substitute the cake flour with a high-quality 1:1 gluten-free flour blend that contains xanthan gum. The texture will be slightly different but still delicious.
Why did my fondant horn fall over?
The horn likely didn’t have enough time to dry and harden, or the skewer inside didn’t go deep enough into the cake. Make the horn 24 hours ahead and ensure the skewer penetrates at least 3 inches into the cake.
Can I use store-bought frosting?
Technically yes, but store-bought frosting is much softer and sweeter. It will struggle to hold the shape of the detailed roses and stars in the mane and may slide off the sides.
How do I transport this tall cake?
Use a tall cake box (you can buy boxes with extenders). Ensure the cake is well-chilled before moving it. Place the box on the flat floor of the car, not the seat, and drive carefully.
What if I don’t have a turntable?
You can place your cake plate on a smooth surface and manually turn it, or place it on a clean towel to help it rotate easier, but a turntable makes smoothing the sides significantly easier.
Conclusion
Creating this Tall Unicorn Birthday Cake is a labor of love, but the look on the birthday girl or boy’s face makes every minute of mixing and piping worth it. It is a project that combines baking science with artistic expression, resulting in a dessert that is truly magical. Don’t be afraid to customize the colors of the mane to match your party theme or experiment with different piping tips for unique textures. Remember, baking is about joy, and imperfections are just proof that it was made by hand with heart. So, grab your piping bags, summon your inner artist, and get ready to bake some magic. Happy baking!