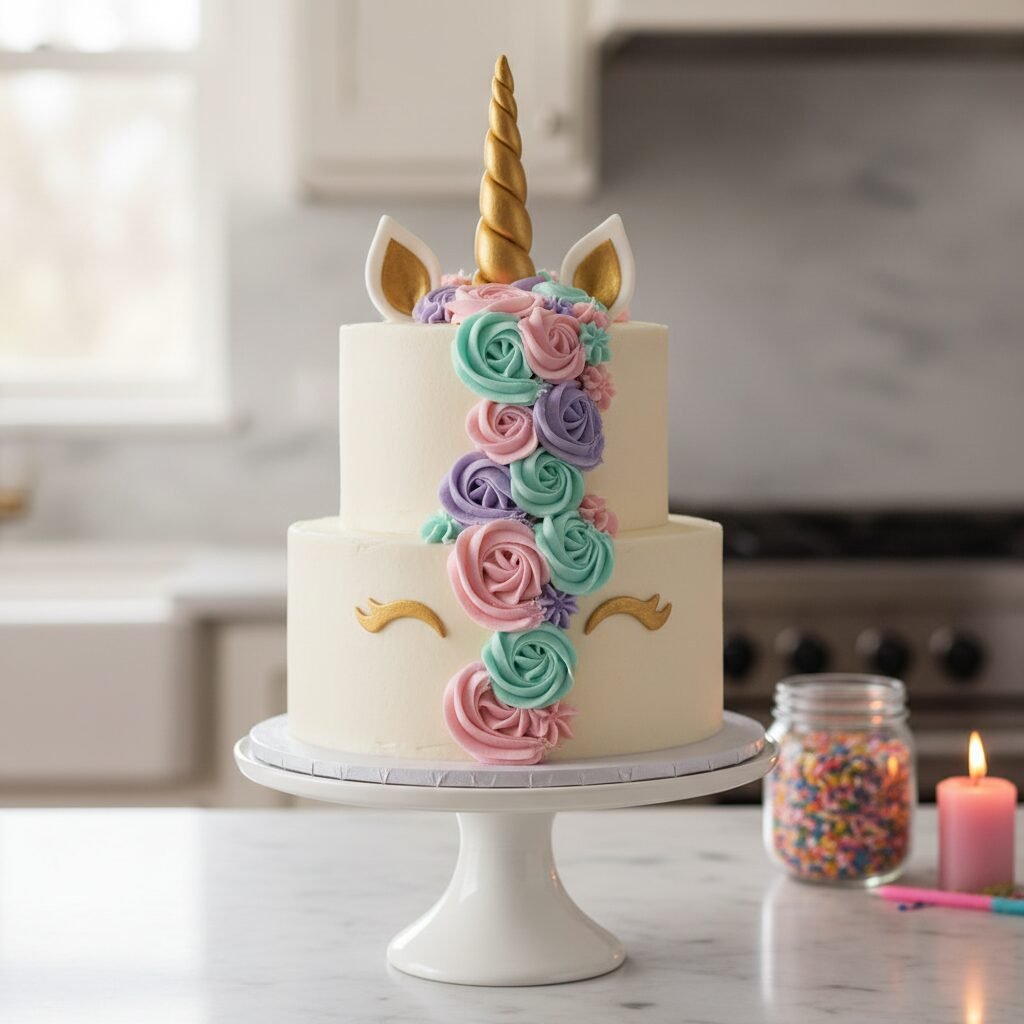
Ultimate Tall Unicorn Birthday Cake: A Magical Three-Layer Vanilla Delight
Tall Unicorn Birthday Cake Three Layer Cake Recipe
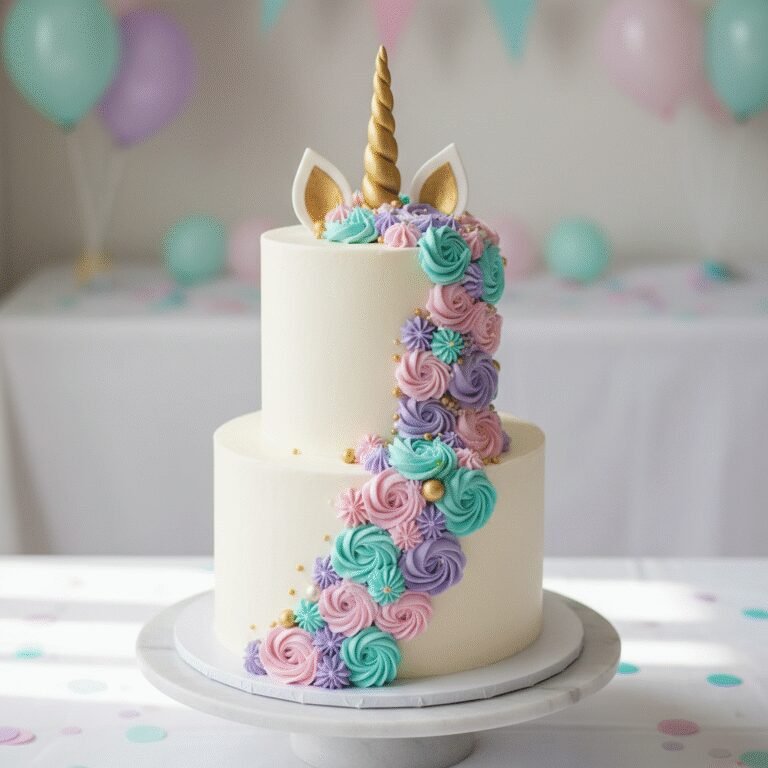
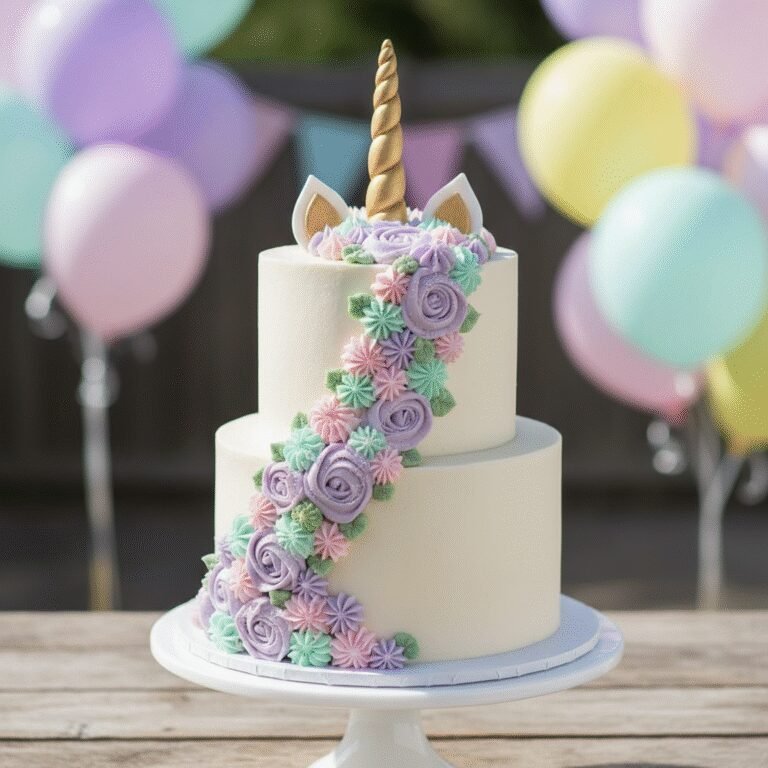
Make birthday wishes come true with this stunning Tall Unicorn Birthday Cake. Featuring three towering layers of moist vanilla bean sponge, silky pastel buttercream, and a majestic golden horn, this recipe is the ultimate magical centerpiece for any celebration.
1 hour 30 minutes
35 minutes
4 hours (includes cooling)
12-15 servings
Dessert
Baking
American
Vegetarian
There is something undeniably enchanting about a unicorn cake. It’s not just a dessert; it is a centerpiece, a conversation starter, and a vessel for childhood wonder. In the world of Pinterest-perfect parties and Instagrammable moments, the Tall Unicorn Birthday Cake stands as the reigning queen of confectionary cuteness. But let’s be honest—too often, these viral cakes look spectacular but taste lackluster, relying heavily on fondant and dry sponges to maintain their structural integrity. This recipe changes the narrative completely. We are creating a cake that tastes even better than it looks.
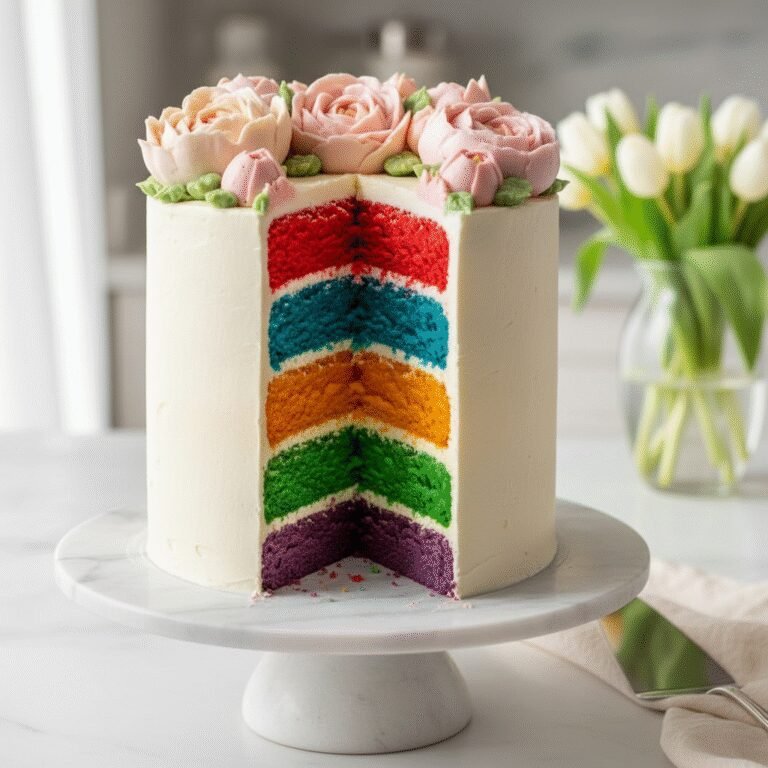
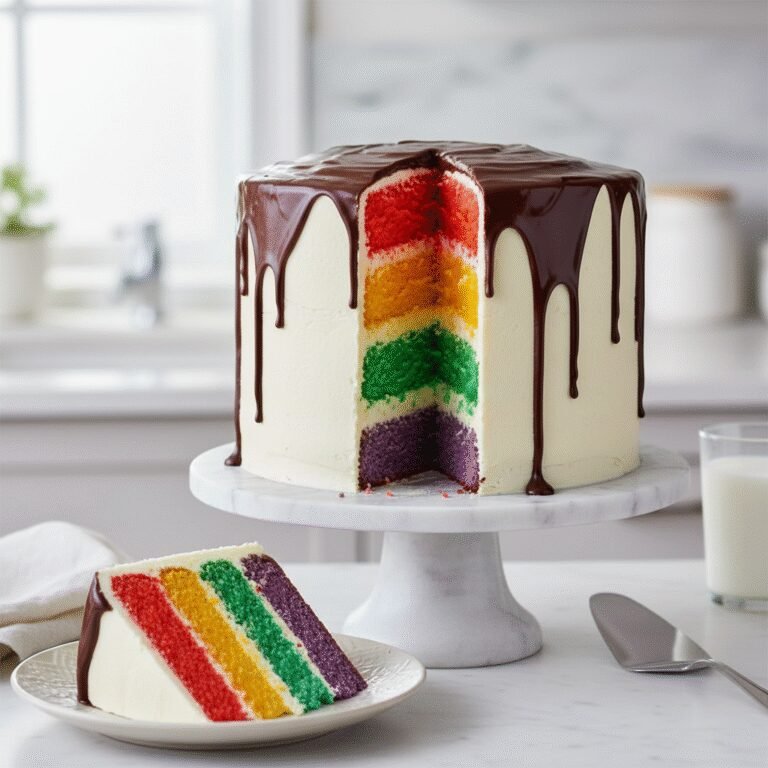
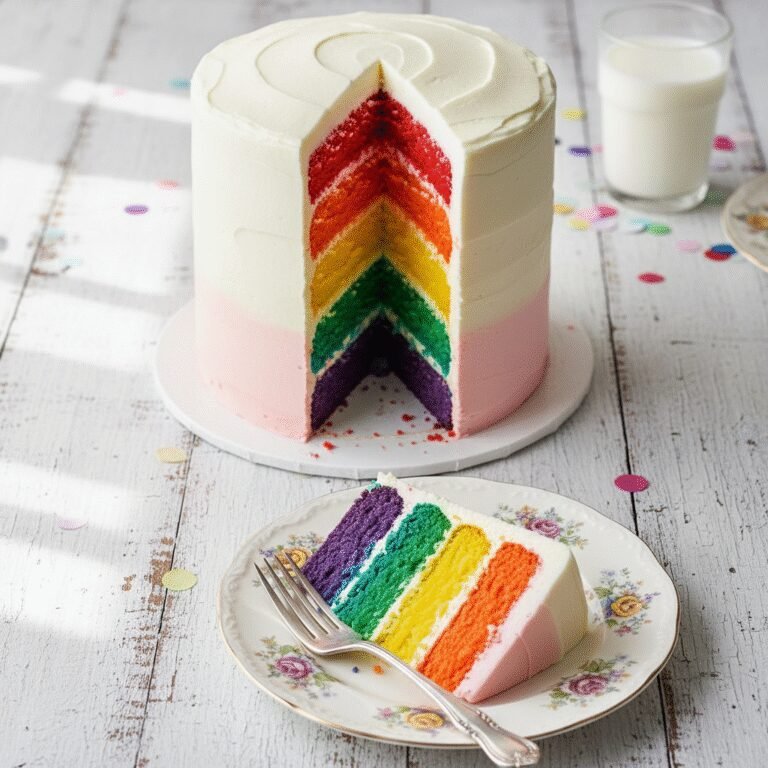
Imagine slicing into a towering, three-layer masterpiece. The knife glides through a sturdy yet tender ‘white velvet’ vanilla crumb that melts in your mouth, perfectly complemented by layers of creamy, not-too-sweet American buttercream. The height of the cake—achieved by stacking three thick 6-inch rounds—gives it that modern, professional bakery aesthetic that distinguishes it from a standard sheet cake. The exterior is a canvas for your creativity, featuring a whimsical mane of pastel rosettes, sparkling sprinkles, and, of course, the iconic golden horn. Whether you are a seasoned baker looking for your next challenge or a parent determined to bake the birthday cake of the century, this guide covers every single detail. From achieving the perfect flat cake top to piping a mane that defies gravity, get ready to bring a little bit of magic into your kitchen. This isn’t just baking; it’s edible art that celebrates joy, color, and the sweetest of memories.
History & Origins
The phenomenon of the Unicorn Cake is a relatively recent but explosive chapter in the history of modern baking. While animal-shaped cakes have existed for decades (often utilizing specific shaped pans like the famous Wilton molds of the 1980s), the modern ‘Unicorn Cake’ as we know it—a round, tall cake with closed ‘sleepy’ eyes and a piped buttercream mane—can be traced back to the mid-2010s. Most culinary historians and food bloggers credit the initial design to Canadian baker Jenna Hutchinson of Jenna Rae Cakes, or arguably the viral explosion to Rosie Alyea of Sweetapolita, though the trend was a collective evolution of the baking community on Instagram.
Around 2016, the culinary world saw a massive influx of ‘unicorn’ themed foods, popularized further by major coffee chains releasing unicorn-themed beverages. However, the cake version had staying power because it moved away from the heavy, often inedible use of fondant that characterized the ‘Cake Boss’ era of the early 2000s. Instead, the Unicorn Cake celebrated the art of buttercream piping. It utilized the ‘barrel cake’ trend—cakes that are taller than they are wide—which gained popularity in wedding cake design for its elegance and modern silhouette. This shift allowed home bakers to create professional-looking characters using standard round pans and piping tips, democratizing high-end cake decorating. The design became a cultural icon, symbolizing a shift towards whimsical, pastel, and joyful aesthetics in food media, influencing everything from macarons to cupcakes and remaining a staple request for birthday parties across the United States.
Why This Recipe Works
This recipe succeeds where many others fail because it prioritizes structural integrity without sacrificing moisture—a delicate balance required for tall, multi-layered cakes. Standard sponge recipes are often too soft to support the weight of three tall layers and a heavy buttercream mane, leading to leaning or bulging. Conversely, dense pound cakes can be unpleasantly heavy. This recipe utilizes a ‘reverse creaming’ method (mixing fat into dry ingredients first) combined with egg whites and sour cream. This creates a ‘white velvet’ texture: a tight, plush crumb that is sturdy enough to stack high but remains incredibly soft and moist on the palate.
Furthermore, the buttercream recipe provided is specifically formulated for piping. A standard buttercream might be too soft, causing the beautiful rosettes of the unicorn’s mane to droop or melt under room temperature. Our ratio of high-fat butter to powdered sugar, whipped for an extended period, creates a stable, airy frosting that holds sharp edges for the piping tips, ensuring the mane looks defined and voluminous. We also use gel food coloring instead of liquid drops to achieve vibrant pastel hues without altering the consistency of the frosting. Finally, the use of a 6-inch pan for the three layers creates that trendy ‘tall’ look, which actually makes the cake easier to frost smoothly compared to wider, shorter cakes, as you have less surface area to level on top.
Why You’ll Love This Recipe
- ✓Sturdy yet moist ‘white velvet’ crumb perfect for stacking.
- ✓Stable buttercream recipe that holds complex piping shapes.
- ✓Step-by-step guide to sculpting the fondant horn and ears.
- ✓Uses reverse creaming method for a professional bakery texture.
- ✓Customizable color palette for the unicorn mane.
- ✓Achieves the trendy ‘barrel cake’ height with standard pans.
Equipment You’ll Need
- ✓Three 6-inch round cake pans
- ✓Stand mixer with paddle and whisk attachments
- ✓Digital kitchen scale
- ✓Offset spatula
- ✓Bench scraper (cake smoother)
- ✓Piping bags
- ✓Piping tips (1M, 2D, 4B, and round tip)
- ✓Wooden skewer or dowel (for the horn)
- ✓Gold luster dust
- ✓Small food-safe paintbrush
- ✓Turntable (lazy susan)
Ingredients
- ✓3 cups Cake flour, sifted
- ✓2 cups Granulated sugar
- ✓1 tbsp Baking powder
- ✓1/2 tsp Salt
- ✓1 cup Unsalted butter, room temperature, cut into cubes
- ✓1 cup Whole milk, room temperature
- ✓1/2 cup Sour cream, room temperature
- ✓5 large Egg whites, room temperature
- ✓1 tbsp Pure vanilla extract
- ✓1 tsp Almond extract (optional)
- ✓2 cups Unsalted butter (for frosting), softened
- ✓7-8 cups Powdered sugar, sifted
- ✓1/4 cup Heavy cream
- ✓Pinch of salt
- ✓Gel food coloring (Pink, Purple, Teal)
- ✓White fondant (approx. 4 oz)
- ✓Black fondant (small amount for eyes)
- ✓Edible gold luster dust
- ✓Clear alcohol or lemon extract (to mix with gold dust)
Instructions
- Preheat your oven to 350°F (175°C). Grease three 6-inch cake pans, line the bottoms with parchment paper, and grease the paper. Dust with flour and tap out excess.
- In the bowl of a stand mixer fitted with the paddle attachment, mix the cake flour, sugar, baking powder, and salt on low speed for 30 seconds to combine.
- Add the cubed butter one piece at a time while the mixer is running on low. Continue mixing until the mixture resembles coarse sand and no large chunks of butter remain.
- In a separate jug, whisk together the milk, sour cream, egg whites, vanilla, and almond extract.
- Pour half of the liquid mixture into the dry ingredients. Beat on medium-high speed for 2 minutes to build structure. Scrape down the sides of the bowl.
- Lower the speed and add the remaining liquid in two batches, mixing just until combined after each addition. Do not overmix.
- Divide the batter evenly among the three prepared pans (use a scale for accuracy). Bake for 30-35 minutes, or until a toothpick inserted into the center comes out clean.
- Let cakes cool in pans for 10 minutes, then turn out onto a wire rack to cool completely. Once cool, level the tops with a serrated knife if domed.
- While cakes cool, make the horn and ears. Roll a snake of white fondant tailored to a taper at one end. Wrap it around a damp wooden skewer to form a spiral horn. Shape two triangles for ears. Let them dry/harden for at least an hour.
- Mix gold luster dust with a few drops of clear alcohol (vodka) or lemon extract to make a paint. Paint the horn and the inner part of the ears gold. Set aside to dry.
- Make the buttercream: Beat the butter on high speed for 5-7 minutes until pale and creamy. Add powdered sugar one cup at a time on low speed. Add heavy cream, vanilla, and salt. Whip on high for 3-5 minutes until fluffy.
- Reserve about 1/3 of the frosting white for the base coat. Divide the remaining frosting into three bowls and tint with pink, purple, and teal gel colors.
- Stack the cake layers with a generous layer of white buttercream between each. Apply a thin ‘crumb coat’ all over the cake and chill for 20 minutes.
- Apply the final coat of white buttercream and smooth with a bench scraper. Chill again for 20 minutes.
- Insert the gold horn into the center top of the cake and place the ears on either side.
- Roll thin snakes of black fondant to create the ‘sleepy eyes’ and attach them to the front of the cake using a tiny dot of water.
- Fill piping bags fitted with various tips (1M, 2D, 4B) with the colored frostings. Pipe rosettes, stars, and swirls starting from the top of the cake (around the horn) and cascading down one side to create the mane.
- Add sprinkles and edible glitter to the mane for extra sparkle.
Expert Cooking Tips
- ✓Use room temperature ingredients for the cake batter; cold ingredients will cause the batter to curdle and result in a dense cake.
- ✓Invest in a cake turntable; it makes smoothing the sides of the cake infinitely easier and results in a professional finish.
- ✓When piping the mane, alternate colors and piping tips randomly to create a natural, organic, and voluminous look.
- ✓If your kitchen is hot, chill the buttercream for 10 minutes before piping to ensure the rosettes hold their shape.
- ✓Weigh your batter into the pans to ensure even layers that bake at the same rate.
- ✓Make the fondant horn a day in advance if possible, so it dries completely hard and is easier to paint.
- ✓Use ‘cake strips’ around your pans to encourage flat tops, reducing the amount of cake you have to cut off to level them.
Substitutions and Variations
If you need to make this cake gluten-free, replace the cake flour with a high-quality 1:1 gluten-free baking flour blend that contains xanthan gum. For a dairy-free version, use plant-based butter sticks (not tub margarine) and full-fat oat milk or soy milk in the batter and frosting; omit the sour cream or use a dairy-free yogurt alternative. If you don’t have cake flour, you can make a substitute by measuring 1 cup of all-purpose flour, removing 2 tablespoons, and adding 2 tablespoons of cornstarch. Sift this mixture twice before using. For the flavor, you can easily switch the almond extract for lemon zest or a different extract like strawberry, though vanilla is the classic choice for the white cake base. If you dislike fondant, you can pipe the ears using stiff buttercream and use a large swirl lollipop or an inedible plastic topper for the horn.
Common Mistakes to Avoid
The most common mistake with this cake is rushing the cooling process. If the cake layers are even slightly warm when you begin to frost, the butter in the buttercream will melt, causing the layers to slide apart and the frosting to pool at the bottom. Another mistake is overmixing the batter after adding the flour; this develops too much gluten and results in a tough, bread-like texture rather than a tender crumb. When coloring the frosting, avoid liquid food coloring found in standard grocery store aisles; the extra liquid can break the buttercream emulsion. Always use gel paste colors. Finally, failing to perform a ‘crumb coat’ (a thin initial layer of frosting) will result in crumbs getting mixed into your final white layer, ruining the pristine look of the unicorn’s face.
Serving Suggestions
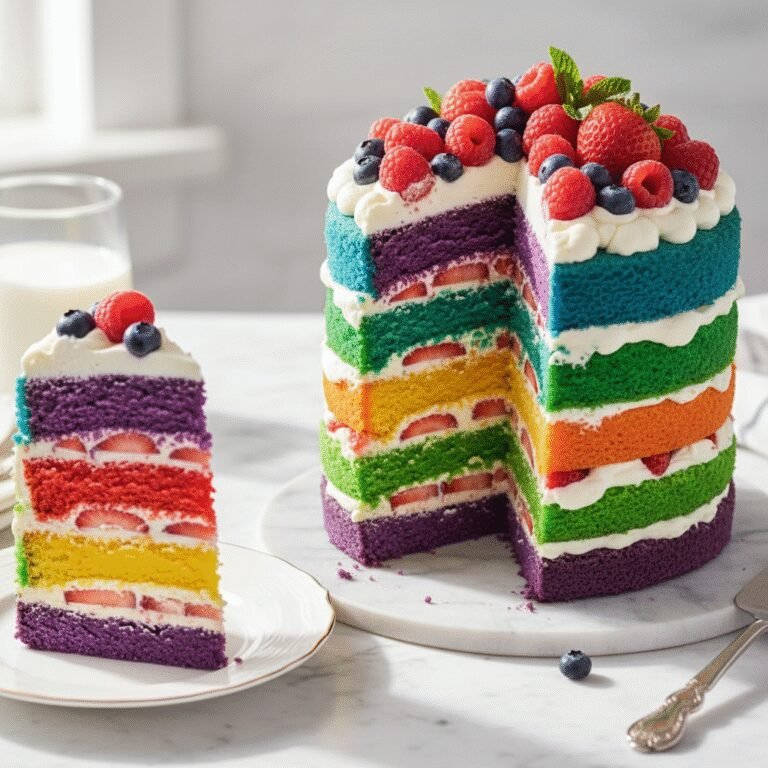
This cake is a showstopper, so presentation is key. Serve it on a high pedestal cake stand to accentuate its height. Because the cake is tall (barrel style), the slices can be quite large. To serve, it is often best to cut the cake using the ‘grid method’ or cut a rectangular slab from the center first, rather than traditional wedges, to ensure manageable portion sizes. Serve with a side of fresh berries to cut through the sweetness of the buttercream, or a scoop of strawberry ice cream. A glass of cold milk or sparkling pink lemonade pairs perfectly with the vanilla flavor profile.
Storage and Reheating Tips
Since this cake contains butter and dairy, it is best stored in the refrigerator, especially if the room temperature is warm. However, buttercream cakes should always be eaten at room temperature. Remove the cake from the fridge 1 to 2 hours before serving to allow the frosting and cake crumb to soften. Leftovers can be stored in an airtight container in the fridge for up to 4 days. To freeze, wrap individual slices tightly in plastic wrap followed by aluminum foil; they will keep for up to 3 months. Thaw frozen slices in the fridge overnight before bringing to room temperature.
Nutrition Facts (Estimated)
| Serving Size | 1 slice |
| Calories | 650 |
| Fat | 30g |
| Saturated Fat | 18g |
| Unsaturated Fat | 10g |
| Trans Fat | 0.5g |
| Cholesterol | 85mg |
| Sodium | 320mg |
| Carbohydrates | 85g |
| Fiber | 1g |
| Sugar | 45g |
| Protein | 6g |
Frequently Asked Questions
Can I make the cake layers ahead of time?
Yes! You can bake the layers up to 2 days in advance. Wrap them tightly in plastic wrap and store them at room temperature (if cool) or in the fridge. You can also freeze the wrapped layers for up to a month.
Do I need dowels for this cake?
For a 6-inch, 3-layer cake, you typically do not need internal dowels if your cake is dense enough and the filling isn’t too slippery. However, if you are traveling with the cake, a central wooden dowel driven through all layers into the cake board provides extra security.
My buttercream is too full of air bubbles. How do I fix it?
If your frosting has too many air pockets, switch to the paddle attachment on your mixer and run it on the lowest speed for 5-10 minutes. This ‘knocks’ the large air bubbles out and makes it silky smooth.
Can I use store-bought frosting?
It is not recommended for the piping work. Store-bought frosting is usually too soft to hold the definition of the rosettes for the mane and may slide off the vertical sides of the cake.
How do I get the gold paint to dry?
The key is mixing the luster dust with a high-proof alcohol (like vodka or Everclear) or lemon extract. The alcohol evaporates quickly, leaving just the dry gold powder behind. Do not use water, or the fondant will dissolve and become sticky.
What if I don’t have 6-inch pans?
You can use two 8-inch pans instead. The cake will be wider and shorter, so it won’t look as ‘tall,’ but it will still taste delicious. You may need to adjust baking time slightly (check around 25 minutes).
Why did my cake sink in the middle?
This usually happens if the oven door was opened too early during baking, releasing heat, or if the cake was underbaked. Always rely on the toothpick test rather than just the timer.
How do I transport this tall cake?
Transport the cake in a tall cake box (you can buy these at craft stores or online). Place the box on the flattest part of your car floor (usually the passenger footwell), not on a slanted seat. Keep the car cool.
Conclusion
Creating this Tall Unicorn Birthday Cake is a labor of love that pays off in dividends of smiles and awe. While it may seem like a complex project, breaking it down into manageable steps—baking, making the horn, and the final decoration—makes it accessible for bakers of all levels. The result is not just a delicious dessert, but a magical memory that will be cherished long after the last crumb is eaten. So, gather your sprinkles, whip up that buttercream, and get ready to unleash your inner artist. Happy baking, and may your celebration be as magical as this cake!