The Ultimate Moist Apple Snack Cake: Perfect for Picnics
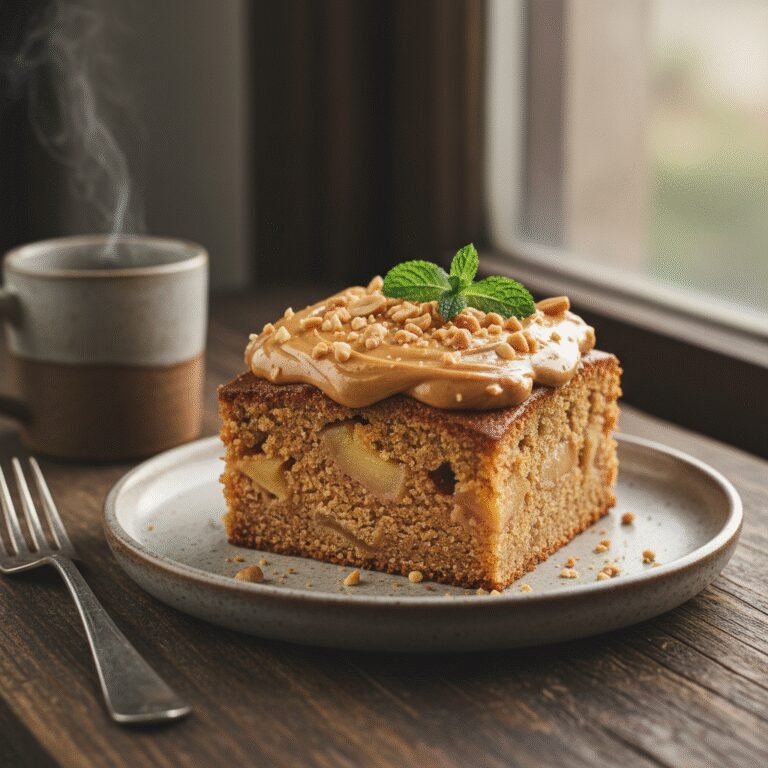
Moist Apple Snack Cake For Picnic Recipe
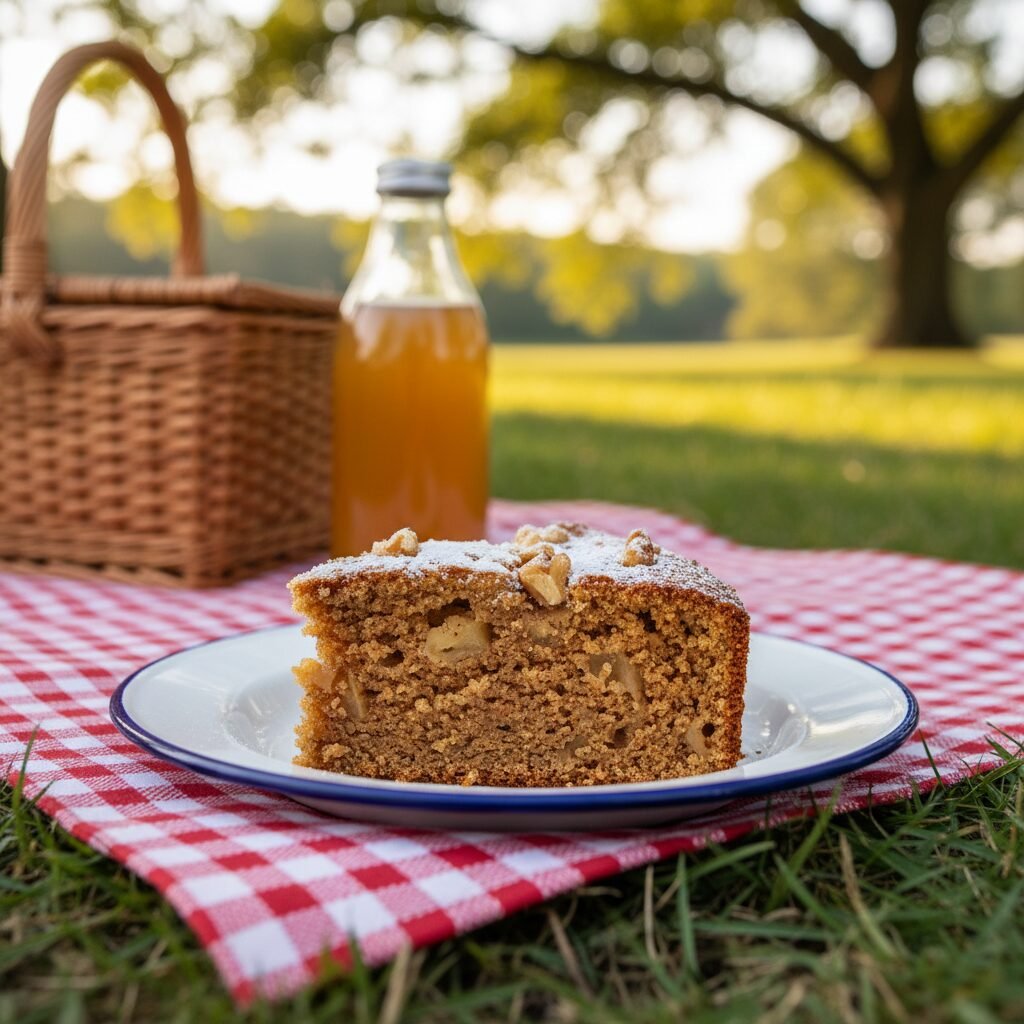
This incredibly moist apple snack cake is the unsung hero of outdoor gatherings, boasting tender chunks of tart apples and warm autumn spices in every bite. Designed to travel well without messy frosting, it is the absolute best treat to pack for your next picnic or road trip. Simple to whip up and even better the next day, this recipe is a guaranteed crowd-pleaser.
20 minutes
40 minutes
1 hour
9-12 servings
Dessert
Baking
American
Vegetarian
There is something undeniably magical about the combination of sweet, baked apples and warming spices like cinnamon and nutmeg. It evokes memories of crisp autumn air, cozy sweaters, and the golden light of late afternoon. However, this Moist Apple Snack Cake isn’t just reserved for the fall season; it is a year-round staple in my kitchen, particularly when the weather turns nice enough for alfresco dining. Unlike elaborate layer cakes that require delicate handling and temperature control, a snack cake is the workhorse of the dessert world. It is humble, sturdy, and relies entirely on the quality of its crumb and flavor profile rather than flashy decorations.
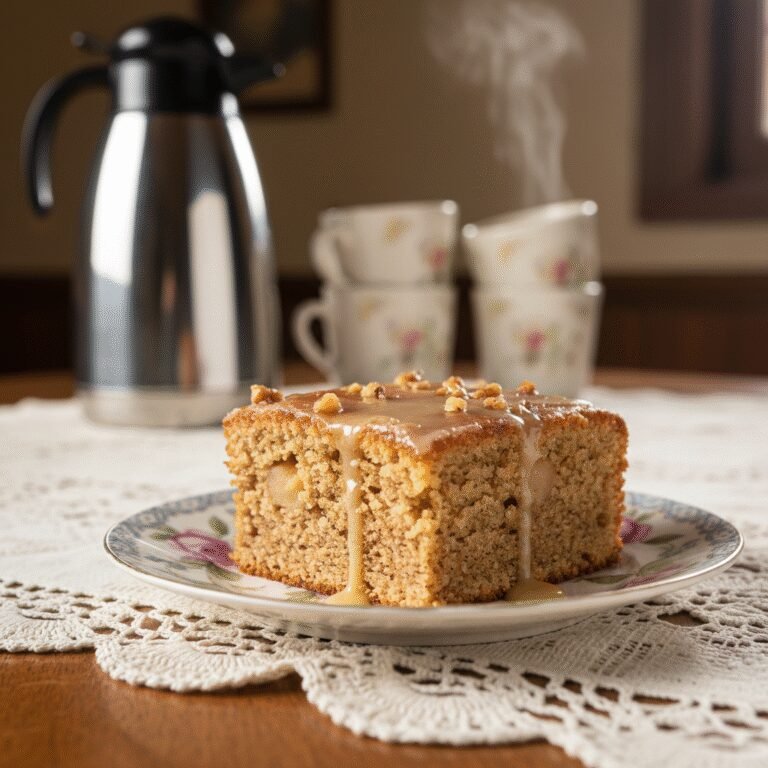
I specifically developed this recipe with picnics in mind. We’ve all had that tragic experience of opening a Tupperware container at the park only to find a smashed, melted mess of frosting and crumbs. This cake solves that problem beautifully. It is rich and buttery enough to stand on its own without a glaze or frosting, though a light dusting of powdered sugar never hurts. The texture is somewhere between a dense pound cake and a fluffy muffin, studded generously with hand-chopped apples that release their juices during baking to create pockets of pure delight. Whether you are hiking up a trail, setting up a spread on the beach, or just looking for a reliable treat for a school bake sale, this apple snack cake delivers comfort and convenience in equal measure. It pairs just as beautifully with a thermos of hot coffee as it does with a cold glass of iced tea.
History & Origins
The concept of the ‘snack cake’ is deeply rooted in American culinary history, often running parallel to the rise of home baking convenience in the early to mid-20th century. While fruit-dense cakes have existed for centuries across Europe—think of the British fruitcake or the German Apfelkuchen—the American snack cake carved out its own niche as a simple, single-layer cake baked in a square or rectangular pan, intended to be eaten out of hand rather than with a fork and plate. During the Great Depression and later the war years, recipes that maximized flavor while minimizing expensive ingredients like butter and eggs were paramount. ‘Wacky cakes’ and simple spice cakes became staples.
The apple variety of the snack cake taps into an even older tradition. Apples have been a cornerstone of North American agriculture since they were introduced by European colonists. Because apples could be stored in root cellars for months, they were the primary fruit available for baking through the long winter and into early spring. Historically, farm families would utilize ‘storage apples’ that had gone slightly soft for baking, as the heat of the oven transformed the texture. This recipe pays homage to those rustic farmhouse traditions, where the focus was on sustenance, flavor, and using what was abundant. Over the decades, the apple cake evolved from a breakfast staple to a lunchbox favorite, eventually becoming the beloved picnic treat we know today.
Why This Recipe Works
This recipe succeeds where many others fail because of a few critical scientific interactions between the ingredients. First and foremost is the choice of fat. While butter provides excellent flavor, oil is actually superior for cakes that need to stay moist for days. Oil remains liquid at room temperature, whereas butter solidifies; this means an oil-based cake feels softer on the palate and retains that ‘fresh-baked’ texture even after sitting in a picnic basket for hours. To get the best of both worlds, we use a blend of oil for texture and a splash of melted butter for that signature rich taste.
Secondly, the method of incorporating the apples is key. Rather than grating the apples, which can make the batter gummy and overly wet, or slicing them into large wedges that separate from the crumb, we dice them into small, uniform cubes. This ensures that the apples are suspended evenly throughout the batter, providing a burst of fruit in every bite without compromising the structural integrity of the cake. The acidity of the apples (especially if you use Granny Smith or Honeycrisp) reacts slightly with the baking soda, contributing to the lift and tenderness of the crumb. Finally, the brown sugar adds hygroscopic properties, meaning it attracts and holds moisture from the air, ensuring your cake never dries out.
Why You’ll Love This Recipe
- ✓Travels perfectly without messy frosting
- ✓Stays moist for days thanks to the oil-butter blend
- ✓Packed with fresh fruit in every bite
- ✓One-bowl mixing method for easy cleanup
- ✓Freezer-friendly for meal prepping snacks
- ✓Versatile enough for breakfast, dessert, or tea time
Equipment You’ll Need
- ✓8×8 or 9×9 inch square baking pan
- ✓Large mixing bowl
- ✓Medium mixing bowl
- ✓Whisk
- ✓Rubber spatula
- ✓Vegetable peeler
- ✓Sharp chef’s knife
- ✓Measuring cups and spoons
- ✓Parchment paper
Ingredients
- ✓1 1/2 cups all-purpose flour
- ✓1 teaspoon ground cinnamon
- ✓1/2 teaspoon ground nutmeg
- ✓1/4 teaspoon ground allspice
- ✓1 teaspoon baking soda
- ✓1/2 teaspoon salt
- ✓1/2 cup vegetable oil (or canola oil)
- ✓2 tablespoons unsalted butter, melted
- ✓3/4 cup granulated sugar
- ✓1/4 cup light brown sugar, packed
- ✓2 large eggs, room temperature
- ✓1 teaspoon pure vanilla extract
- ✓2 cups apples, peeled, cored, and diced into 1/2 inch cubes (approx. 2 medium apples)
- ✓1/2 cup chopped walnuts or pecans (optional)
- ✓Confectioners’ sugar for dusting (optional)
Instructions
- Preheat your oven to 350°F (175°C). Grease an 8×8 inch baking pan with butter or cooking spray and line it with parchment paper, leaving an overhang on two sides for easy removal.
- In a medium bowl, whisk together the flour, cinnamon, nutmeg, allspice, baking soda, and salt until well combined and no lumps remain. Set aside.
- In a large mixing bowl, whisk together the vegetable oil, melted butter, granulated sugar, and brown sugar until the mixture looks like wet sand.
- Add the eggs one at a time, whisking vigorously after each addition until the mixture is smooth and slightly thickened. Stir in the vanilla extract.
- Gradually add the dry ingredients to the wet ingredients. Switch to a rubber spatula and mix gently until just barely combined. Do not overmix; a few streaks of flour are okay at this stage.
- Fold in the diced apples and chopped nuts (if using). Stir until the flour is fully incorporated and the apples are evenly distributed throughout the thick batter.
- Pour the batter into the prepared baking pan and use the spatula to smooth the top into an even layer.
- Bake for 35 to 45 minutes, or until a toothpick inserted into the center comes out clean or with just a few moist crumbs attached. The top should be golden brown and spring back when lightly pressed.
- Remove the cake from the oven and let it cool completely in the pan on a wire rack. This is crucial as the cake sets while it cools.
- Once cool, use the parchment paper overhang to lift the cake out of the pan. Cut into 9 or 12 squares. Dust with confectioners’ sugar before serving if desired.
Expert Cooking Tips
- ✓Use a mix of tart and sweet apples (like Granny Smith and Fuji) for a more complex flavor profile.
- ✓Do not overmix the batter once the flour is added, or the gluten will develop too much and make the cake tough.
- ✓Dice the apples uniformly so they cook at the same rate.
- ✓Ensure your eggs are at room temperature so they emulsify properly with the oil and sugar.
- ✓If the top is browning too quickly but the center is raw, tent the pan loosely with aluminum foil for the last 10 minutes.
- ✓Let the cake cool completely before slicing to prevent it from crumbling.
Substitutions and Variations
This recipe is highly adaptable to various dietary needs and pantry limitations. If you are gluten-free, you can substitute the all-purpose flour with a high-quality 1:1 gluten-free baking flour blend; just be sure it contains xanthan gum. For a dairy-free version, simply omit the 2 tablespoons of melted butter and replace them with an extra 2 tablespoons of oil or melted coconut oil. If you want to reduce refined sugar, you can swap the granulated sugar for coconut sugar, though this will make the cake darker and slightly denser. In terms of mix-ins, walnuts and pecans are classic, but you could also use raisins, dried cranberries, or even chopped dates for a chewy texture. If you don’t have vegetable oil, melted coconut oil or a light olive oil works beautifully and adds a subtle fruity note. For the spices, if you don’t have allspice or nutmeg, simply increasing the cinnamon or using a pre-made ‘apple pie spice’ blend is a perfectly acceptable shortcut.
Common Mistakes to Avoid
The most common mistake with apple cake is using the wrong type of apple. Avoid using Red Delicious or other mealy eating apples, as they will turn into mush and lose their flavor during baking. Stick to firm baking apples like Granny Smith, Honeycrisp, Braeburn, or Jonagold. Another frequent error is overbaking. Because this is a moist snack cake, it can be tricky to tell when it’s done. If you wait until the toothpick is bone dry, you may have dried out the cake. Look for a few moist crumbs on the toothpick. Additionally, be careful not to over-measure your flour. If you scoop the measuring cup directly into the flour bag, you pack it down and end up with too much flour, leading to a dry cake. Instead, spoon the flour into the cup and level it off with a knife. Finally, do not skip the cooling step; cutting into the cake while it is hot will result in a gummy texture and the slices will fall apart.
Serving Suggestions
While this cake is designed to be eaten out of hand at a picnic, there are many ways to elevate it for different occasions. For a classic picnic vibe, wrap individual squares in parchment paper and tie them with rustic twine. If you are serving this at home for dessert, warm a slice slightly in the microwave and top it with a scoop of vanilla bean ice cream and a drizzle of salted caramel sauce. For a breakfast twist, serve a slice alongside a dollop of Greek yogurt and a sprinkle of granola. In some parts of the United States, notably the Midwest and New England, it is traditional to serve apple cake or pie with a slice of sharp cheddar cheese; the salty-savory cheese contrasts beautifully with the sweet, spiced cake. A simple dusting of powdered sugar is elegant and sufficient for most casual gatherings.
Storage and Reheating Tips
One of the best features of this cake is its shelf life. It can be stored at room temperature in an airtight container for up to 3 days; in fact, the flavors often meld and improve on the second day. If you live in a particularly hot or humid climate, you may want to store it in the refrigerator to prevent spoilage, where it will last for up to 5-6 days. Allow refrigerated slices to come to room temperature before eating for the best texture. For long-term storage, this cake freezes exceptionally well. Wrap individual squares tightly in plastic wrap and then place them in a heavy-duty freezer bag. They can be frozen for up to 3 months. To thaw, simply leave them on the counter for an hour or microwave gently for 20-30 seconds.
Nutrition Facts (Estimated)
| Serving Size | 1 square |
| Calories | 285 |
| Fat | 14g |
| Saturated Fat | 3g |
| Unsaturated Fat | 10g |
| Trans Fat | 0g |
| Cholesterol | 35mg |
| Sodium | 210mg |
| Carbohydrates | 38g |
| Fiber | 2g |
| Sugar | 18g |
| Protein | 4g |
Frequently Asked Questions
Can I double this recipe?
Yes, absolutely. You can double the ingredients and bake it in a 9×13 inch pan. You will likely need to increase the baking time by 5-10 minutes. Keep an eye on it and use the toothpick test.
Do I have to peel the apples?
It is highly recommended. Apple skins can become tough and leathery during baking, which interferes with the soft texture of the cake. Peeling ensures a uniform, tender bite.
Can I use applesauce instead of oil?
You can substitute half of the oil with unsweetened applesauce to reduce the fat content, but I wouldn’t recommend replacing all of it. The oil is necessary for that tender, moist crumb. Using only applesauce can result in a rubbery texture.
Why did my apples sink to the bottom?
This happens if the batter is too thin or the apple chunks are too large. This batter is thick enough to suspend diced apples, but if you find they are sinking, you can toss the apple pieces in a tablespoon of flour before folding them into the batter.
Is this cake overly sweet?
No, this cake has a balanced sweetness. The tartness of the apples and the spices cut through the sugar. It is sweet enough to be a dessert but not so sugary that it feels heavy.
Can I bake this in a muffin tin?
Yes! This batter makes excellent muffins. Line a standard muffin tin with paper liners and bake at 375°F for 18-22 minutes.
What are the best apples for this cake?
Granny Smith is the gold standard for baking because they hold their shape and provide a tart contrast. Honeycrisp, Braeburn, and Pink Lady are also excellent choices.
Can I add a glaze?
Certainly. A simple glaze made of powdered sugar, a splash of milk, and a drop of vanilla or maple extract would be delicious drizzled over the top once the cake has cooled.
How do I transport this for a picnic?
You can either transport it whole in the baking pan covered with foil, or slice it beforehand and place the squares in a rigid container. Avoid soft bags where the cake might get crushed.
Conclusion
This Moist Apple Snack Cake is truly a recipe that keeps on giving. It requires minimal effort yet delivers maximum flavor, comfort, and utility. Whether you are packing a basket for a romantic sunset picnic, prepping snacks for a family road trip, or simply looking for a way to use up that bag of apples from the orchard, this cake is the answer. It embodies the spirit of homemade baking—simple, honest, and delicious. I hope it becomes a cherished part of your recipe collection, bringing a little taste of sweetness to your outdoor adventures. Don’t forget to share your creations and tag us on social media; we love seeing how you enjoy our recipes!